Procedure to enable/disable logs for Crow Canyon solutions for SharePoint On-premises
Applies to: SharePoint On-premises (SP 2010, SP 2013, SP 2016, SharePoint Server Subscription Edition)
Description: If any of the Crow Canyon features are not working as intended, our log files helps us to troubleshoot the issue. If there are multiple servers in the farm, enable the registry settings and configure folder permissions on all the servers.
Procedure to enable logs for CrowCanyon solutions
Log on to the SharePoint server
-
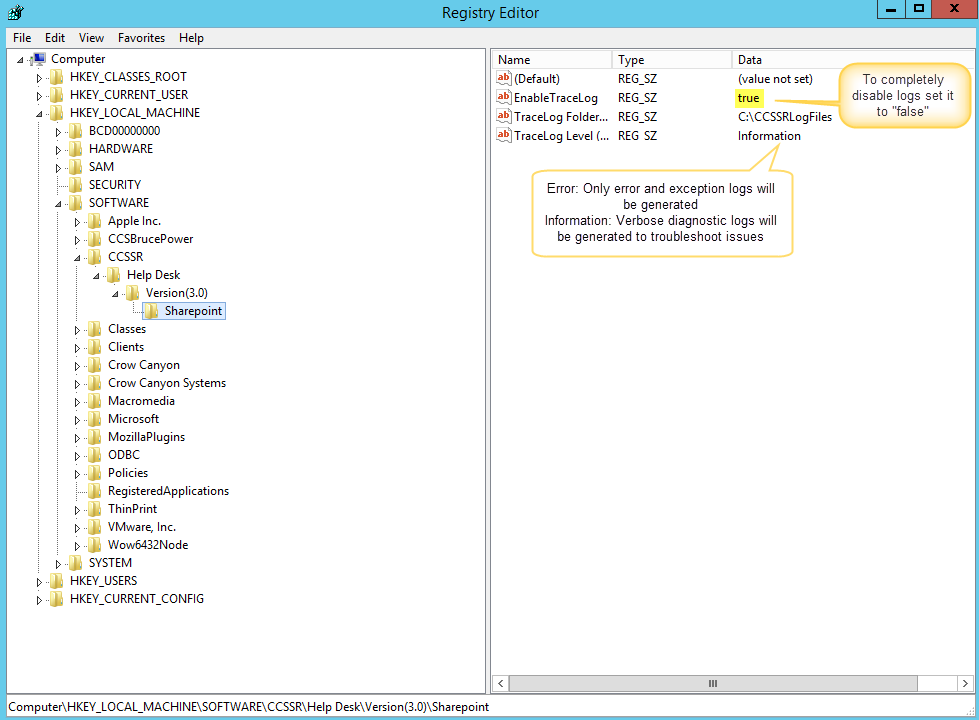
- Open regedit
- Open product specific registry key as listed below (e.g. for IT Help Desk: Local Machine\Software\CCSSR\Help Desk\Version (3.0)\SharePoint)
Enable TraceLog: true/false
By default “Enable Tracelog” set to “true”. If you want to disable logs generation completely for CrowCanyon solutions change “Enable TraceLog” to “false”.
TraceLog Folder:
CrowCanyon logs will be generated in the specified location (E.g.C:\CCSSRLogFiles).
Note: This location can be changed. Also, enable permissions on this folder as described below
TraceLog Level (Information/Error):
By default “TraceLog Level (Iformation/Error)” set to “Error” and logs will be generated for only exception scenarios
Set TraceLog Level (Information/Error) to “Information” if diagnositc logs are required for an issue. After generating the required log files, change the logging back to “Error” mode.
Registry Path for Crow Canyon Solutions
| S.No | Name | Registry path | Default TraceLog Folder | File Name |
| 1. | Crow Canyon Product workflows logs | Local Machine\Software\CCSSR\Help Desk\Version (3.0)\SharePoint | C:\CCSSRLogFiles | CCSSRCreationLog, CCSSRUpdationLog, CCSSRERLog, CCSSRECLog, CCSCRLog, CCSSRRootCauseLog, CCSSRApprovalLog, |
| 2. | Crow Canyon TimerJob logs | Local Machine\Software\Crow Canyon Systems\SharePoint\TimerJobs\ | C:\CCSSRLogFiles | CCSSRSLALog, CCSArchivalJobLog, SLATimerJobLog, CCSAutoCloseJobLog, CCSAutoCloseFeatureLog, RecurrenceFeatureLog, RecurrenceJobLog, AssetMaintenanceFeatureLog |
| 3. | Crow Canyon Calculated Table | Local Machine\Software\Crow Canyon Systems\SharePoint\Calculated Table | C:\CCSWebpartLogFiles | CalculatedTableLog |
| 4. | Crow Canyon WebParts | Local Machine\Software\Crow Canyon Systems\SharePoint\WebParts | C:\CCSSRLogFiles | CCSElapsedTimeLog, CCSElapsedTimeWebMethod |
| 5. | Crow Canyon Advanced Alerts | Local Machine\Software\Crow Canyon\SharePoint\AdvancedAlerts | C:\Crow Canyon Logs | CCSAdvancedAlertLogs, |
| 6. | Crow Canyon Workflow Manager | Local Machine\Software\Crow Canyon\SharePoint\WorkflowManager | C:\Crow Canyon Logs | CCSWorkflowManagerLogs, CCSWorkflowManagerTimerLogs |
| 7. | Crow Canyon Common Utilities | Local Machine\Software\Crow Canyon\SharePoint\CommonUtils | C:\Crow Canyon Logs | CCSCommonUitlsLogs |
| 8. | LAN Sweeper Integration | Local Machine\Software\Crow Canyon Systems\SharePoint\TimerJobs | C:\CCSSRLogFiles | LSIntegrationJobLog, LSIntegrationWPLog |
| 9. | Purchasing Workflows | Local Machine\Software\CCSSR\Help Desk\Version (3.0)\SharePoint | C:\CCSSRLogFiles | CCSPOApproverWorkflowLogs |
| 10. | Crow Canyon CSM Workflows | Local Machine\Software\CCSCSM\Help Desk\Version (2.1)\SharePoint | C:\CCSCSMLogFiles | CCSCSMEmailCaptureLog |
| 11. | Crow Canyon Custom Fields | Local Machine\Software\Crow Canyon\SharePoint\Custom Fields | C:\Crow Canyon Logs | CCSCascadedLookupLogs, CCSDiscussionLogs, CCSTaskManagerLogs, CCSLicenseManagerLogs, CCSPurchaseAssetLinkFeatureEventRecieverLog, CCSITPurchaseLinkFeatureEventRecieverLog, CCSPurchaseToAssetLog, PurchaseRequestStabilizerRecieverLog |
| 12. | SCCM Integration | Local Machine\Software\Crow Canyon\SharePoint\Custom Fields | C:\CCSSCCMAssetSyncLogs | CCSSCCMAssetSyncLogs |
Note:
1. If there are multiple servers in the farm, enable the registry settings and configure folder permissions on all servers. Based on the server that handles the particular request, logs will be genrated in that server.
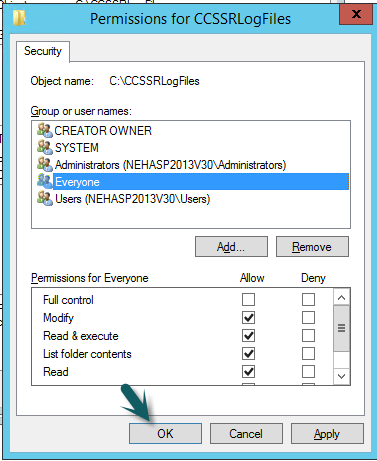
2. Give Read and Write permissions for “Everyone” on TraceLog Folder.
E.g: C:\CCSSRLogFiles
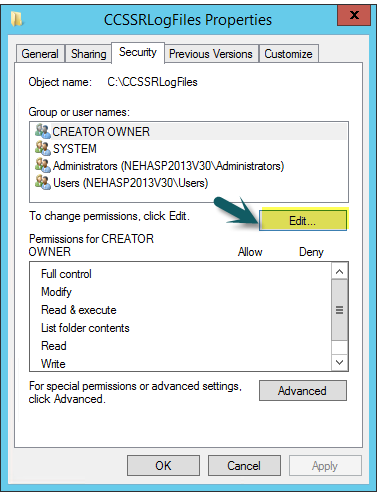
Go to CCSSRLogFiles folder –> Properties –> Security –> Edit
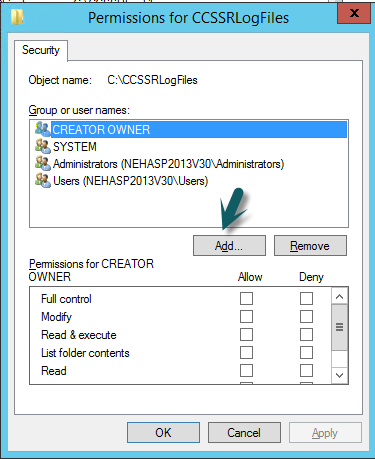
Click “Add” to give permissions for Everyone