Applies to: SharePoint online and On-Premises (2013 / 2016 / 2019/SharePoint Server Subscription Edition)
Description
This article describes the steps to create and configure Portal site. Portal provides a secure and intuitive user interface to end users to interact with NITRO Applications.
Note: For SharePoint Online, portal site can be configured in two ways:
- Using Crow Canyon ‘Power Portal’ application as described in this article
- As a NITRO activated site with portal functionality and look and feel. This is a newer method of building portals and gives more flexibility in site configurations. Please refer this article for steps to create and configure portal site
Detailed Instructions
To create portal site, go to service request application (i.e. IT Professional/IT Standard/Facilities/Request Management sites) -> Application Administration -> Crow Canyon NITRO Apps -> Crow Canyon Power Portal and enter the required details and create a new portal site.
Parent Site: Choose the site under which the portal site needs to be created. Generally it will be the corresponding application site (i.e. IT Premium/Facilities/Request Management site)
Site Title: Give the Title for the Portal site. This can be changed later from site settings if needed
Site Address: Give the URL for the Portal site. Please note that it requires lot of configuration changes if URL has to be changed later
License Type: Choose the “Trial” and proceed with the installation, once installation is complete, contact Crow Canyon for permanent license. If no option is available under License Type, please contact Crow Canyon Support. Refer this article to convert the Crow Canyon Trial License to Subscription/Enterprise license.

Note: Creation of portal site is same for both SharePoint online and on-premises, only the user interface may differ.
After creating the portal site, we need to configure the portal site for the specific application and this is done with portal template files that have the required settings. We will send these portal tempalte files as part of the service request application installation package (i.e. IT Premium/Facilities/Request Management applications).
Upload template files to corresponding document libraries
- Go to Portal Site -> “PortalSettings” document library -> upload “t_PortalSettings.xml” file
- Go to Portal Site -> Site Assets -> Create folder with name “CCS” -> Create another folder “Forms” with in the “CCS” folder -> Upload “t_forms_[[KnowledgeBaseListID]].xml and t_forms_[[TicketsListID]].xml” files in “Forms” folder
- Go to Portal Site -> Site Assets -> Create a new folder “LinkContent” and upload the below files in this folder:
- 566b24f2-57de-4d8f-a26f-b6cc475d88bf.txt
- 51233f2c-1873-48b6-9e29-93d4390e60f0.txt
- b23a4b41-fa17-4b69-9088-6c7c528613b7.txt
- b545bf73-c890-4a9b-9b9e-bba0b13d66b8.txt
Process the template files
Go to Portal Site -> Site Pages -> Open “Template Settings” page and process portal settings, Work Order list forms and Knowledge base list forms.
Configure Portal Settings file
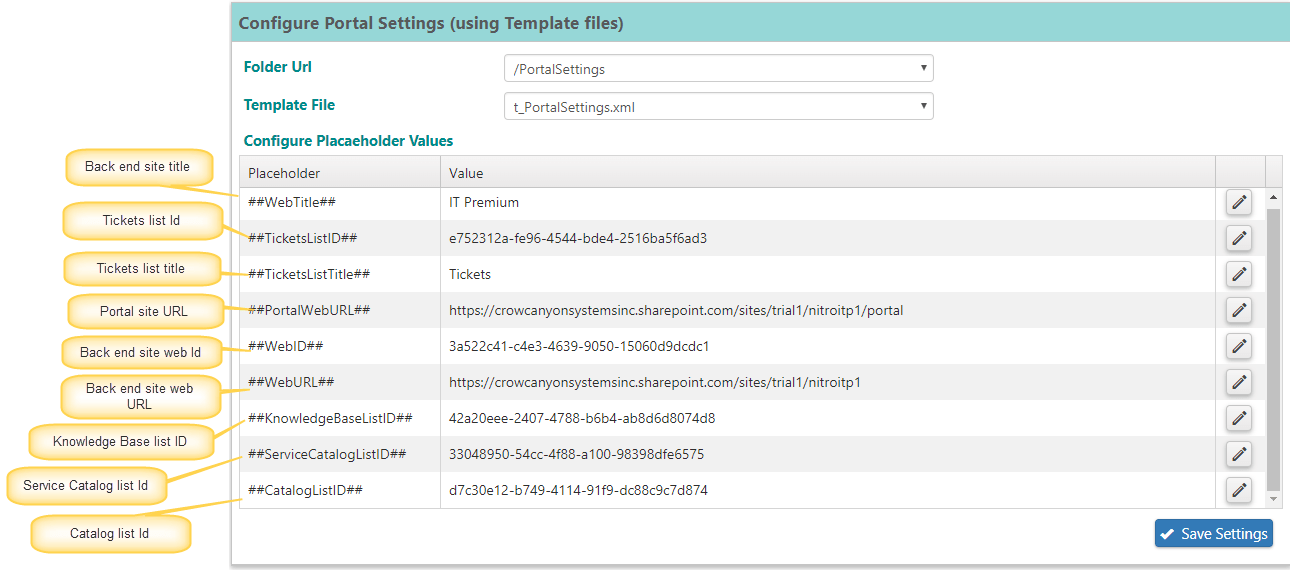
1. Select the “/PortalSetttings” under Folder Url, select “t_PortalSettings.xml” under “Template File”
Note: This article is same for IT, Facilities and Request Management applications and only difference is the name of the main list (Tickets list). Below instructions are given as per Tickets list name, please use the corresponding list name based on the application that you are installing.
- For IT Premium application – ‘Tickets’
- For Facilities application – ‘Work Orders’
- For Request Management application – ‘Requests’
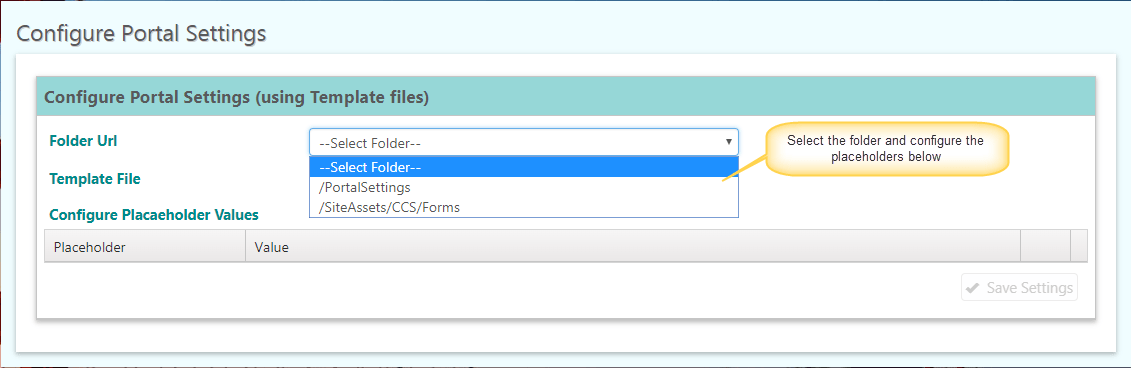
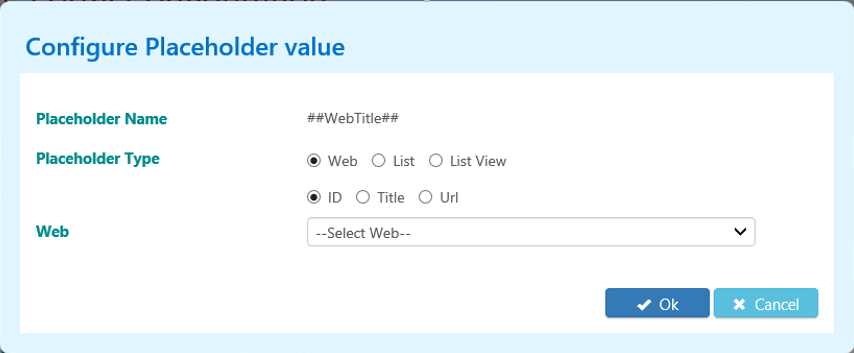
2. Configure placeholder values by editing all of them with the appropriate value. Sample screenshots below:
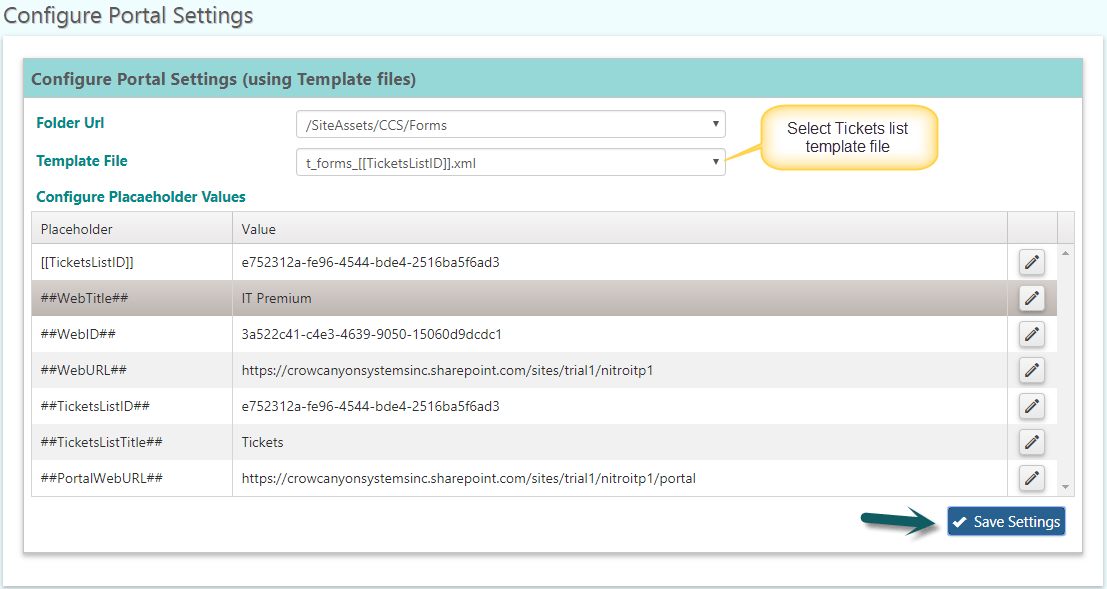
Configure Tickets list forms
1 Select the “/SiteAssets/CCS/Forms” under Folder Url, select “t_forms_[[TicketsListID]].xmll” under “Template File”:
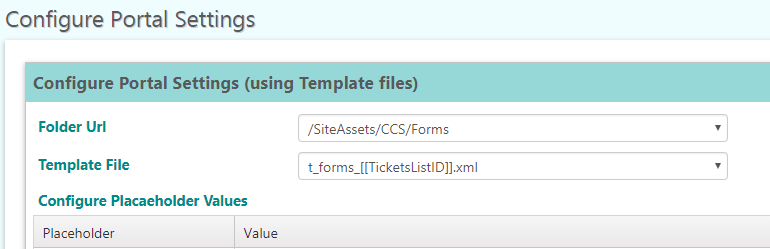
Configure placeholder values by editing every possible property and choose the appropriate value. Sample screenshot below:
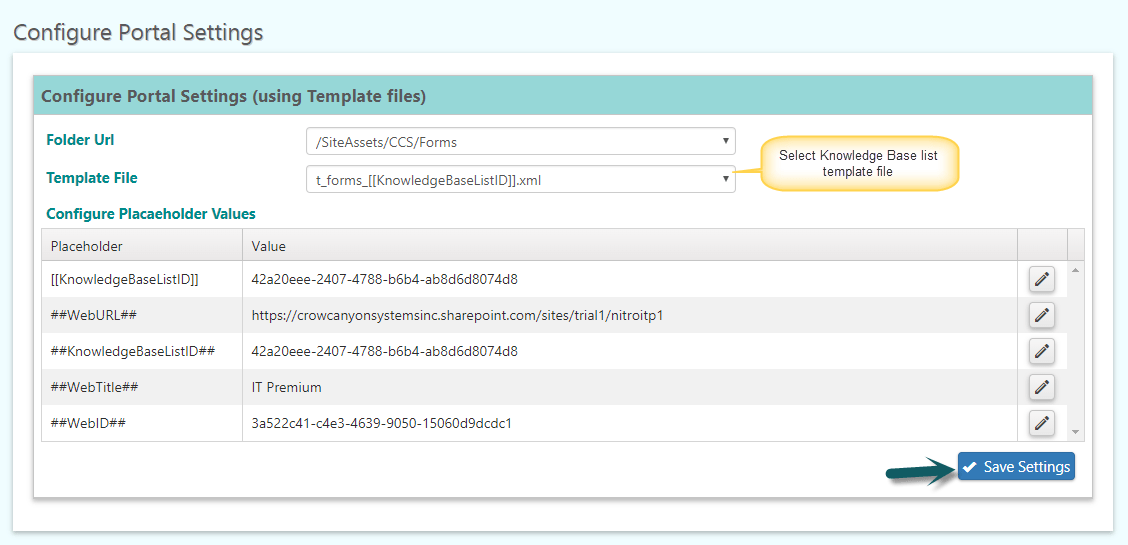
Configure Knowledge Base list forms
Select the “/SiteAssets/CCS/Forms” under Folder Url, select “t_forms_[[KnowledgeBaseListID]].xml” under “Template File”:

Configure placeholder values by editing every possible property and choose the appropriate value. Sample screenshot below:
Portal site is ready once these steps are ready.
Configure Portal Security Settings
Once above configurations are completed, Portal security settings can be configured for end users to auto redirect to the Portal site when they try to login to the main site (i.e. IT/Facilities/Request Management). To configure this portal security settings, refer this article.