Applies To: SharePoint On-Premises and NITRO Studio based applications
Description
This article lists the configurations required when SharePoint site URL is changed for a site using Crow Canyon NITRO Studio. This can be the case when when SSL is configured for a site (http://… to https://…) or when alternate access mapping is configured for the web application. There could also be the case of directly changing the site URL after installation of Crow Canyon applications.
- Case 1: Multiple URLs for site
- Alternate access mappings are configured to access the sites for the web application with multiple URLs
- Case 2: Single URL for site
- Alternate access mappings are configured to change URL, site is accessed only using this single URL
- Subsite URL is changed manually
- SSL is applied to the site (http://… to https://…)
For any of the above cases then URL change configurations have to be done and alternate access mapping URLs need to be specified in the Crow Canyon Site Settings.
Case 1: Multiple URLs
1. Upgrade NITRO Studio for the site
Go to the Application Site -> Site Settings -> Crow Canyon NITRO Apps -> Click “UPDATE THIS SITE” link (if available) to upgrade the NITRO Studio for the site.
If link is not visible then site is already updated and no action is required for this step.
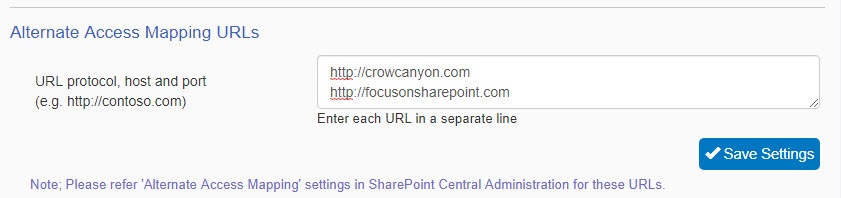
2. Configure Alternate Access Mapping URLs in Crow Canyon NITRO Site Settings.
Go to Application site -> Site Settings -> Crow Canyon NITRO Site Settings and configure the alternate access mapping URLs. Please enter all valid URLs of the site collection in separate lines as shown below:
Note:
Ticket links in the auto notifications (Application Administration -> Notification) will point to the “Default URL Zone” that is set for the web application in the SharePoint server.
To modify these links with alternate access mapping URL, go to SharePoint Central Administration -> System Settings -> Farm Management-> Configure Alternate Access Mappings -> Check and update the default URL as needed. This default URL will be used in the auto notifications.
3. Configure the URLs in the NITRO Apps with server relative URLs
-
Application Administration URL configuration
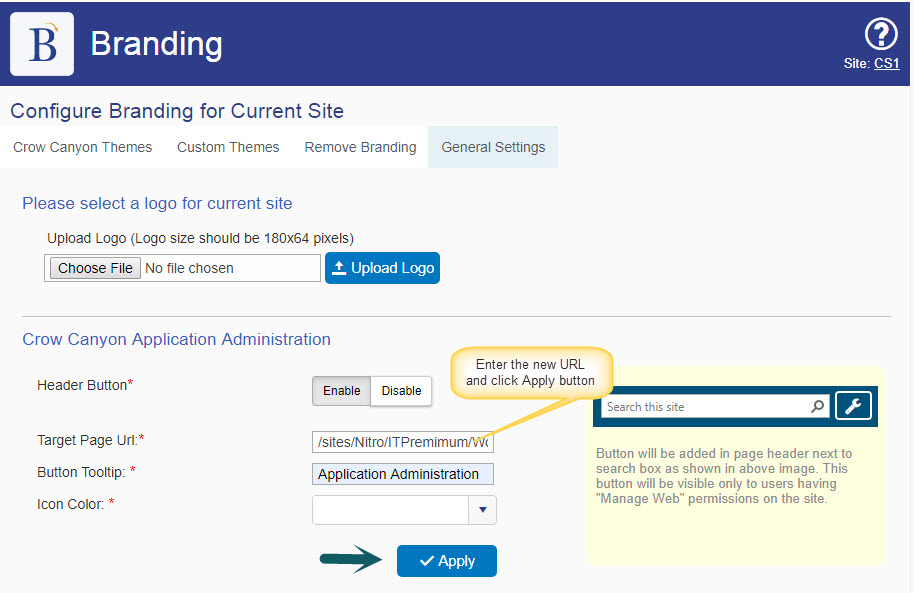
Modify the URL to the server relative URL and configure the Application Administration with new URL in Crow Canyon Branding.
Sample URL: http://crowcanyon:3000/sites/Nitro/ITPremimum/Workspaces/Configuration.aspx
Server Relative URL: /sites/Nitro/ITPremimum/Workspaces/Configuration.aspx
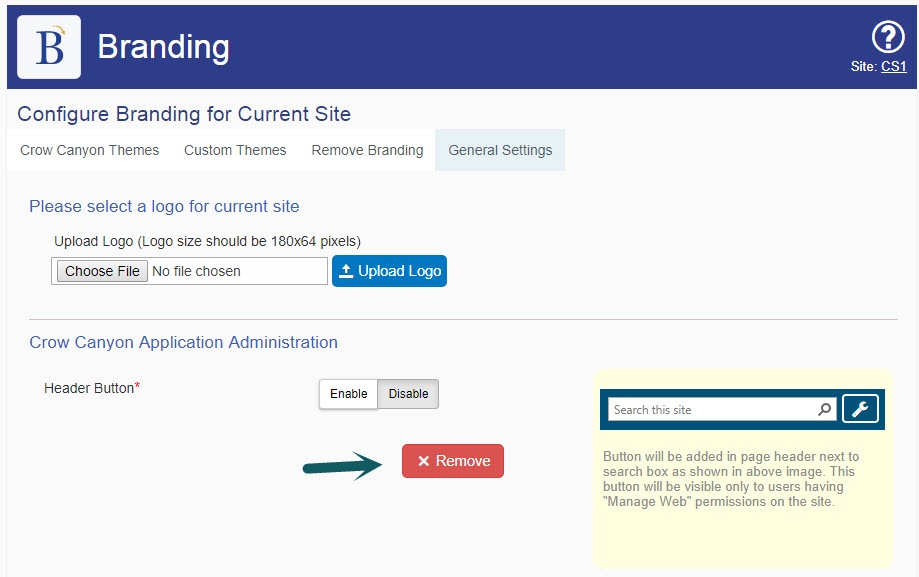
Go to Application Site -> Site Settings -> Crow Canyon Branding (Classic sites) -> General Settings -> Remove the Application Administration URL and reconfigure with new server relative URL:
-
Change URLs in Crow Canyon Tiles and Dials
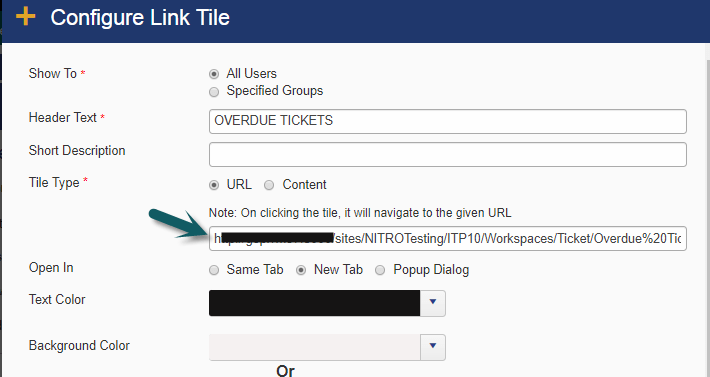
Go to Application Site -> Site Settings -> Crow Canyon Tiles and Dials -> Tiles -> Modify the URLs in Header and Body navigation URLs with server relative URLs (for server relative URL, please refer above section). Similarly modify the URLs in Link Tiles where the “Tile Type” is “URL”.
If there are no Tiles or Link tiles configured then ignore this step.
-
Portal Quick Ticket links
Go to the Portal site -> Portal Settings -> Home Page Settings -> Quick Links -> Edit the Tile and modify the navigation URL with server relative URL.
-
Re-save Portal Security Settings
Go to Portal Site -> Portal Settings -> Security Settings -> Select the site in the drop-down and re-save the settings
-
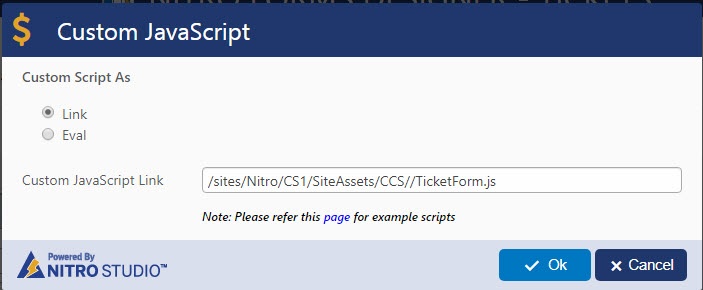
Custom JavaScript file link in NITRO forms
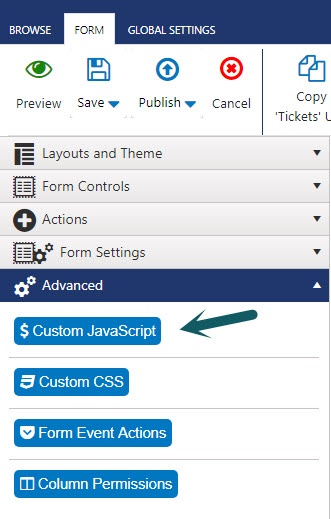
If the NITRO forms are using any Custom JavaScript file URL from the SharePoint site, modify the URL with server relative URL.
Go to the list -> List Settings -> Crow Canyon NITRO Forms -> Custom JavaScript and modify the URL with server relative URL and then publish the form.
Case 2: Site is using single URL but that URL is changed
Crow Canyon applications use the site URL in different places like NITRO forms, Custom Actions, URL Actions etc. These settings need to be updated with new site URL for corresponding functionality to work. Please refer below table for the steps:
| S.No. | Component | Description and Steps |
| 1 | Crow Canyon Timer Jobs
|
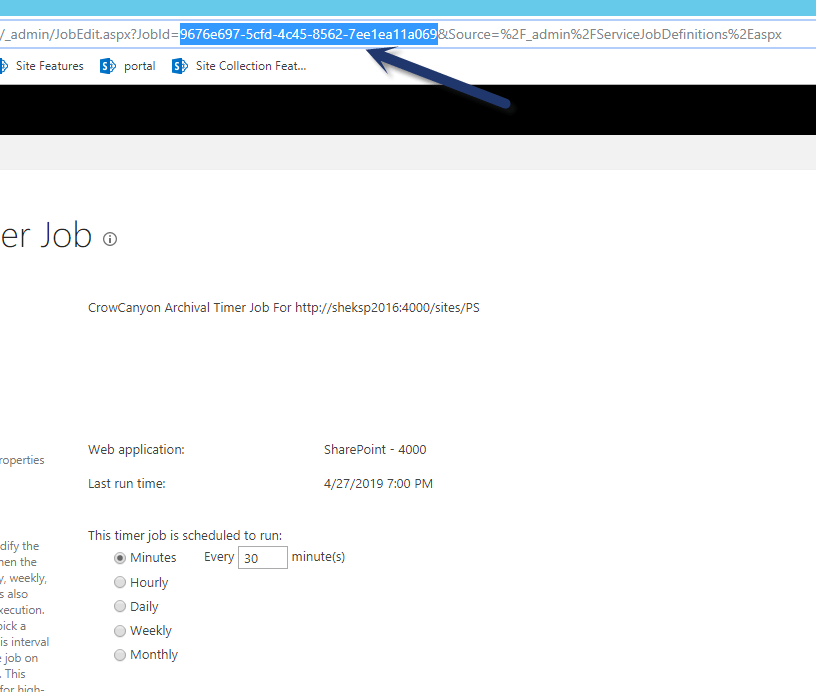
Delete old timer jobs using PowerShell and reactivate the Timer Job features using new site URL
1. Open SharePoint Management Shell and run below command:
To find the Timer Job’s GUID, go to SharePoint Central Administration site, Monitoring, Review Job Definition, open the old Crow Canyon Timer Job that is referring to old site URL, copy the timer job id from the address bar of the browser as shown below: 2. Please refer below article to re-activate timer jobs with new URL (Ignore #2 in the below article): |
| 2 | Crow Canyon URL Actions
|
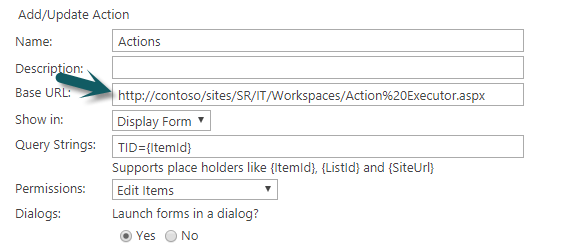
Crow Canyon URL Actions are configured for Tickets list in Crow Canyon application. Go to site contents –> Tickets list –> list settings –> Crow Canyon URL Actions –> edit each URL action and update the URL for the action with new site URL and save the settings as shown below
Note: In Asset Management application, URL actions will be configured for the Assets list. |
| 3 | Home Tiles
|
For V3.7 without NITRO Studio:
Go to site contents –> Tiles2 list –> edit each item and update the URLs as shown below. Please ignore if list is not present in the site contents. Similarly go to “Home Tiles” list and update the URLs. Ignore if the list does not exist. For NITRO Studio based Application: Go to Crow Canyon NITRO Studio –> Tiles and Dials –> Manage Link Tiles –> edit each tile and update the navigation URLs with new site URLs and save settings as shown below:
|
| 4 | Quick Launch and Top Link Bar Links | Check each link in the Quick Launch, Top Link Bar and ensure all the URLs are pointing to the new site URL |
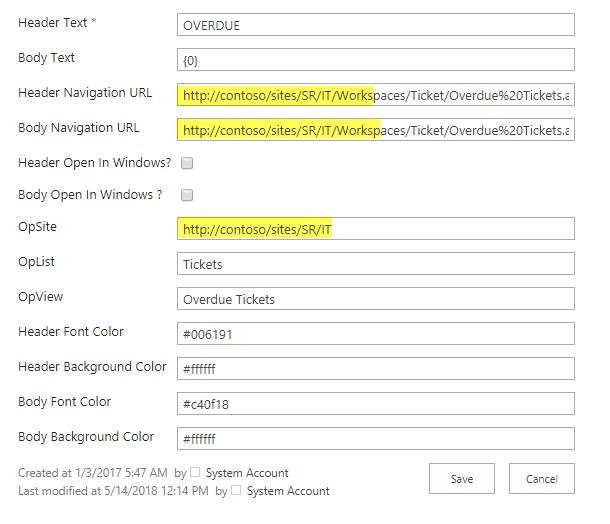
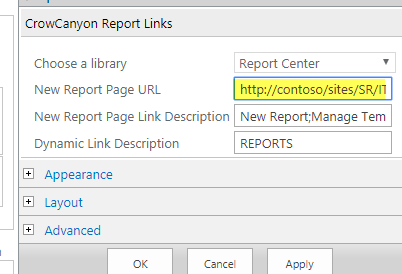
| 5 | Crow Canyon Report Center | Go to site contents –> Report Center document library –> edit each page present in this library –> edit “Report Links” web part –> update the URLs present in the web part settings as shown below and save the settings.
|
| 6 | Crow Canyon Branding | 1. Remove Application Administration: Go to Site settings –> Crow Canyon Branding –> General settings –> Remove application administration button
2. Remove branding: Go to Site settings –> Crow Canyon Branding –> Remove branding –> Click on “Revert” button 3. Apply Branding: Go to Site settings –> Crow Canyon Branding –> Crow Canyon Themes –> Apply required branding and select the required type of quick launch as needed. 4. Configure Application administration: Refer the steps from https://www.crowcanyon.info/nitro/appmanual_v2/index.html?general-settings2.html Note: To get the Application Administration URL, go to site contents –> Administration document library –> copy the URL for “Configure Lists” page. |
| 7 | Crow Canyon NITRO Forms | In NITRO form settings, we use the site URL in different places and these site urls need to be updated. Go to site contents –> Site Assets –> CCS –> Forms –> download all the xml files.
Now using Notepad++, find and replace the Old Site URL with New Site URL and upload the files to same location. After the files are replaced, go to each list that has the NITRO forms configured –> list settings –> Crow Canyon NITRO Forms –> publish the forms. After all the forms are published, go to site settings –> Crow Canyon NITRO Site Settings –> click on “Reset Cache” |
| 8 | Crow Canyon Portal Settings and Portal Forms | Go to Portal site –> Site contents –> Site Assets –> CCS –> Forms –> download the xml files and update with old site URL using notepad++ and upload the files to same location
Similarly go to site contents –> Portal Settings document library –> download Portal settings.xml and update the old site URL with New site URL using notepad++ and upload the file to same location. Now navigate to Portal site –> Portal settings –> Portal forms –> edit each form and publish the forms again. Also go to Portal settings –> Security settings –> reconfigure the Portal security settings. |
| 9 | Crow Canyon Custom Actions | Go to each list that has Custom Actions –> list settings –> Crow Canyon Custom Actions –> edit each custom action and save the action once |
| 10 | Hyperlinks used in Mail Templates | It is possible that we use hyperlinks in the mail templates that might refer to old site URL. We need to update the URLs for the hyperlinks in the mail templates accordingly.
Crow Canyon Workflow Manager Mail Templates: Go to Site settings –> Crow Canyon Mail Templates –> edit each mail template and update the hyperlinks with correct URL and save the settings. Crow Canyon Email Manager: Go to Site contents –> Tickets list –> Crow Canyon Email Manager settings –> edit the mail template –> update hyperlinks to point to new site URL and save the settings. Notification Utilities: Go to Application Administration –> Notifications –> check if any URLs are present in the mail template body and update as needed. Configurations: Go to Application Administration –> General Configurations –> update Portal Tickets URL with the updated Portal site URL as needed and save the settings. |
| 11 | Crow Canyon Conditional Formatting | Re-save all conditional formatting settings. Go to Site contents –> Tickets list –> list settings –> Crow Canyon Conditional formatting –> edit each setting and save it. We may have to repeat this process for the lists mentioned below
|
| 12 | Crow Canyon License Manager | Contact sharepointsupport@crowcanyon.com so we will update the license for the new site URL and you can start using the application with changed URL. |
Limitations:
- If there are any associated item settings configured for Enhanced Rich Text field type in NITRO Forms then that column’s data contains the old URLs in its content and those values will be updated whenever the item is updated next time using NITRO forms manually.