Applies to:
Crow Canyon NITRO activated sites in:
SharePoint Online and On-Premises 2013/2016/2019
Description
NITRO Forms have lot of built-in functionality to customize layout, design and functionality as required in common business applications. For any specific cases not covered directly by the configurations, custom JavaScript and CSS can be added. These custom scripts can be invoked on form load, on column values change and before/after item submit. For all these cases, scripts can be invoked conditionally based on values entered in the form.
This article describes some sample use cases to configure form event actions in NITRO forms.
Use Case 1 – Whenever value of a column changes, take part of the value entered in column and put it in another column
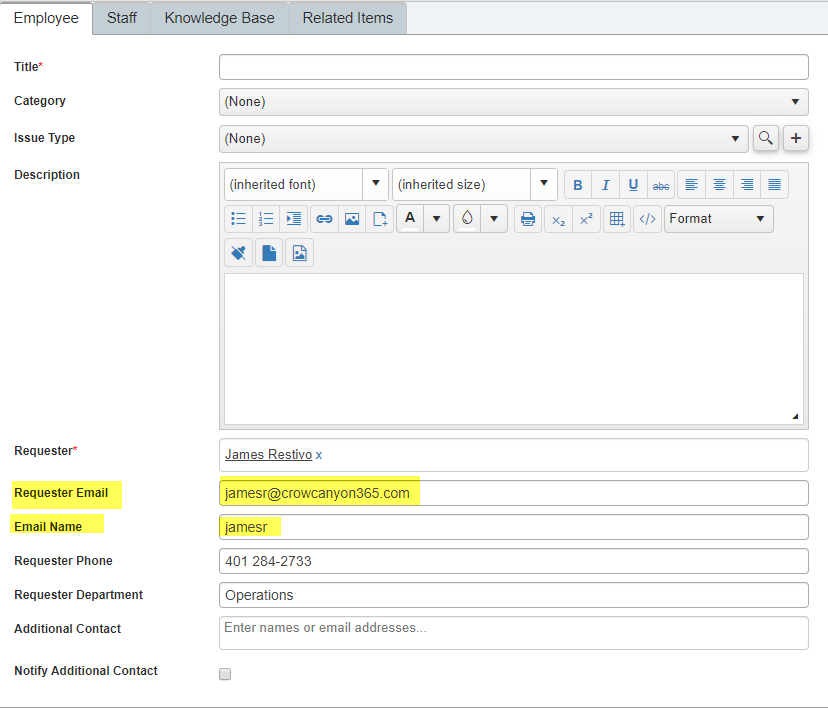
As an example, we will read value from ‘Requester Email’ column in Tickets list and take first six characters and put it in another column ‘Email Name’. As per your use case you can use different columns and update the script to extract the required value.
Detailed Steps
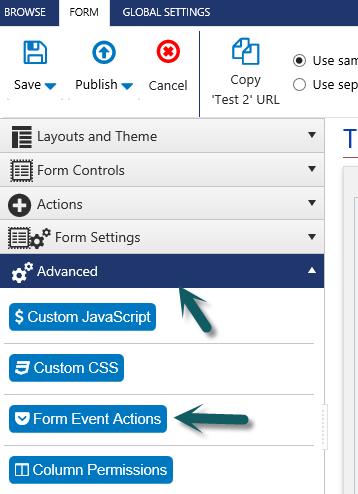
Go to Ticket list -> List Settings -> Crow Canyon NITRO Forms -> Advanced section in left panel -> Form Event Actions and configure new form event action as shown below.
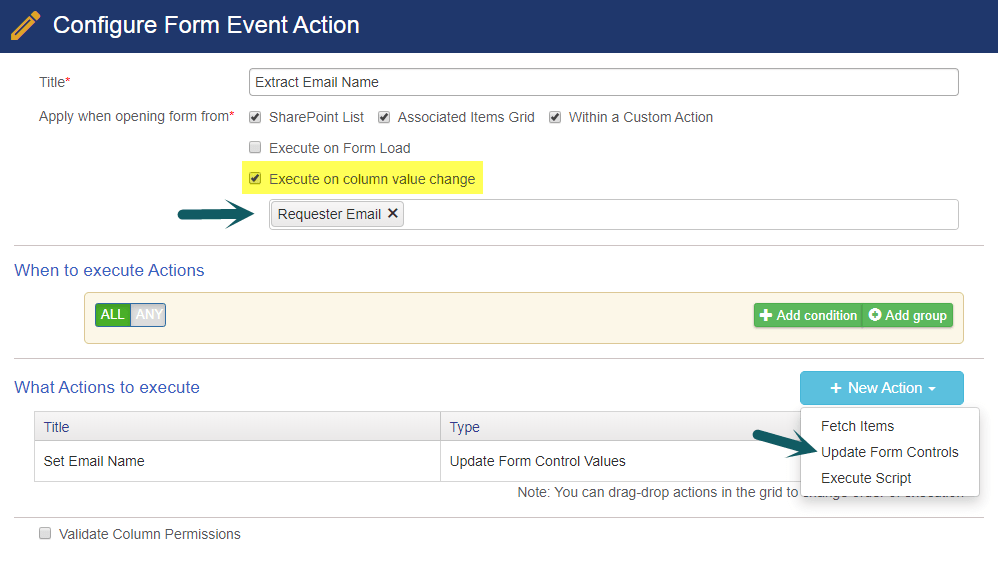
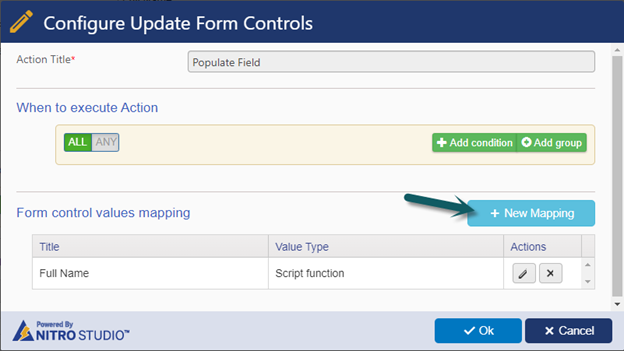
Configure Update Form Controls as shown below:
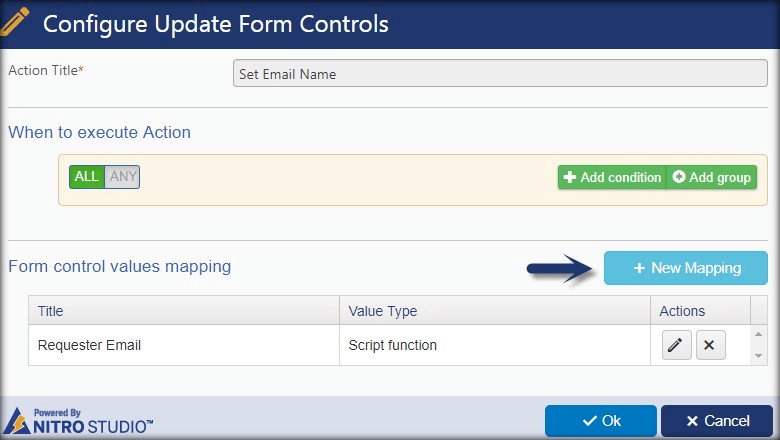
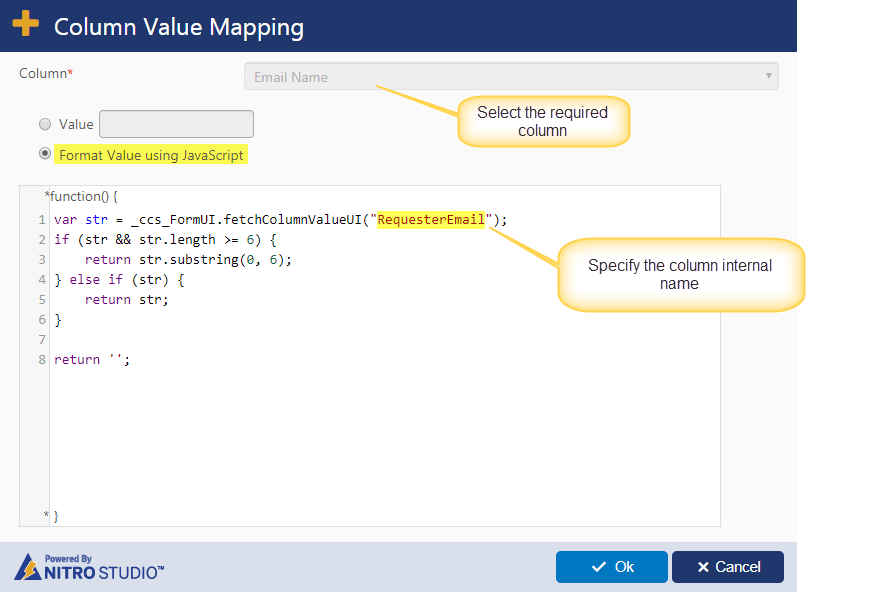
Script:
var str =
_ccs_FormUI.fetchColumnValueUI("RequesterEmail");
if (str && str.length >= 6) {
    return str.substring(0, 6);
} else if (str) {
    return str;
}
 return ‘’;
Note: In the above script replace “RequesterEmail” with internal name of the required column on which you want to configure this action.
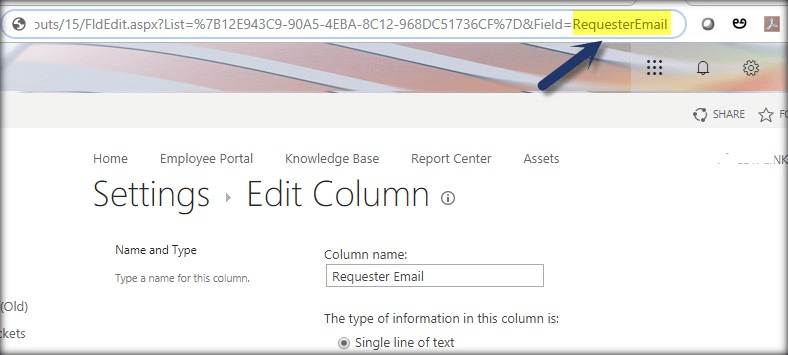
To know the internal name of the column, go to list settings -> Edit the required column -> Get the internal name of the URL in the browser as shown below.
Sample Output
Use Case 2 – Concatenate values in two columns using Form Event Actions
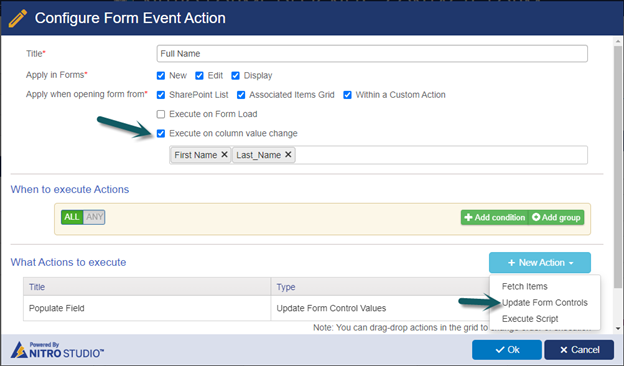
We have taken example to concatenate ‘First Name’ and ‘Last Name’ column values and put the concatenated value in ‘Full Name’ column using form event actions.
Detailed Steps
Navigate to Crow Canyon NITRO Forms designer for the list -> Form Event Actions (in ‘Advanced’ section) and configure as shown below:
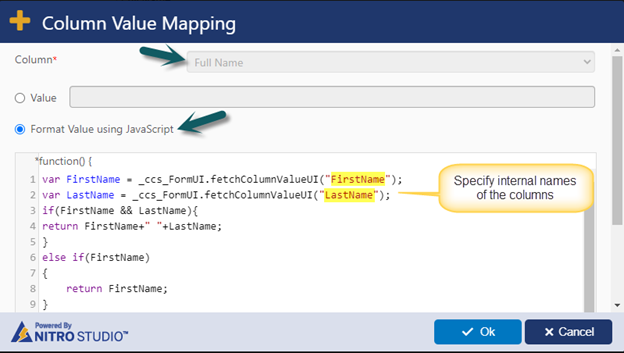
Script:
var FirstName = _ccs_FormUI.fetchColumnValueUI("FirstName");
var LastName = _ccs_FormUI.fetchColumnValueUI("LastName");
if(FirstName && LastName){
return FirstName+" "+LastName;
}
else if(FirstName)
{
	return FirstName;
}
else if (LastName)
{
	return LastName;
}
else
{
	return "";
}
In above script, replace ‘FirstName’ and ‘LastName’ with internal names of the respective columns.
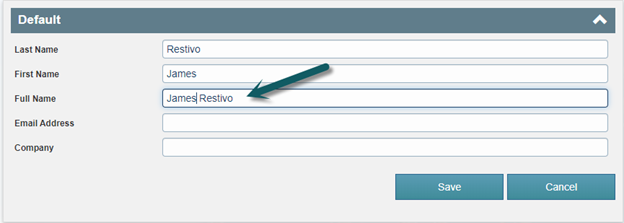
Sample Output
Use Case 3 – Show/Hide ‘Edit’ button dynamically in item display form
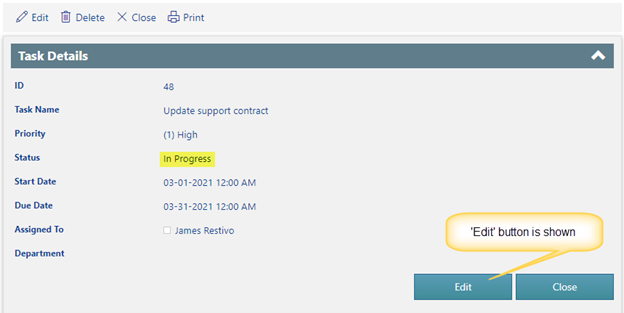
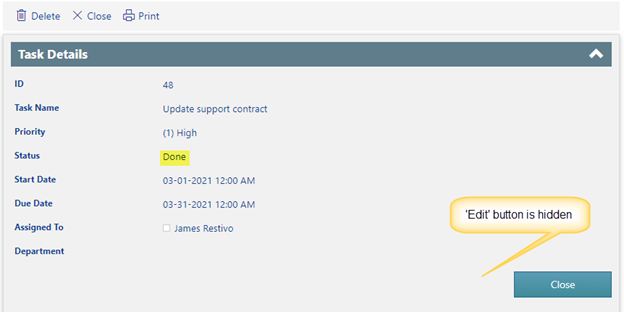
In this sample use case, we have configured form event action to show/hide ‘Edit’ button dynamically in item display form.
In this example, ‘Edit’ button will be hidden when ‘Status’ is done, otherwise, it will be visible.
Detailed Steps
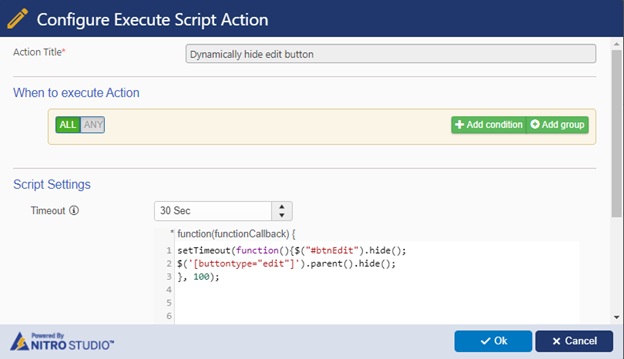
1. Configure form event action as shown below. Below action will be executed in display form when status is ‘done’.
Navigate to Crow Canyon NITRO Forms designer for the list -> Form Event Actions (in ‘Advanced’ section) and configure form event action as shown below:
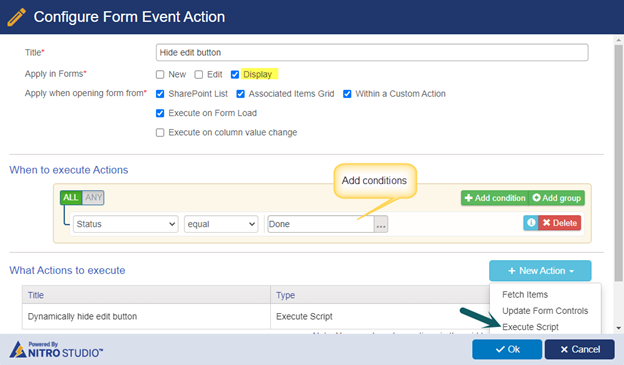
- Configure ‘Execute Script’ action with the below script.
Script:
setTimeout(function(){$("#btnEdit").hide();
$('[buttontype="edit"]').parent().hide();
}, 100);
Sample Output:
Use Case 4 – Open the edit form of lookup item
Sample list schema and use case
- Standard SharePoint list.
- ‘Category’: Single selection enabled NITRO lookup column
- ‘Edit’ link will open edit form of selected category in new tab.

Steps to configure
- Add ‘Line/HTML’ control below the lookup column.
Navigate to Crow Canyon NITRO Forms designer for the list -> Add ‘Line/HTML’ control (under ‘Form Controls’ section) below the lookup column.

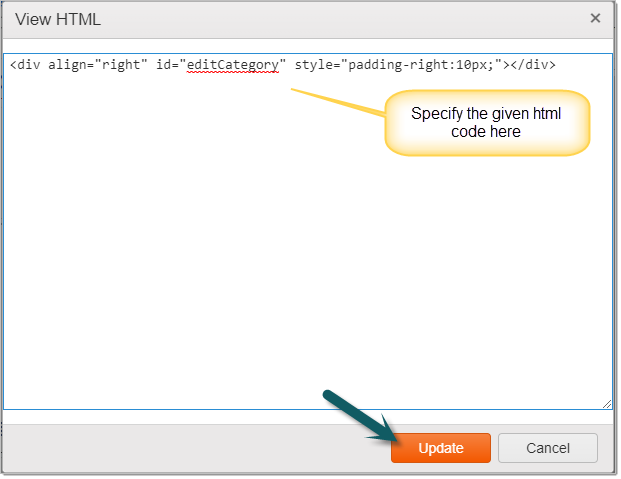
2. Update the ‘Line/HTML’ control code with below script in ‘Line/HTML Settings’.
Script:
<div align="right" id="editCategory" style="padding-right:10px;"></div>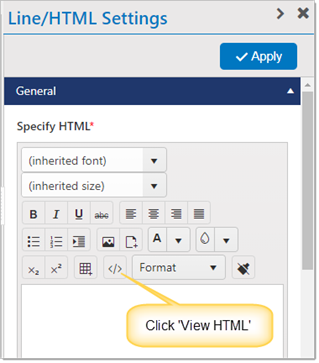
3. Configure form event actions as shown below:
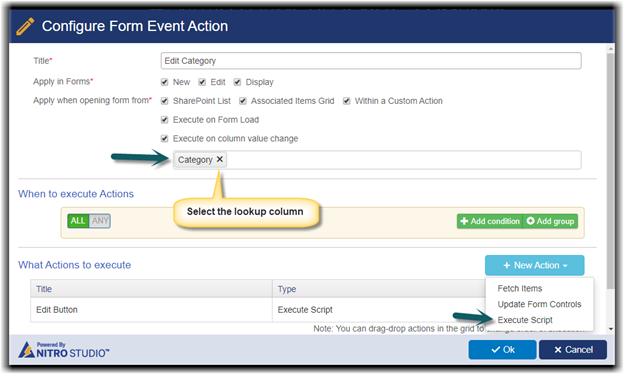
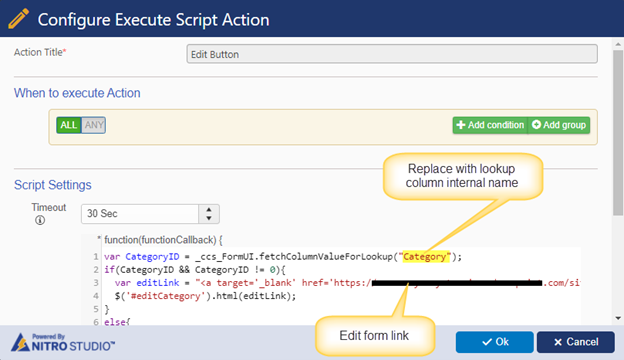
Configure execute script action:
Script:
var CategoryID = _ccs_FormUI.fetchColumnValueForLookup("Category");

if(CategoryID && CategoryID != 0){
  var editLink = "<a target='_blank' href='https://contoso.sharepoint.com/sites/helpdesk/it/SitePages/CCSEditForm.aspx?ListID=c5223fe0-157f-4729-8f22-9d68b8128bea&ItemID=" + CategoryID +"'>Edit</a>";
  $('#editCategory').html(editLink);
}
else{
  $('#editCategory').html("");
}
functionCallback();
Note:
- Replace ‘Category’ with NITRO lookup column internal name.
- Replace the URL with lookup list edit form URL.
Use Case 5 – Auto set default value for date column
Sample list schema and use case
- Standard SharePoint list
- ‘Due Date’: Date column
- Auto set ‘Due Date’ column value seven days from today on form load
- ‘Due Date’: Date column
Steps to configure
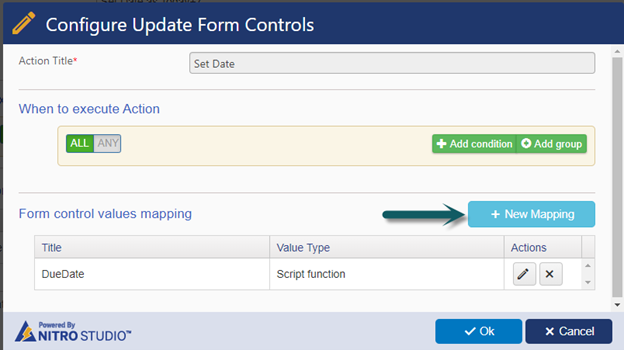
1. Navigate to Crow Canyon NITRO Forms designer for the list -> Form Event Actions (under Advanced section in left-hand panel) and configure FEA on load as shown below:
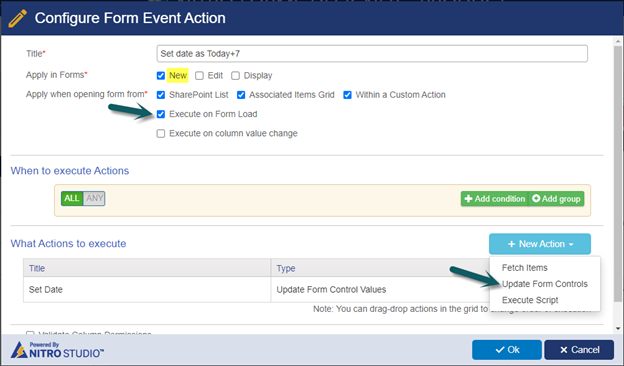
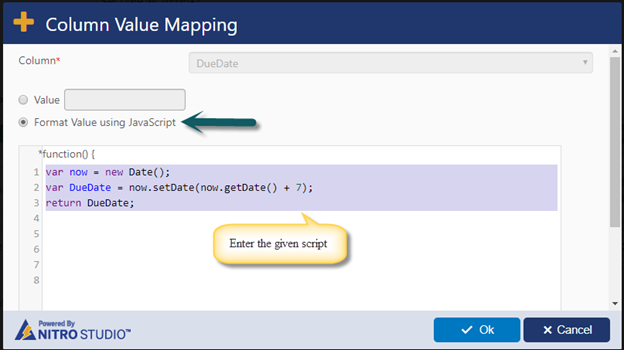
Configure script function:
Script:
var now = new Date();
var DueDate = now.setDate(now.getDate() + 7);
return DueDate;
Note: In this sample, we are setting ‘Due Date’ column value seven days from today. It is possible to set number of days from today as per requirement by replacing ‘7’ in the above script.