Applies To:
Crow Canyon NITRO activated sites in:
SharePoint Online and On-Premises 2013/2016/2019/SharePoint Server Subscription Edition
Description
There are some common steps that we perform while configuring NITRO Apps such as extracting list ID from the URL, enable version history, etc. We might perform these steps to change some list settings or these steps can be the part of main configurations.
This article lists some of the use cases for common steps in NITRO Apps configurations:
- How to navigate to list settings page
- How to get the internal name of a list column
- How to get the Id of a SharePoint list
- How to enable version history for list
- How to open list forms in a dialog
- How to create a column with internal name
How to navigate to list settings page
To navigate to the list settings page, please go to Site Contents -> Navigate to the required list -> List settings from the list ribbon.

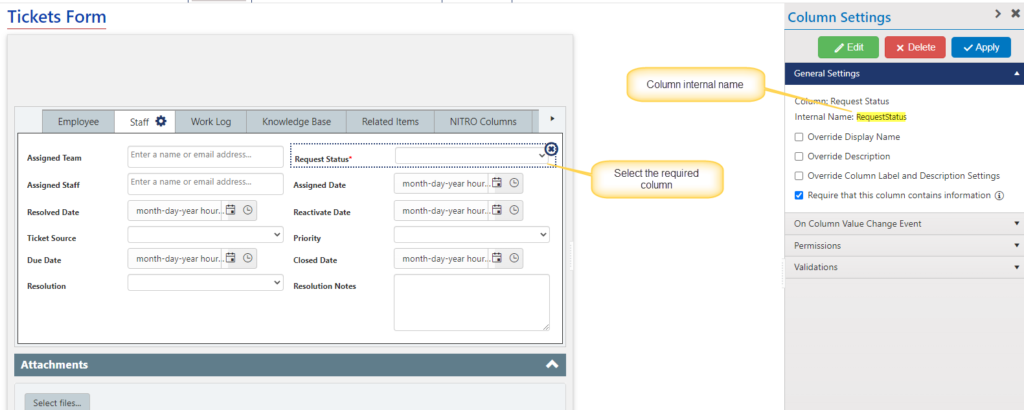
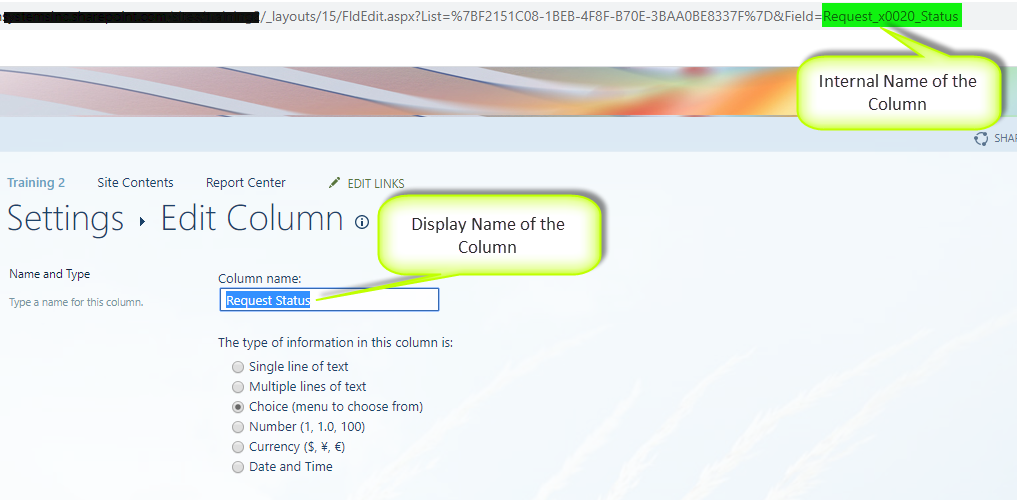
How to get the internal name of a list column
To get internal name of the column, please go to Site Contents -> Navigate to the required list -> List Settings -> Crow Canyon NITRO Forms -> Select the required column on the form and find the column internal name in column settings
Alternatively, go to the list settings -> Edit the column and find the internal name of the column at the end of the URL in the browser.
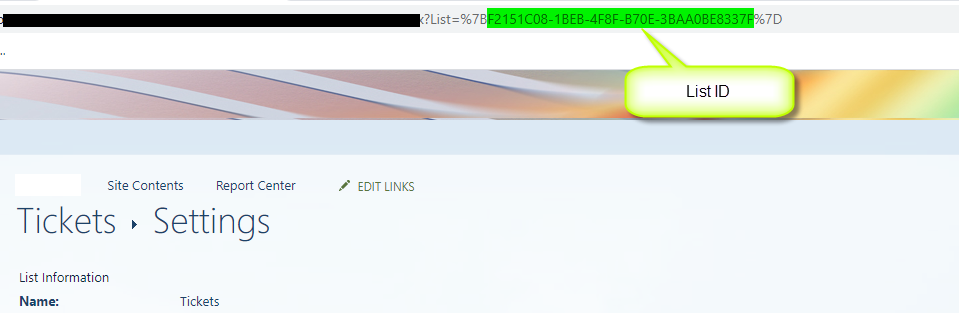
How to get the Id of a SharePoint list
To know the SharePoint list ID, please go to Site Contents -> Navigate to the required list -> List settings and find the list Id at the end of the URL.
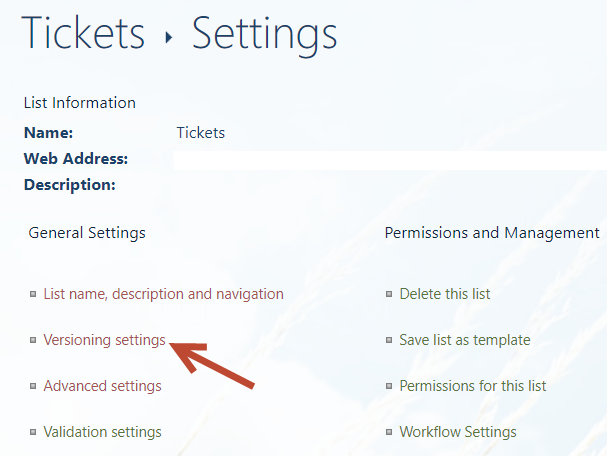
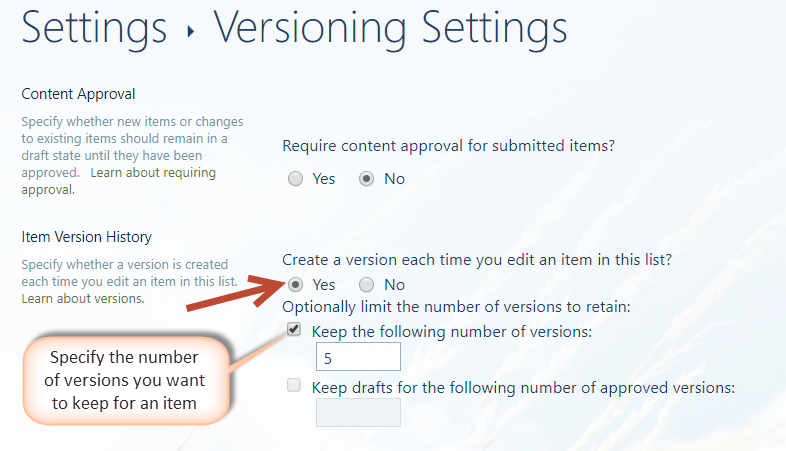
How to enable version history for list
The SharePoint Version History feature makes it possible to see and restore earlier version of list items.
To enable version history, please go to Site Contents -> Navigate to the required list -> List settings -> Versioning settings under General settings and enable item version history.
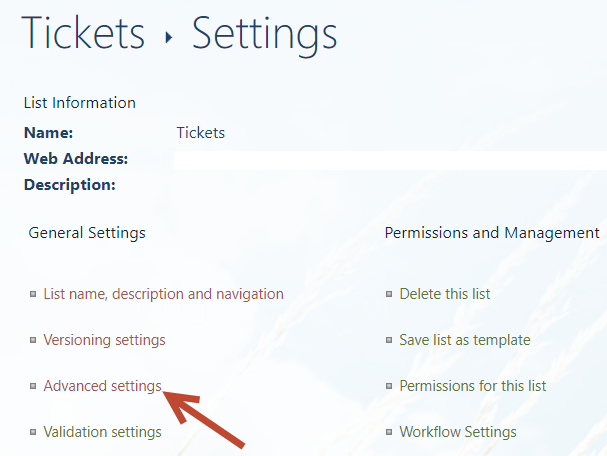
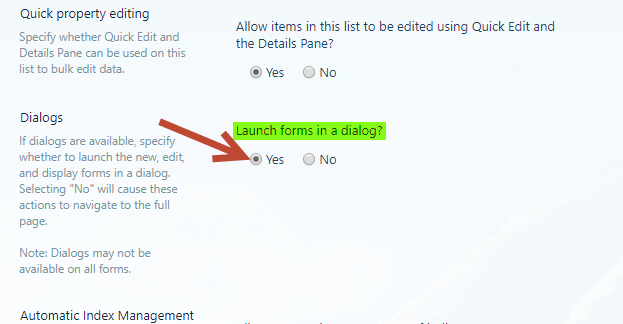
How to open list forms in a dialog
SharePoint list forms (new, edit and display) can be opened in a dialog box instead of navigating to the full page.
Please go to Site Contents -> Navigate to the required list -> List settings -> Advanced settings under General settings and enable Launch forms in a dialog.
How to create a column with specific internal name
SharePoint list columns have a display name and an internal name. Once created, display name can be changed but internal name is not editable. SharePoint automatically generates internal name of the column from its display name. Internal name cannot have spaces and special characters so it can be different from display name.
For example, if we create a column with name ‘Task Status’, SharePoint will generate its internal name as ‘Task_x0020_Status’. Here space is replaced with equivalent Unicode character value.
To create a column with specific internal name, during column creation we need to specify the display name without any special characters and whitespace characters. For example, in this case we will create the column with display name as ‘TaskStatus’. After creating the column, we can edit the column from list settings page and modify the display name (‘Task Status’).