Applies to: SharePoint Online
Description
Crow Canyon services like Crow Canyon Data Sync Service and Data Sync (Auditing For SharePoint) accept legacy authentication where we need to enter user name and password in configuration. For this, legacy authentication needs be enabled at tenancy level. As an alternative to legacy authentication, we can grant access using SharePoint app-only method described in this article.
Pre-requisites
- Site Collection Administrator
Summary of Steps
- Register new app
- Grant permissions to the registered app
Detailed Steps
- Register new app
- Go to SitecollectionURL/_layouts/15/AppRegNew.aspx by using a web browser.
- SitecollectionURL: Target site collection that this application is supposed to access and perform required operations through the Crow Canyon service.
- Example: https://contoso.sharepoint.com/sites/nitro/_layouts/15/AppRegNew.aspx
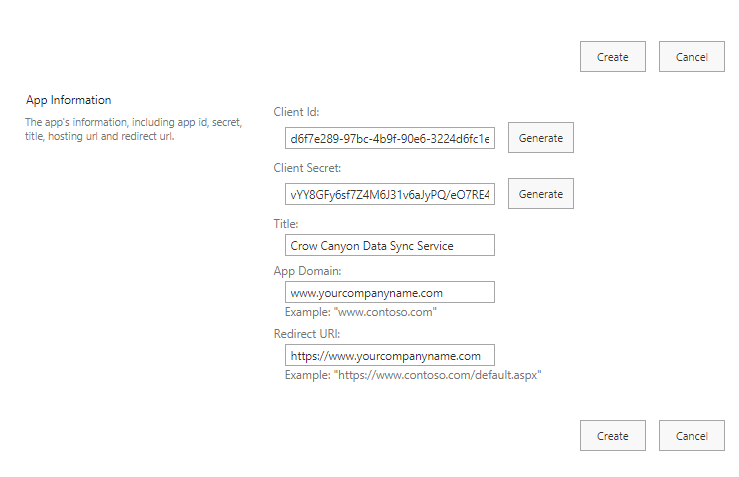
- Enter values for the following form fields and then click “Create”.
- Client Id: Click “Generate” button and that will generate a unique value.
- Client Secret: Click “Generate” button and that will generate a unique value.
- Title: A user-friendly title; for example, Crow Canyon Data Sync Service. Users are prompted to grant or deny the add-in the permissions that the add-in is requesting. This title appears as the name of the add-in on the consent prompt.
- App Domain: Enter your tenant domain. Do not include protocol (“https:”) or “/” characters in this value. Please note that in the sample screenshot below, we use yourcompanyname as just example and do not use it as it is.
- Redirect URI: Enter redirect URL including the protocol, which must be HTTPS. Again, sample screenshot has just an example and do not use as it is.
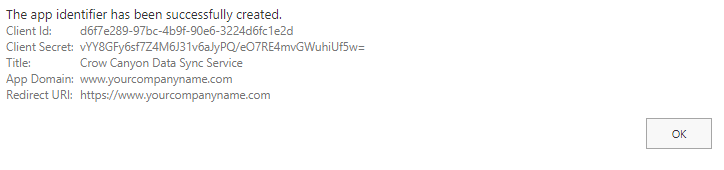
- After we click “Create” button, it will show the summary of information as shown below.
- Important: Store the retrieved information (client id and client secret) since you’ll need this in the next step!
2. Grant permissions to the registered app
- Go to SiteCollectionUrl/_layouts/15/appinv.aspx. Once the page is loaded, enter client id generated in above step and click “Lookup” button. This will auto populate the title, app domain and redirect URL as shown below:
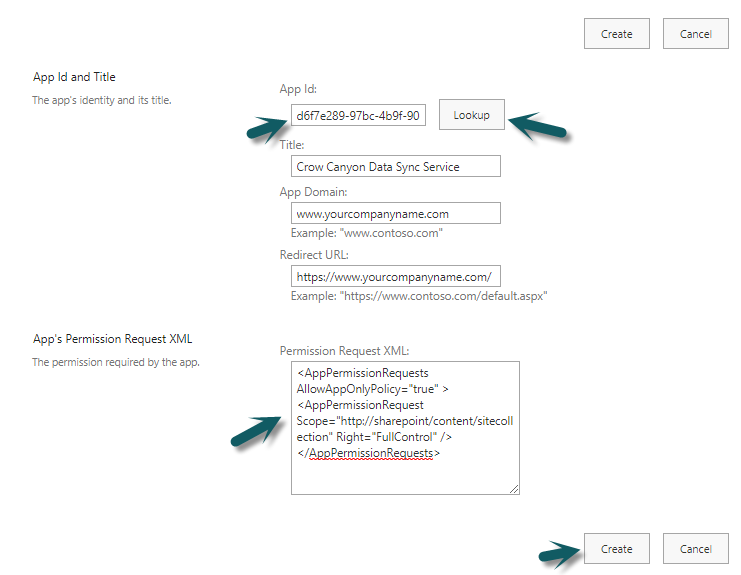
- To grant permissions, you’ll need to provide the permission XML that describes the needed permissions. For Crow Canyon services it needs below permissions:
<AppPermissionRequests AllowAppOnlyPolicy="true" >
<AppPermissionRequest Scope="http://sharepoint/content/sitecollection" Right="FullControl" />
</AppPermissionRequests>
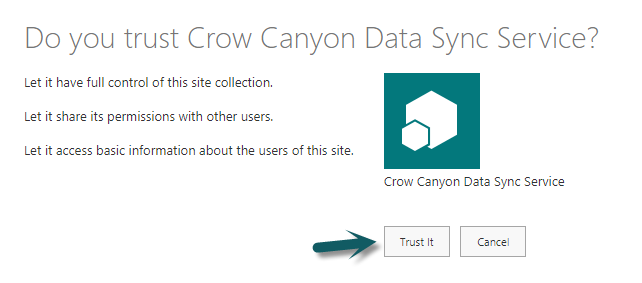
- When you click on Create you’ll be presented with a permission consent dialog. Press ‘Trust It’ to grant the permissions: