Applies To
SharePoint Online
Description
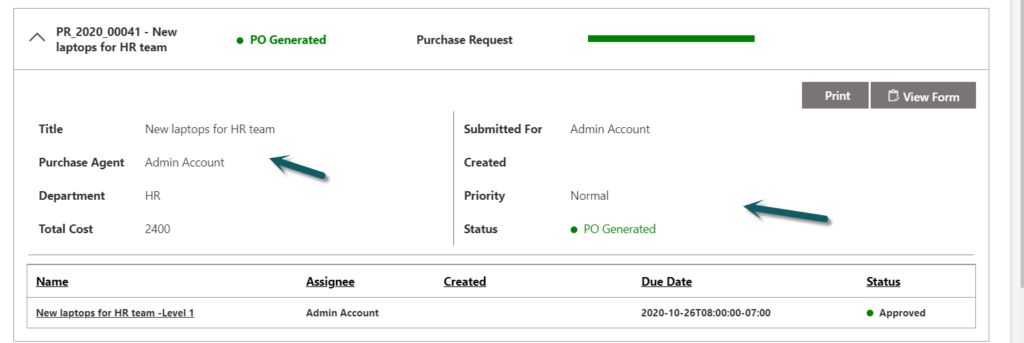
This article describes the steps to configure Dashboard page in NITRO Applications to show related items and progress of them. See sample output from below image.
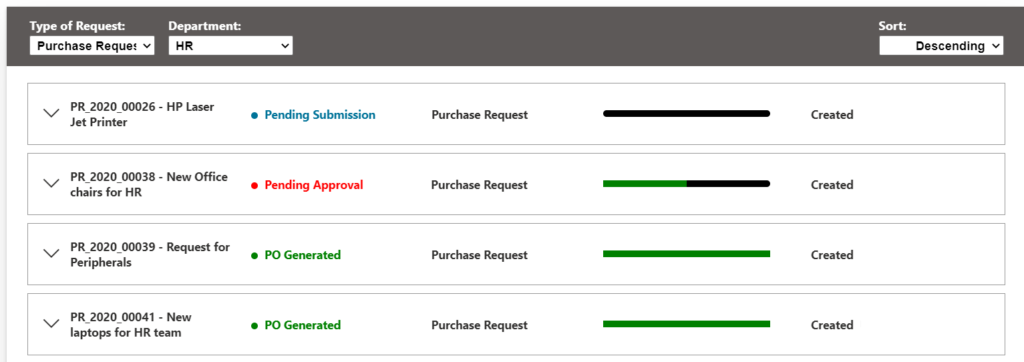
There is no direct app or UI to configure above dashboard web part and it needs to be done using an xml file.
Summary of steps
- List Schema
- Create Dashboard page
- XML Configuration
Detailed Steps
List Schema
We need a Parent list and Child lists related to Parent for the dashboard configuration. In this example, we are considering Crow Canyon Purchase Order System application dashboard page.
- Parent List: Purchase Requests
- Child List: Approval Tasks
Create Dashboard Page
Go to Site contents –> site Pages –> create a new site page with required name
Edit the page –> add web part –> add ‘Dashboard – Crow Canyon’ web part and specify a name for web part as shown below.
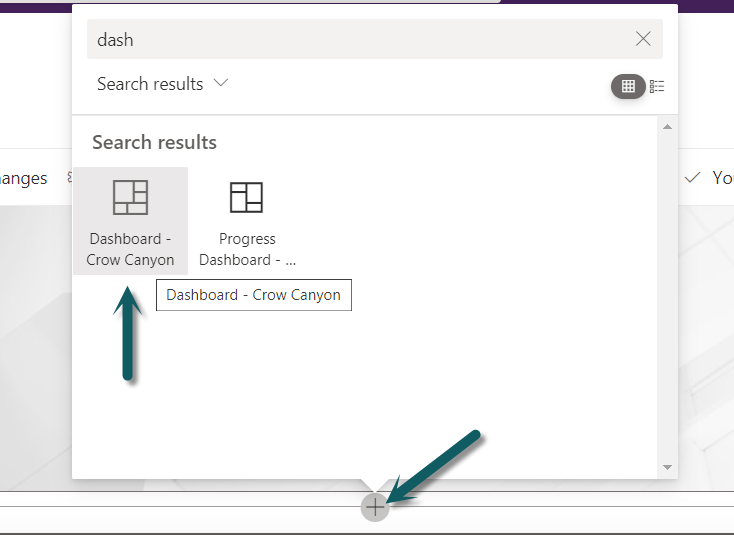
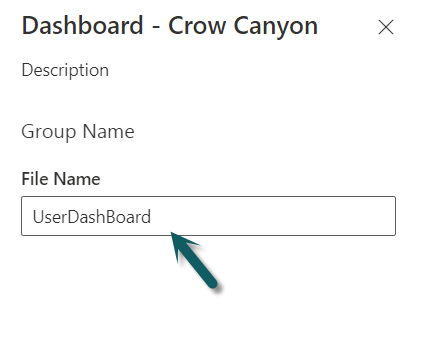
The name we used in above web part will be the xml file name that we will be configuring in further steps.
XML Configuration
Look and Feel of the dashboard page is configured using this xml file. Below is the link to get the sample xml file.
Extract the zip file to find ‘UserDashBoard.xml’ file –> right click on the file –> Properties –> Unblock the file if it is blocked.
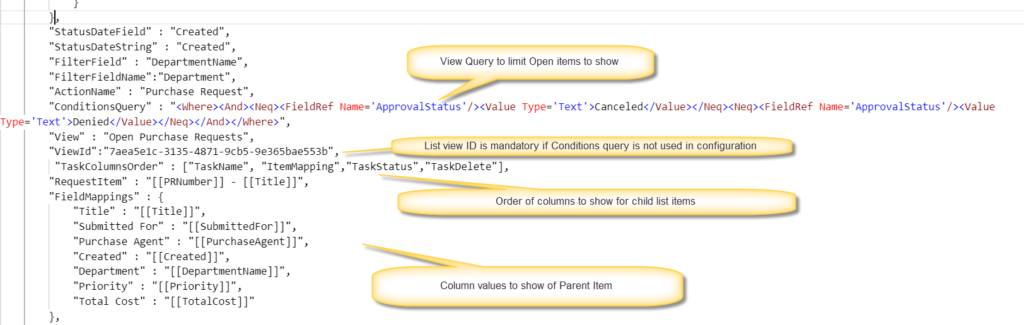
In the XML file, we take the input of the Parent list and child list related configurations as shown below.
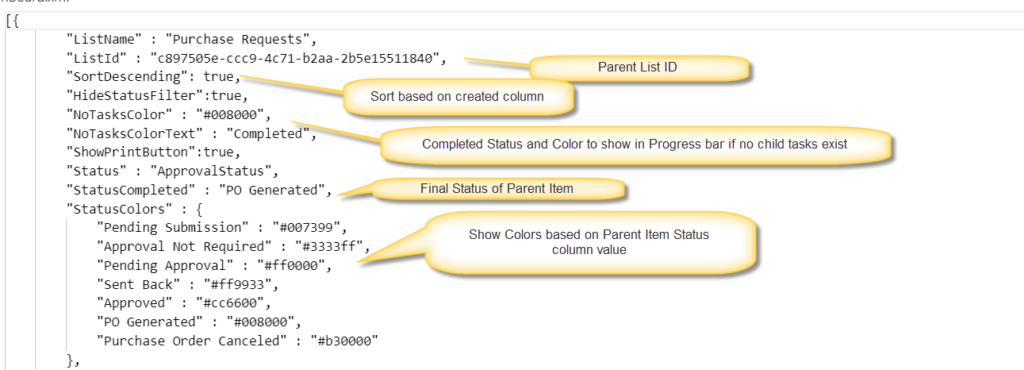
For the parent list item column values to shown in dashboard page like below, we take the input in XML file which is further explained below.
Below is configuration XML related to this.
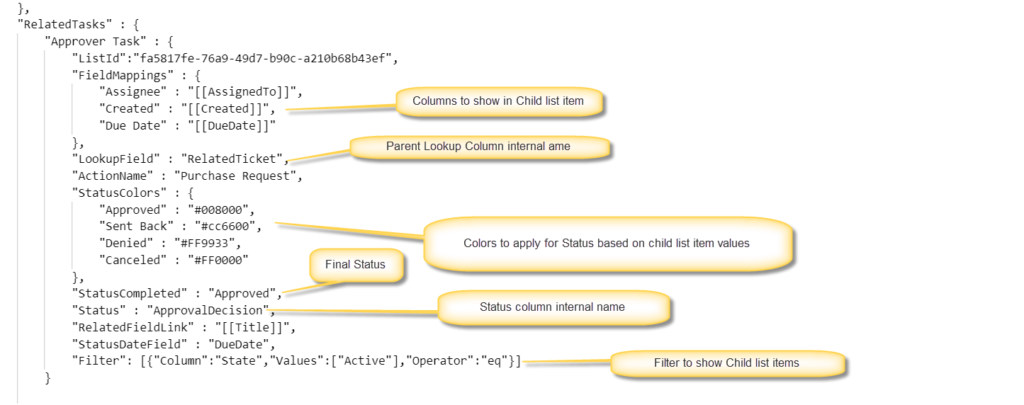
Similarly, when we consider Child list item values to show in dashboard like below, related configuration is explained.

XML Configuration
After the XML is configured, go to site assets –> CCS folder –> Dashboard Folder –> add the xml file at this location. Please create ‘Dashboard’ folder if it is not already existing.