Applies to: SharePoint On-premises (2013, 2016 and 2019/SharePoint Server Subscription Edition)
Description
In Custom Actions and NITRO Workflows, Generate Document action works with “Open XML API” and “Microsoft Office API”. Below configurations are required in the SharePoint server to work Generate Document action with “Microsoft Office API”. If you have multiple servers in farm, then these are required in all the application/web servers.
Pre-requisites:
1. Install Microsoft office on SharePoint server machine and make sure that office is licensed.
2. Microsoft .NET Framework 4.8 or above should be installed on the server.
3. Create a folder with name “Desktop” in below system folders:
C:\Windows\System32\config\systemprofile
AND
C:\Windows\SysWOW64\config\systemprofile
4. Create a new folder with name “tempfiles” in C drive
5. Configure as per below checklists in each SharePoint server
Check List 1:
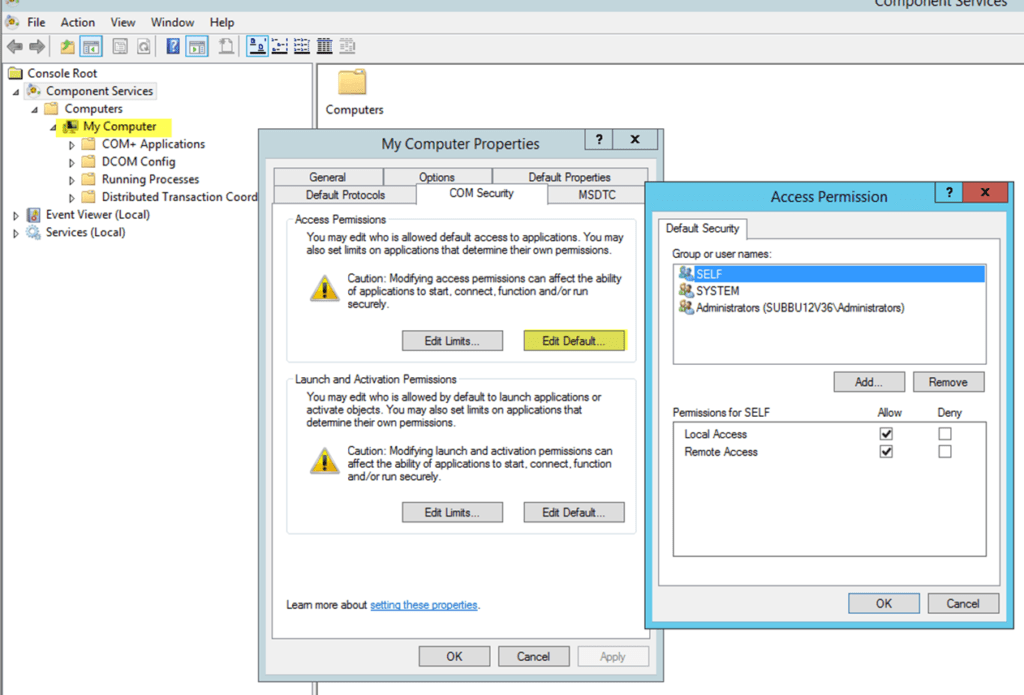
1. Open DCOMCNFG (search in the command line), Component Services -> Computers -> My Computer -> right click on the My Computer and select properties
2. Choose the COM Securities tab.
3. In Access Permissions, click “Edit Defaults” and add “Local Access“ and “Remote Access” permissions for app pool user of CrowCanyon Application.
4. To know the application pool user, go to IIS Manager -> Application Pools -> See the identity (user) of crow canyon application pool account
5. In Launch and Activation Permissions, click Edit Defaults and add “Local Launch” and “Local Activation” permissions for app pool user of CrowCanyon Application
Check List 2:
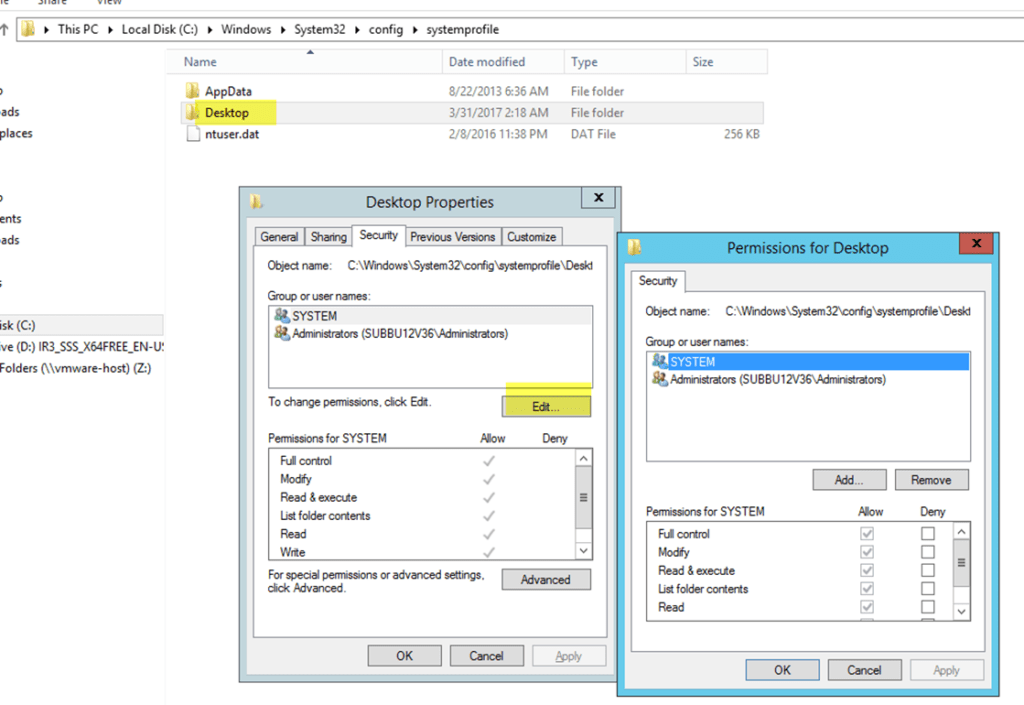
1. Open Windows Explorer
2. Depending on the 32bit or 64bit version of office installed on the server, do the following configurations:
32bit Office installation: Navigate to C:\Windows\System32\config\systemprofile
64bit Office installation: Navigate to C:\Windows\SysWOW64\config\systemprofile
3. Verify the folder “Desktop” exists. If not, create the “Desktop” folder. Select the “Desktop” folder and right click -> properties -> “Security” tab and add app pool user of Crow Canyon Application with default permissions (Read & execute, List folder contents and Read)
Check List 3:
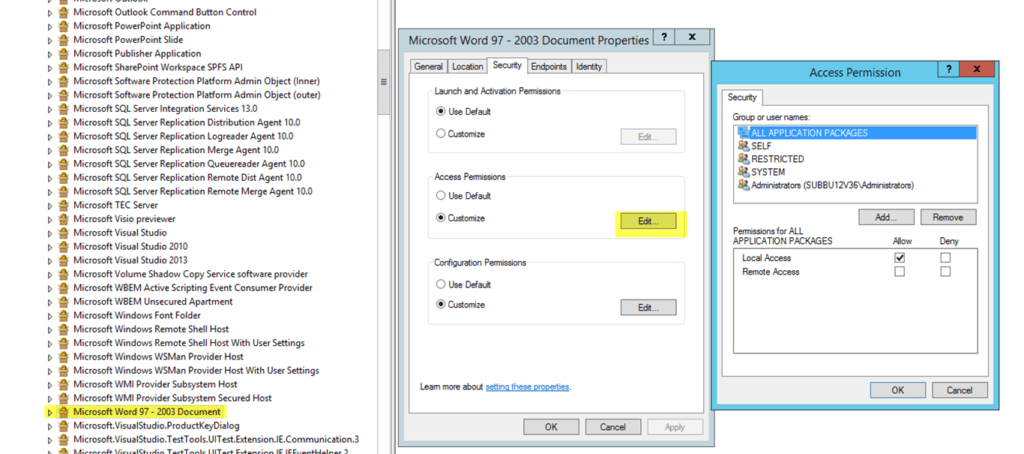
1. Open DCOMCNFG (search in the command line) -> Component Services -> Computers -> My Computer -> DCOM Config
2. Find “Microsoft Word 97 – 2003 Document” (If it is missing check if your Word is also 64 bit (if your Windows is))
Right click -> Properties
Go to “Security” tab and edit the “Customize” radio buttons so that IIS_IUSRS could have rights for launch and access
Next, go to “Identity” and choose “The interactive user” -> apply changes and try again.
If all this fails, go to “General” tab and in “Authentication Level” drop down choose “None”.