Applies to: SharePoint online and On-premises (2013,2016 and 2019/SharePoint Server Subscription Edition)
Application Type: Crow Canyon Helpdesk applications (IT Helpdesk, Request Management and Facilities/Work Orders)
Description
Requester metadata like email, phone and department will be auto populated in Tickets list by default in Crow Canyon helpdesk applications. This metadata will be updated in two ways in Tickets in standard helpdesk applications.
- Tickets created directly from NITRO forms
- Email to Ticket conversion
This article describes the steps to configure additional requester metadata like Job Title, Office etc. in Tickets list.
Summary of steps:
- Find attribute name in user profile properties
- SharePoint Online
- SharePoint On-premises
- User Profile
- Active Directory
- Configure auto-fill settings in Tickets list forms
- General Configurations
Note: This article is same for IT, Facilities and Request Management applications and only difference is the name of the main list (Tickets list). Below instructions are given as per Tickets list name, please use the corresponding list name based on the application.
For IT Helpdesk application – ‘Tickets’
For Facilities application – ‘Work Orders’
For Request Management application – ‘Requests’
Detailed steps
In this article, we have configured “Office” additional property in “Requester Location” column in Tickets list.
1. Find attribute name in user profile properties
To configure additional requester properties in Tickets list, we need to find the attribute/property name from User Profile or Active Directory.
In this article, we have described the steps to find the attribute name in SharePoint online and on-premises.
SharePoint Online:
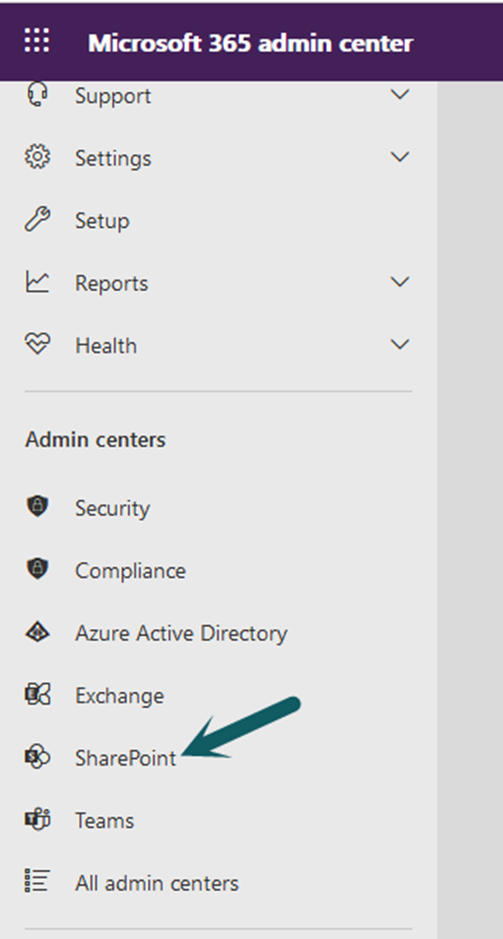
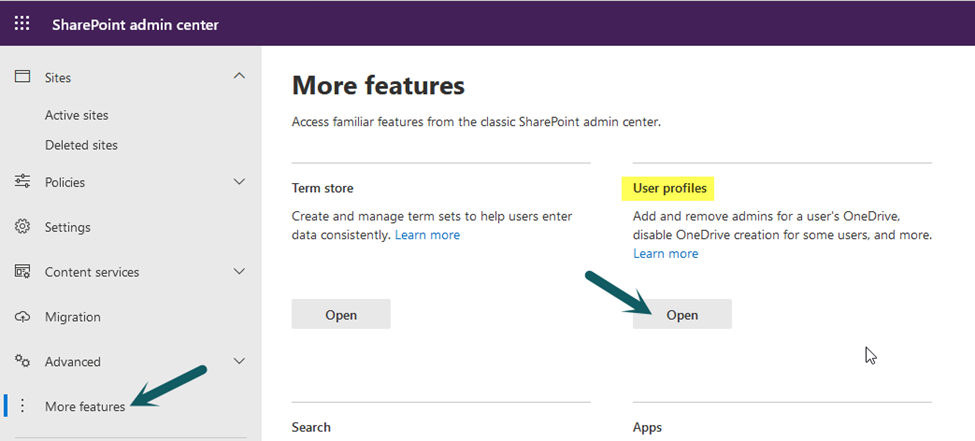
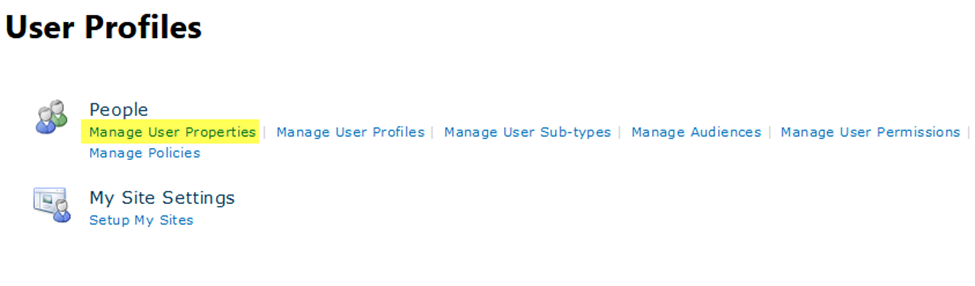
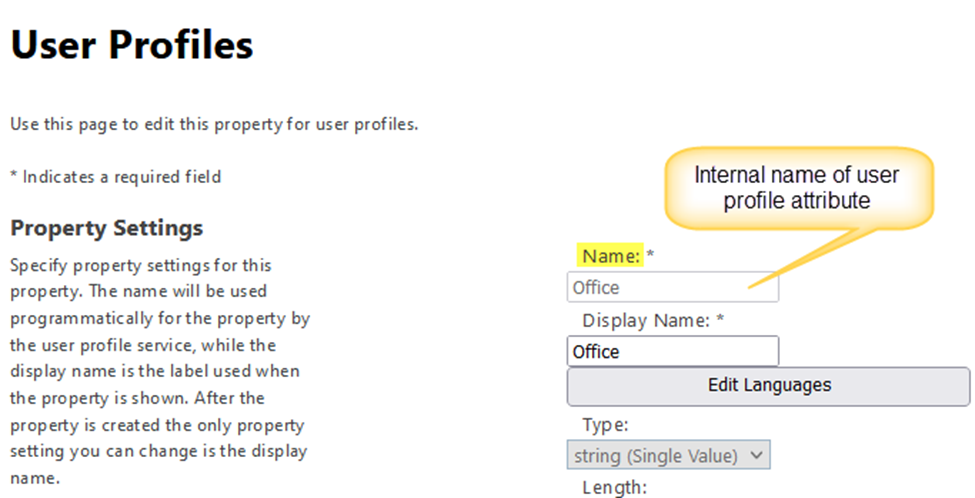
Go to ‘Admin Center’ -> SharePoint -> More features -> User profiles -> ‘Manage User Properties’ -> Edit required property and find the property name as shown below.
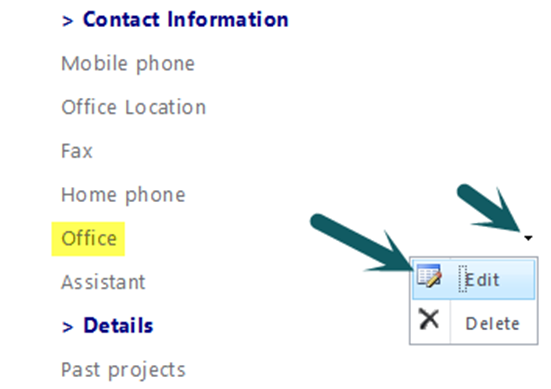
Copy internal name of user profile attribute
SharePoint On-premises:
In SharePoint On-premises, we can get the user information from user profile and Active Directory. Based on our requirement, we need to find the attribute name in User Profile or Active Directory.
User Profile:
To find the attribute name in User Profile, go to Central Administration -> Application Management -> Manage Service Applications -> Click User Profile Service Application -> Manage User Properties under people section in User Profile Service page -> Edit required property and find the property name as shown in above screenshots (same as SharePoint online).
Active Directory:
To find the user attribute names in Active Directory, please refer below link:
https://docs.microsoft.com/en-us/windows/win32/adschema/attributes-all
2. Configure auto-fill settings in Tickets list forms
1.Create “Requester Location” column in Tickets list.
Internal Name: RequesterLocation
Display Name: Requester Location
Type: Single line of text
2. Add “Requester Location” column created above to Tickets list forms
Navigate to the list -> List settings -> Crow Canyon NITRO Forms -> Drag and drop “Requester Location” column to the form in “Tickets” and “PortalTicket” forms
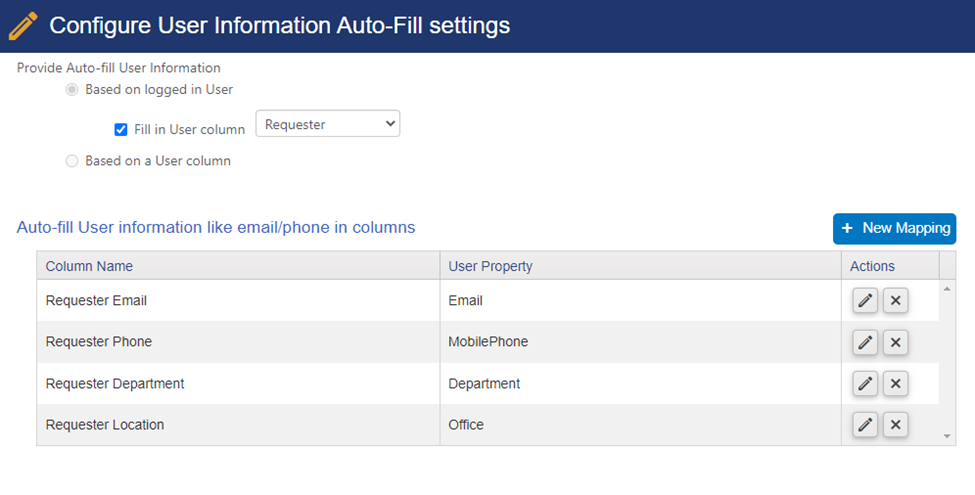
3. Next, configure auto fill settings in “Tickets” and “PortalTicket” forms as shown below:
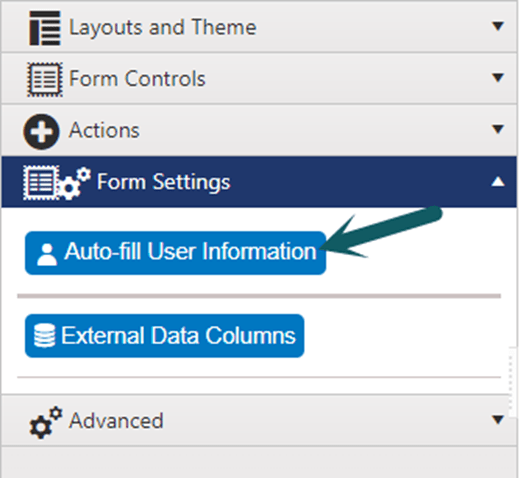
4. Configure auto-fill settings as shown below:
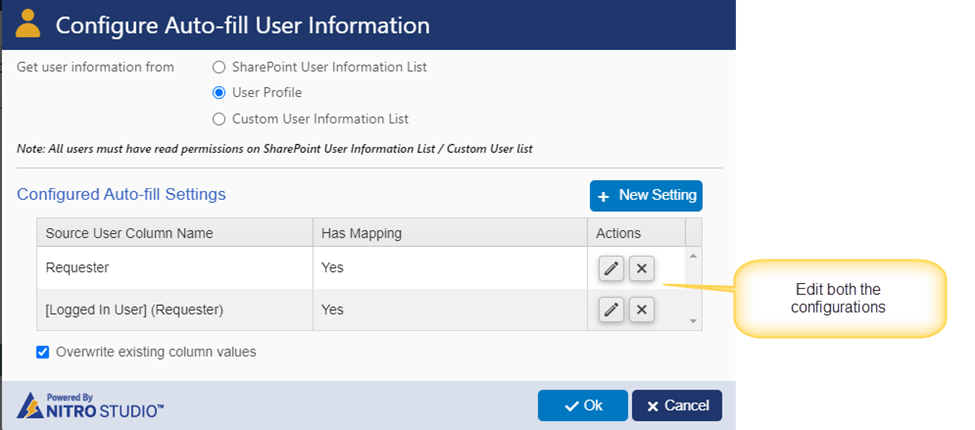
Edit “Requester” configurations and configure “Office” property as shown below.
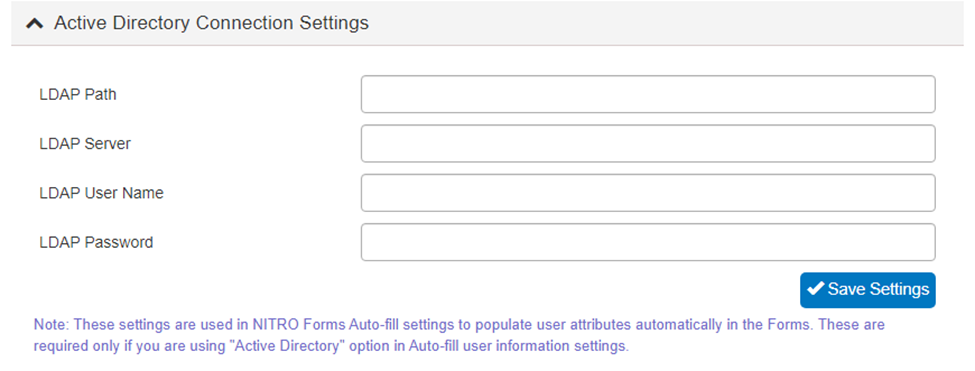
Note: For SharePoint On-premises, we will see Active Directory option in “Auto-fill User Information” settings. If we use “Active Directory” then configure the “Office” property as per the Active Directory attribute name and also we need to specify the “Active Directory Connection Settings” in Crow Canyon NITRO Site Settings.
Go to the Site -> Site Settings -> Crow Canyon NITRO Site Settings under Site Administration -> Expand Active Directory Connection Settings and specify the LDAP configuration settings.
LDAP Path: Specify the LDAP path
Ex: LDAP://ADServerIPAddress/CN=Partitions,CN=Configuration,DC=Domain,DC=Extension;
In above example:
ADServerIPAddress: IP Address of the Active Directory Server
DC=Domain (Domain of the Active Directory)
DC=Extension (extension of the Active Directory)
E.g. for crowcanyon.com, domain will be “crowcanyon” and extension will be “com”
LDAP Server: Specify IP address of the Active Directory server
LDAP User Name: Specify user login name for account having required permissions on the Active Directory
LDAP Password: Specify the password for user
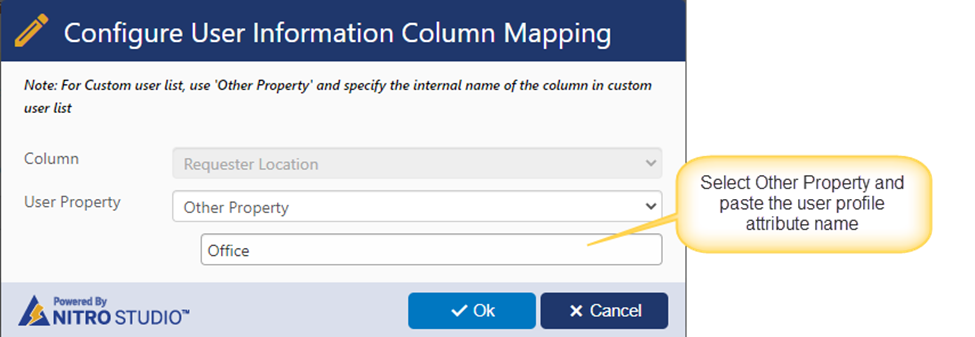
4. Configure column mapping.
Click ‘New Mapping’ button -> Choose the ‘column’ from drop-down for mappings -> Select ‘Other Property’ in ‘User Property’ column -> Paste the internal name of user profile attribute (copied in #1. above).
3. General Configurations
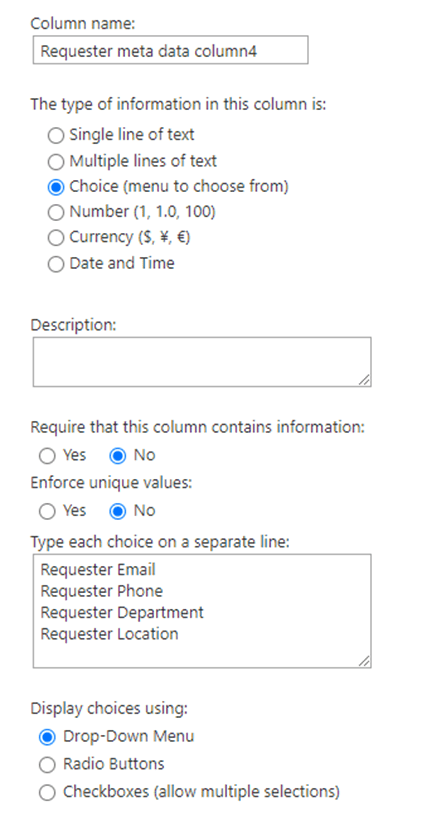
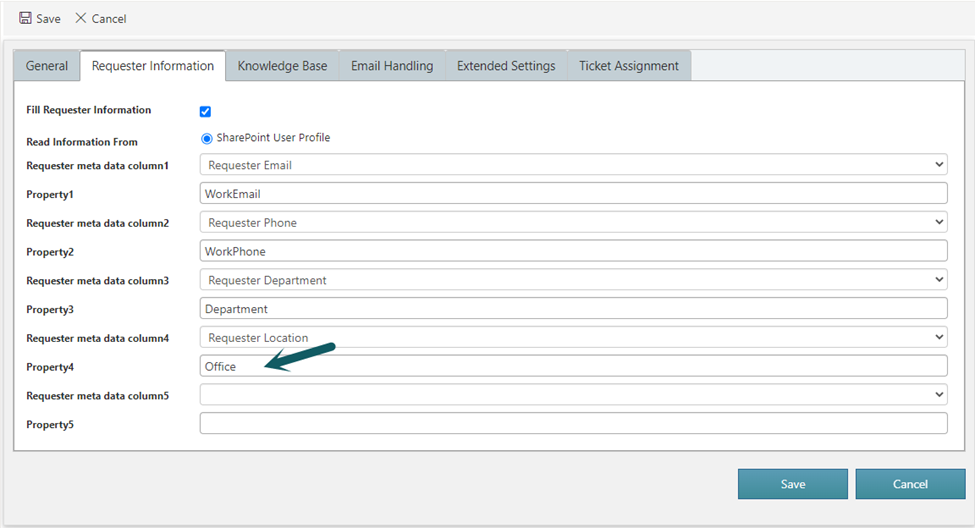
Configure the “Office” property in Configurations list item as shown below:
1. Add “Requester Location” choice value in “Requester Meta Data Column 4”
Go to site contents -> Configurations list -> List Settings -> Edit “Requester Meta Data Column 4” column and add “Requester Location” (i.e. column created in Tickets list) value in the choice values.
2. After adding the choice value, go to Configurations list -> Edit “Configuration – Service Request” item ->Requester Information tab and configure the “Office” property as shown below:
Note: For SharePoint On-premises, we will see Active Directory option in “Read Information From”. If we use “Active Directory” then configure the “Office” property as per the Active Directory attribute name and also specify the LDAP connection settings as described in #2 above in Configuration item.
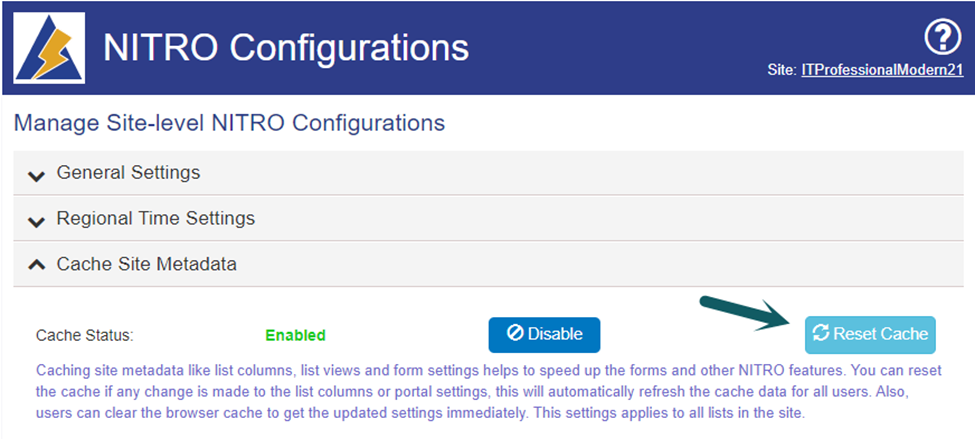
Note: If we are not able to see the new option added in “Requester meta data column4” then “Reset Cache” in Crow Canyon NITRO Site Settings.
Go to Site Settings -> Crow Canyon NITRO Site Settings -> Cache Site Metadata and click “Reset Cache”.