Applies to:
Crow Canyon NITRO activated sites in:
SharePoint Online and On-Premises 2013/2016/2019/SharePoint Server Subscription Edition
Description
This article covers following cases:
- How to change font-weight of web part header text for NITRO components?
- How to change background color of web part header for NITRO components?
- How to change the color of NITRO Form header background and the color of text appearing in the form header when a form is launched in a dialog?
1. How to change font-weight of web part header text for NITRO components?
For modern UI sites:
To change the font-weight of web part header, go to the site -> Site settings -> Crow Canyon Branding (Modern sites) -> Specify ‘Extended CSS’ as shown below -> Save settings.
Script:
.CCS-Webpart-Title{
font-weight: bold !important;
}

For classic UI sites:
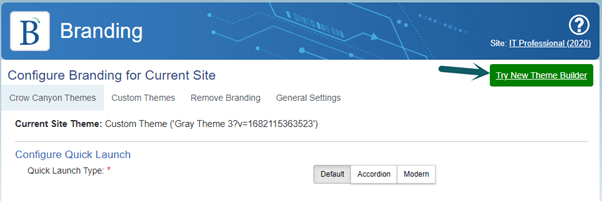
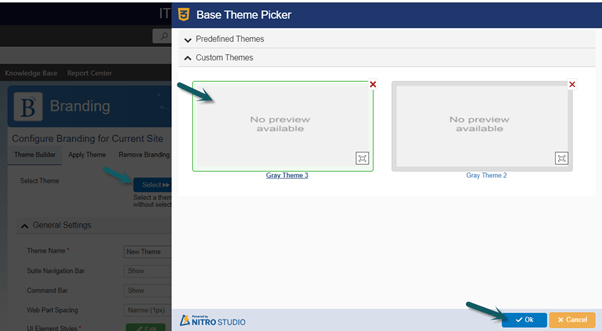
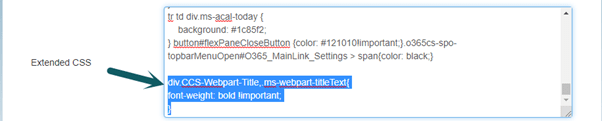
- To change the font-weight of web part header, go to the site -> Site settings -> Crow Canyon Branding (Classic sites) -> Click ‘Try New Theme Builder’ button -> Click ‘Select’ button -> Select the existing site theme from base theme picker -> Specify a new theme name if the base theme is selected from ‘Predefined Themes’ -> Specify below script in ‘Extended CSS’ below the existing script.
Script:
div.CCS-Webpart-Title,.ms-webpart-titleText{
font-weight: bold !important;
}
- Click ‘Save Theme’ button.
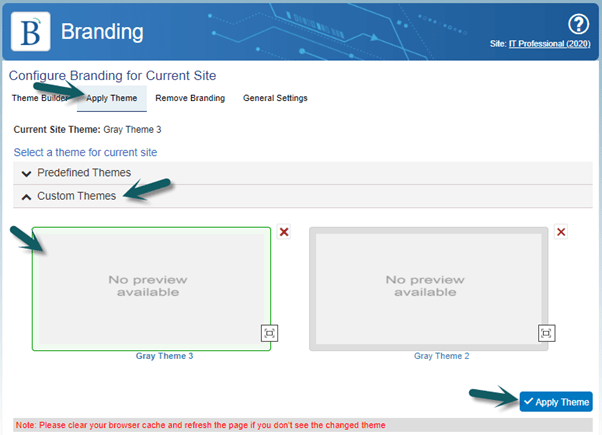
- Go to ‘Apply Theme’ tab -> Expand ‘Custom Themes’ section -> Select the theme that is created above -> Click ‘Apply Theme’ button.
Sample output:
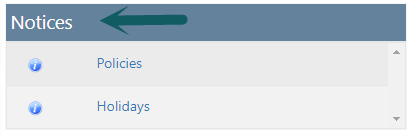
Before above ‘Extended CSS’ in branding.
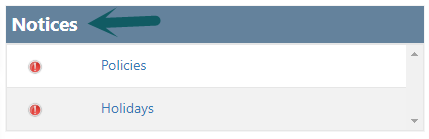
After above ‘Extended CSS’ in branding.
2. How to change background color of web part header for NITRO components?
For modern UI sites:
To change the header background color, go to the site -> Site settings -> Crow Canyon Branding (Modern sites) -> Specify ‘Extended CSS’ as shown below -> Save settings.
Script:
.CCS-Webpart-Title {
    background: #009900 !important;
    color: #fff !important;
}
Note: Change the color codes as required.

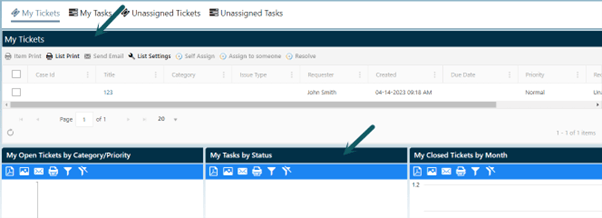
Sample output:

For classic UI sites:
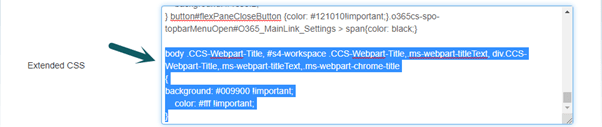
- To change the header background color, go to the site -> Site settings -> Crow Canyon Branding (Classic sites) -> Click ‘Try New Theme Builder’ button -> Click ‘Select’ button -> Select the existing site theme from base theme picker -> Specify a new theme name if the base theme is selected from ‘Predefined Themes’ -> Specify below script in ‘Extended CSS’ below the existing script.
Script:
body .CCS-Webpart-Title, #s4-workspace .CCS-Webpart-Title,.ms-webpart-titleText, div.CCS-Webpart-Title,.ms-webpart-titleText,.ms-webpart-chrome-title
{
background: #023047 !important;
    color: #fff !important;
}
Note: Change the color codes as required.
- Click ‘Save Theme’ button.
- Go to ‘Apply Theme’ tab -> Expand ‘Custom Themes’ section -> Select the theme that is created above -> Click ‘Apply Theme’ button.
Sample output:
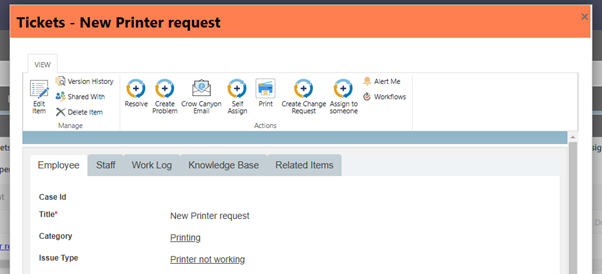
3. How to change the color of NITRO Form header background and the color of text appearing in form header when a form is launched in a dialog?
For modern UI sites:
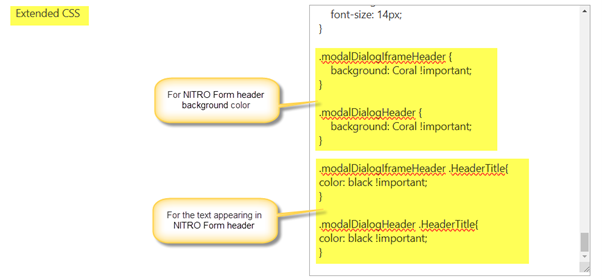
- To change the color of NITRO Form header background and header title, navigate to the site à Site Settings –> Site Administration –> Crow Canyon Branding (Modern Sites) –> General Settings –> Extended CSS –> Specify the CSS as shown below à Save settings.
Script:
.modalDialogIframeHeader {
    background: Coral !important;
}

.modalDialogHeader {
    background: Coral !important;
}

.modalDialogIframeHeader .HeaderTitle{
color: black !important;
}

.modalDialogHeader .HeaderTitle{
color: black !important;
}
Note:
Change the color names in the above script as needed.
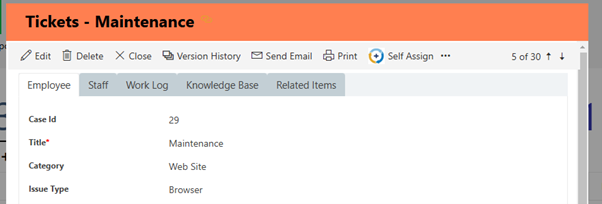
Sample output
For classic UI sites:
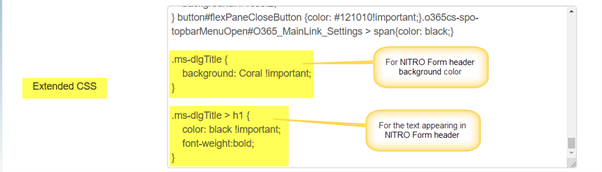
- To change the color of NITRO Form header background and header title, go to the site -> Site settings -> Crow Canyon Branding (Classic sites) -> Click ‘Try New Theme Builder’ button -> Click ‘Select’ button -> Select the existing site theme from base theme picker -> Specify a new theme name if the base theme is selected from ‘Predefined Themes’ -> Specify below script in ‘Extended CSS’ below the existing script.
Script:
.ms-dlgTitle {
background: Coral !important;
}
.ms-dlgTitle > h1 {
color: black !important;
}
Note:
Change the color names in the above script as needed.
2. Click ‘Save Theme’ button.
3. Go to ‘Apply Theme’ tab -> Expand ‘Custom Themes’ section -> Select the theme that is created above -> Click ‘Apply Theme’ button.
Sample output