Applies to: SharePoint online and On-premises (2013, 2016, 2019 and SE)
Description:
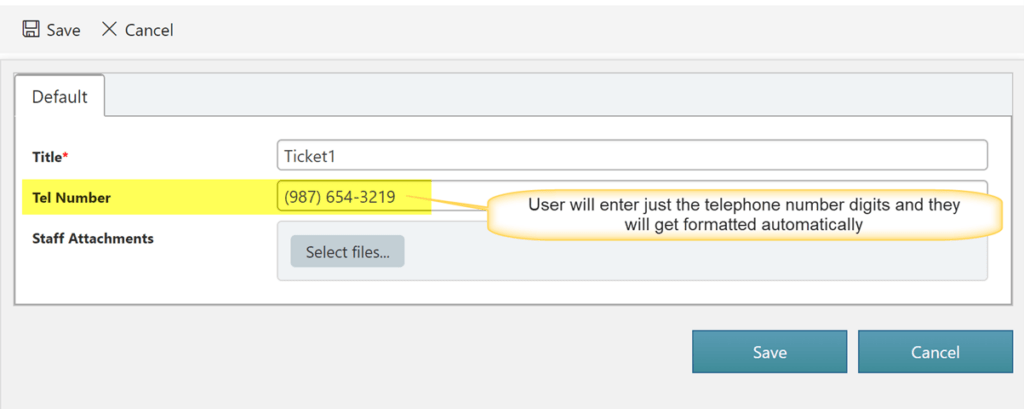
This article describes the steps to format the value entered in a column as phone number using form event actions.
Sample list schema and use case:
- Standard SharePoint list
- ‘TelNumber’: Single line of text column
- Format the value entered in this column as phone number.
- Configure validation such that only allow phone number in the column.
Steps to configure:
- Configure custom JavaScript as shown below:
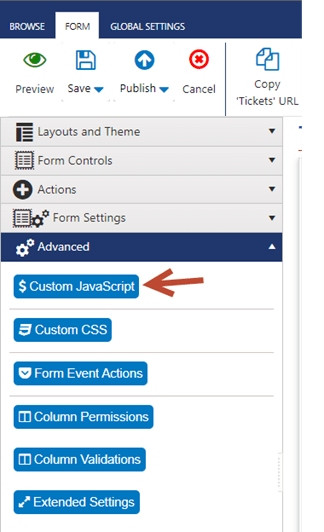
Expand ‘Advanced’ section from left hand panel -> Click ‘Custom JavaScript’ -> Specify the custom script as shown below.
This script will format the user entered digits to the required phone number format. This script can be changed as per any custom formatting required in the column.
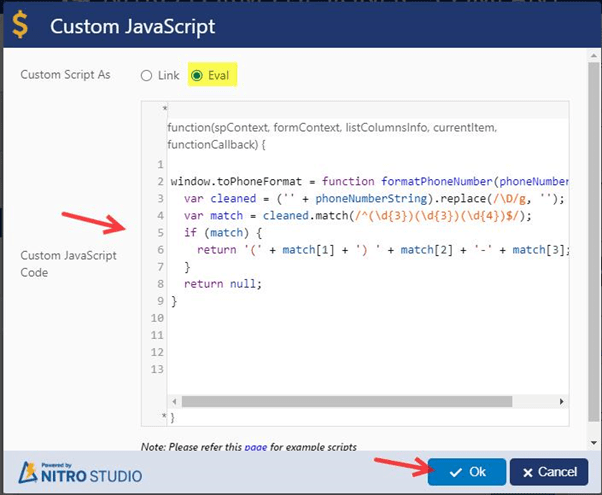
Script used above:
window.toPhoneFormat = function formatPhoneNumber(phoneNumberString) {
var cleaned = (” + phoneNumberString).replace(/\D/g, ”);
var match = cleaned.match(/^(\d{3})(\d{3})(\d{4})$/);
if (match) {
return ‘(‘ + match[1] + ‘) ‘ + match[2] + ‘-‘ + match[3];
}
return null;
}
- Configure form event actions as shown below to format the value specified in ‘TelNumber’ column.
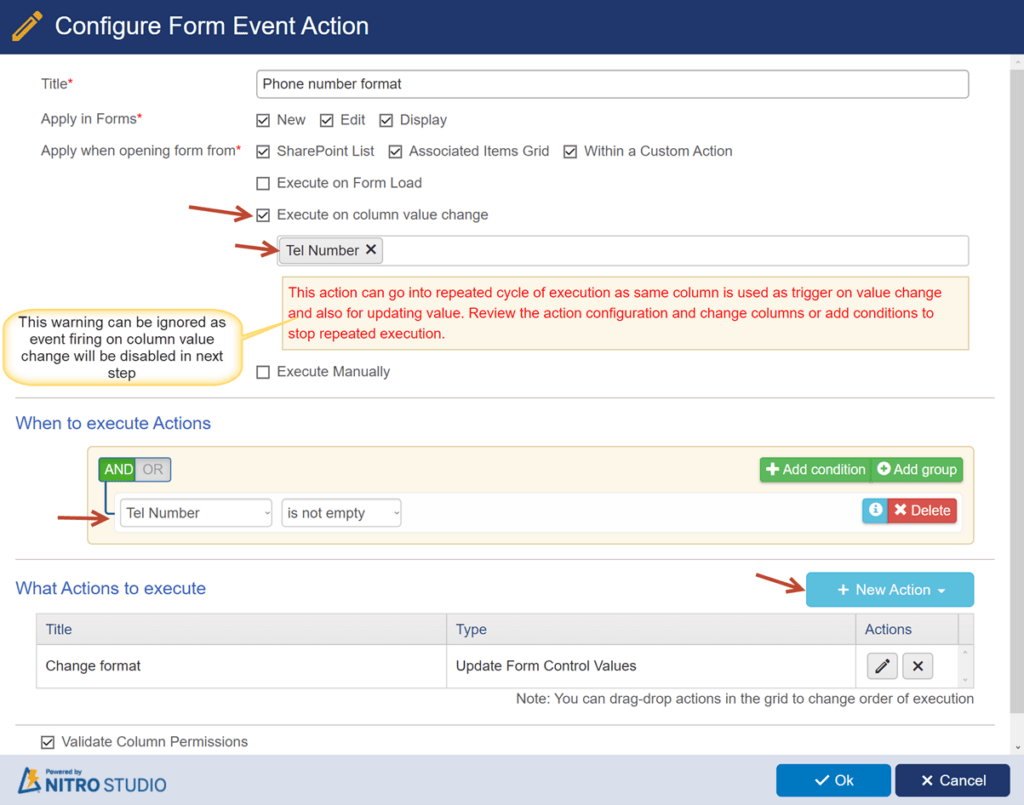
Configure ‘Update form control values’ action to update the ‘TelNumber’
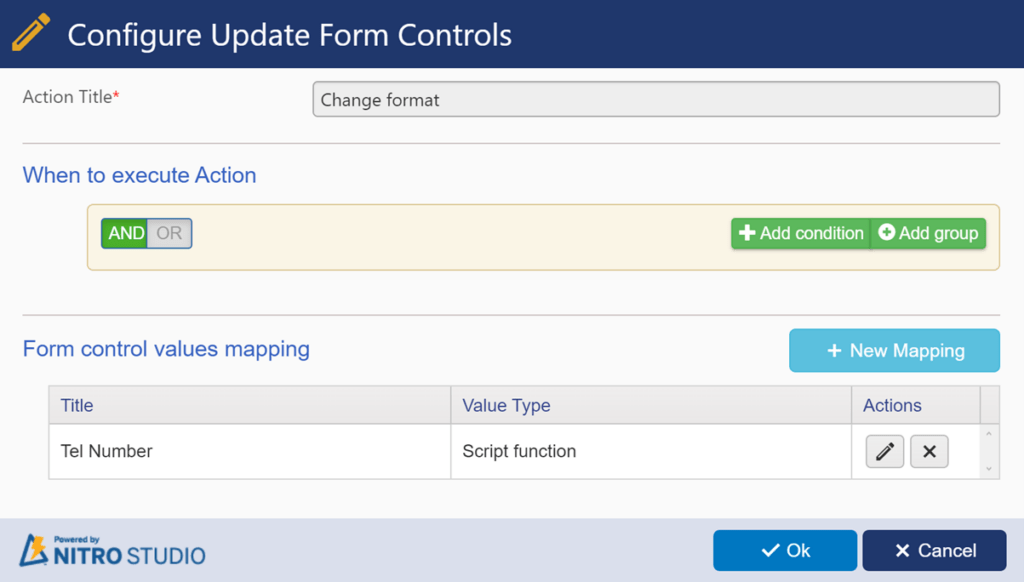
Column value mapping:
Note:
This action is triggered by the user entering the value in the column. And this action updates the formatted value in the same column. To avoid repeated execution of this action, select ‘Never fire’ option for the event. This will ensure that this action is triggered only when user modifies the column value, and not when it is modified by this action.
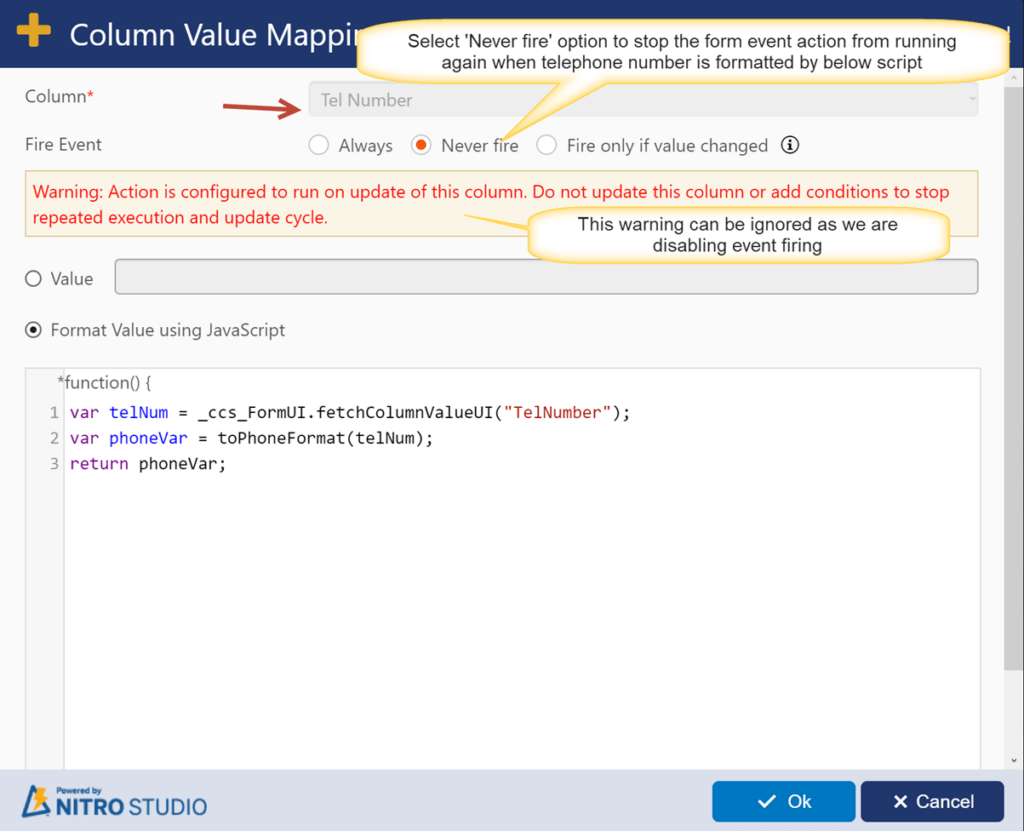
Script used above:
var telNum = _ccs_FormUI.fetchColumnValueUI(“TelNumber”);
var phoneVar = toPhoneFormat(telNum);
return phoneVar;
- Save the form event action.
- Configure validation on the ‘TelNumber’ column. Select the column à Expand ‘Validations’ section from column settings in right hand panel à Add the validation as shown below:
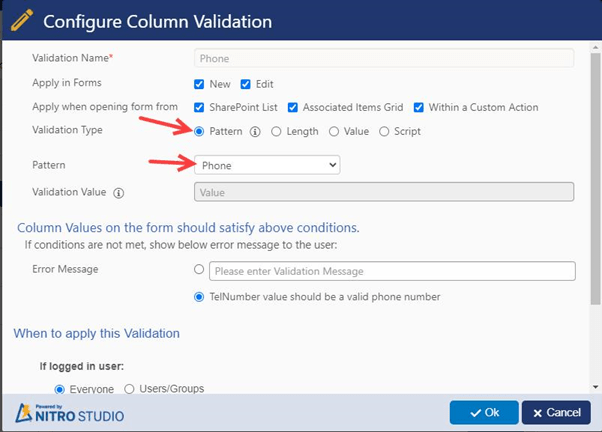
Apply column settings and publish the NITRO Forms.