Applies To:
SharePoint Online and SharePoint On-Premises
Description:
This article explains the steps to autofill the values of column(s) related to the logged-in user’s Manager and Manager Information in a NITRO Form.
For this purpose, Auto-fill User Information and a Form Event Action (FEA) can be configured in NITRO Forms using the steps mentioned below.
Detailed Steps:
1. Navigate to the desired list -> List Settings -> Crow Canyon NITRO Forms.
2. On the opened NITRO Forms designer page, add the required columns. For this example, the columns that are used are as follows:
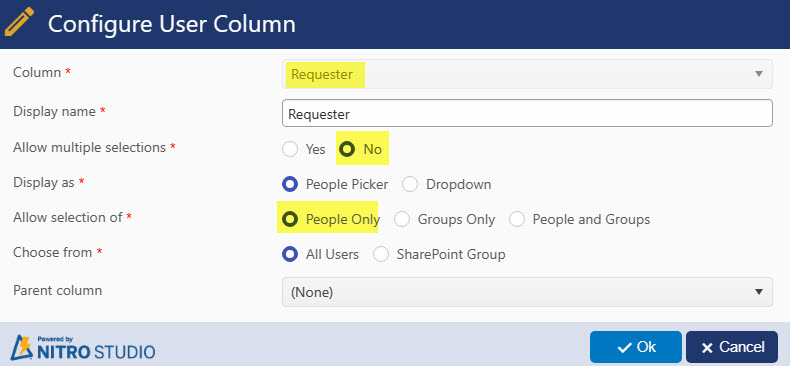
Requester: It is a ‘NITRO User’ column with configuration as shown below:
Requester Manager: It is a ‘NITRO User’ column with configuration same as the Requester column shown above.
Requester Manager Email: A ‘Single line of text’ column will be used to autofill the Manager’s email.
Requester Manager’s Manager: It is a ‘NITRO User’ column with a configuration similar to above two NITRO User columns.
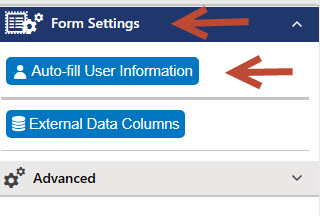
3. Once all the above-configured columns have been added to the designer page of the form, navigate to the ‘Form Settings’ section at the left of the designer page, expand this section, and select ‘Auto-fill User Information’ as shown below:
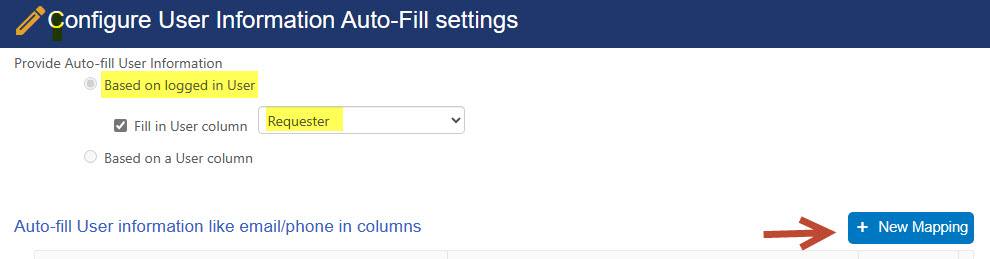
4. On the opened page, select the ‘User Profile’ option for ‘Get user information from’ section and select ‘New Setting’ as shown below:

5. In the opened ‘New Setting’ window, configure the settings to autofill the ‘Requester’ column based on the value from the logged-in user as shown below:
6. On selecting ‘New Mapping’ button from the above screenshot, select the column as ‘Requester Manager’ and ‘User Property’ as ‘Other Property’ and type the field as ‘Manager’ as shown below:
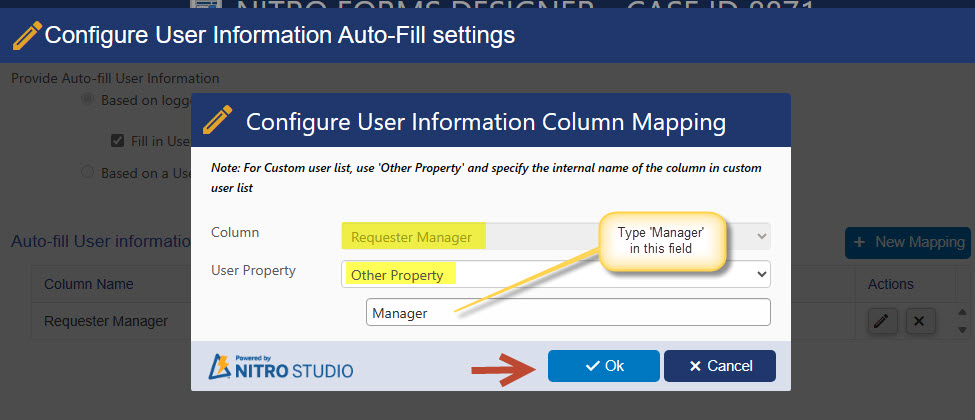
The purpose of this configuration is to autofill the name of the requester’s manager in the column ‘Requester Manager’ based on the current logged-in user.
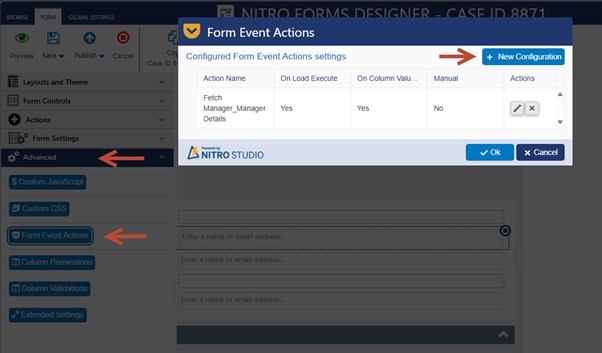
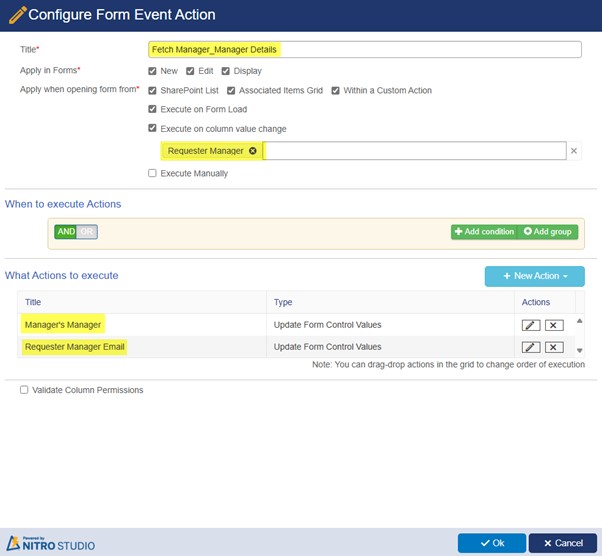
7. Once the auto-fill user settings have been configured, navigate to the left of the designer page, and expand the ‘Advanced’ section -> ‘Form Event Actions’ -> ‘New Configuration’, and configure it as shown below:
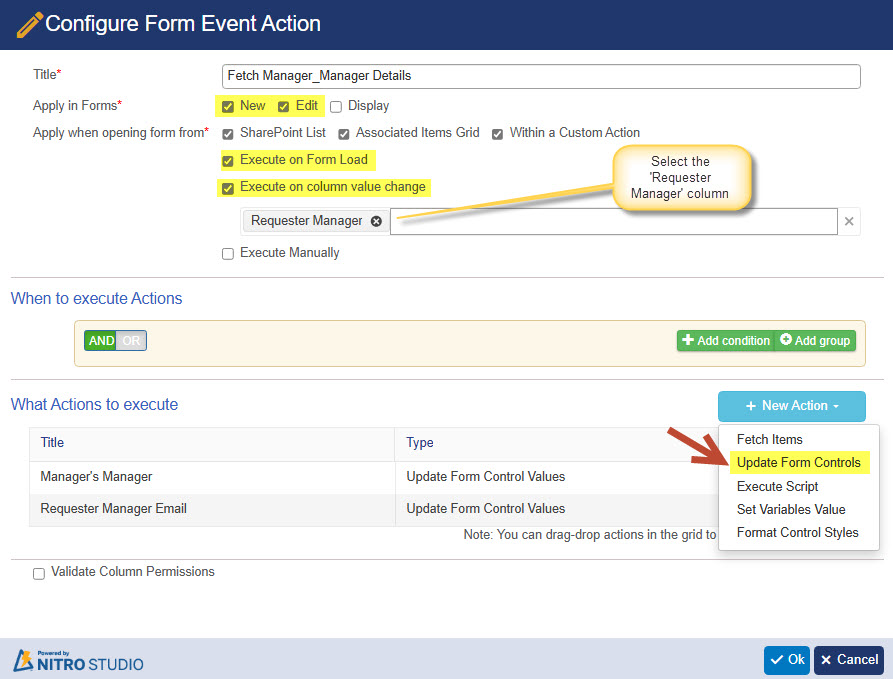
8. On selecting ‘Update Form Controls’, configure the column mapping for ‘Requester Manager’s Manager’ column by selecting ‘New Mapping’ as shown below:
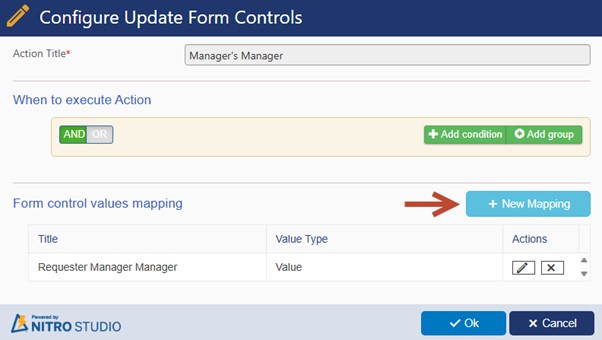
9. The column mapping can be configured as shown below:
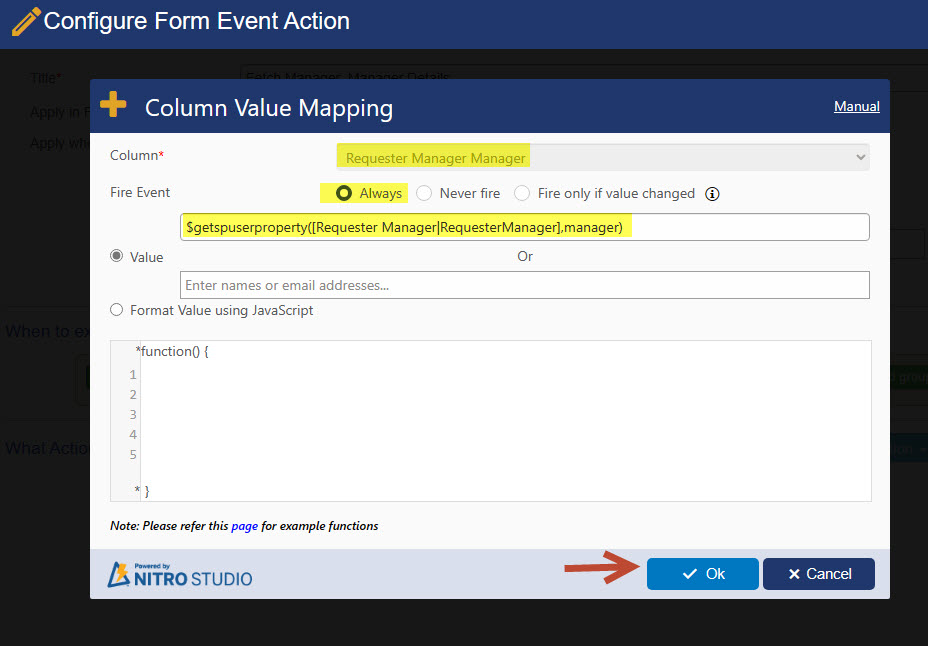
In the above screenshot, the function used is ‘$getspuserproperty’ and the placeholder is ‘Requester Manager’ column as shown below:
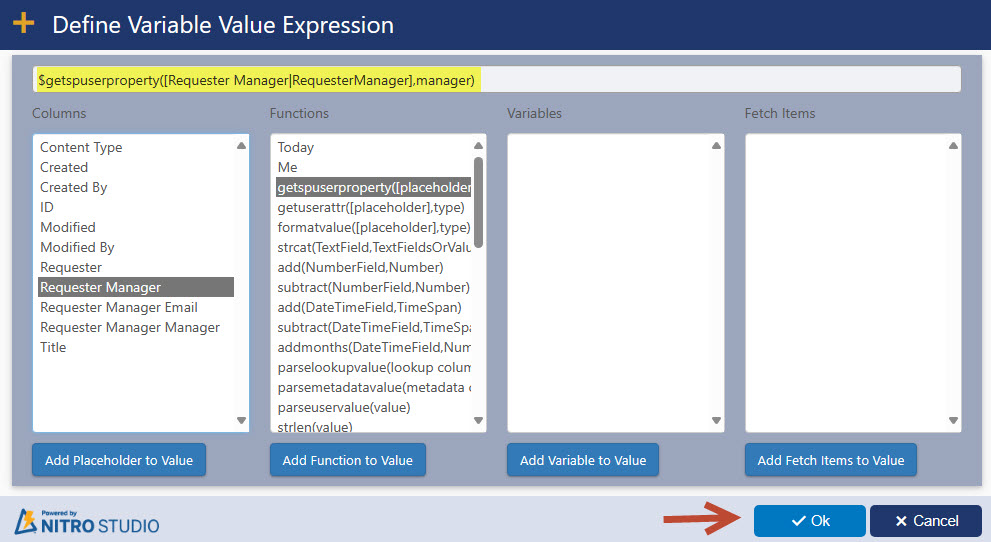
The full syntax used above is:
$getspuserproperty([Requester Manager|RequesterManager],manager)
This configuration helps in auto populating the value for the ‘Requester Manager’s Manager’ column as soon as the value in the ‘Requester Manager’ column is populated (using the previously configured autofill settings).
Note: More information about the ‘$getspuserproperty’ can be found from this article.
10. Similarly, to auto fill the ‘Requester Manager Email’ column, we can configure another column mapping in the same Form Event Action by selecting New Action -> Update Form Controls -> Provide a title for the action -> New Mapping as shown below:
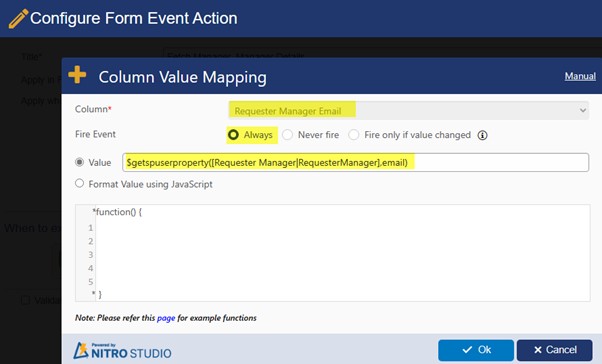
The full syntax is ‘$getspuserproperty([Requester Manager|RequesterManager],email)’.
The configured Form Event Action with all the above mentioned settings will be as shown below:
11. Once all the above configuration is saved, publish the NITRO Forms.
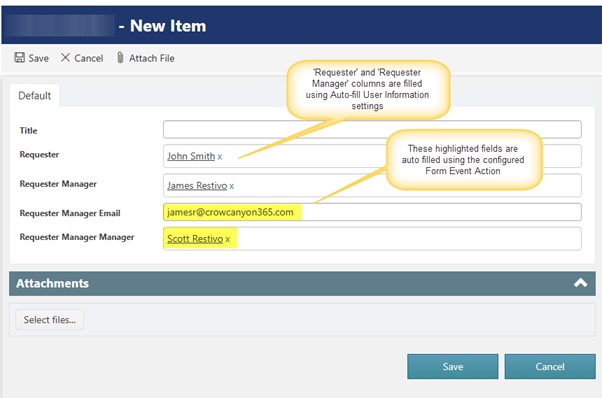
A sample output from a ‘New’ NITRO Form is as shown below: