Applies to:
SharePoint Online and SharePoint On-Premises
Description
This article outlines the steps to configure the following buttons using ‘Submit Action’ button with custom JavaScript in the NITRO Forms. The functionality of these buttons is to save the current item, and open the previous/next item form in a popup dialog, that is available in the Crow Canyon List View.
- ‘Next item edit form’: to open edit form for the next item available in Crow Canyon list view.
- ‘Previous item edit form’: to open edit form for the previous item available in Crow Canyon list view.
- ‘Next item display form’: to open display form for the next item available in Crow Canyon list view.
- ‘Previous item display form’: to open display form for the previous item available in Crow Canyon list view.
Note: ‘Launch Form in a Dialog’ setting should be enabled in the Crow Canyon List View configurations to open NITRO Forms in a dialog.
Detailed steps
‘Next item edit form’: Configure Submit Action button to open edit form for the next item available in Crow Canyon list view.
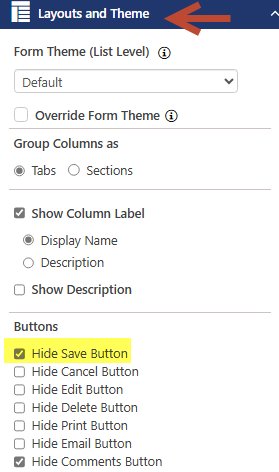
- Navigate to NITRO Forms designer for the list -> Expand ‘Layouts and Theme’ section from the left-hand panel. Under the ‘Buttons’ section, select ‘Hide Save Button’ option to hide default ‘Save’ button from the NITRO form.
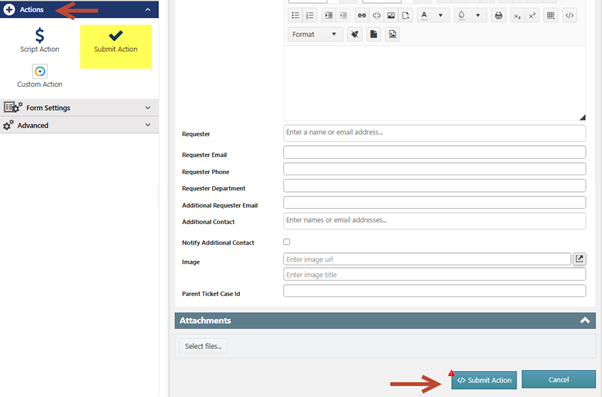
2. Expand ‘Actions’ section from the left-hand panel -> Drag and drop a ‘Submit Action’ button to the desired position on the form designer, as shown below:
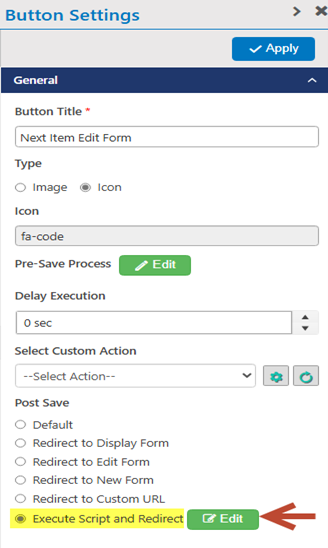
3. Select the dragged Submit Action button -> Configure button settings from the right-hand panel. Button title: “Next Item Edit Form”.
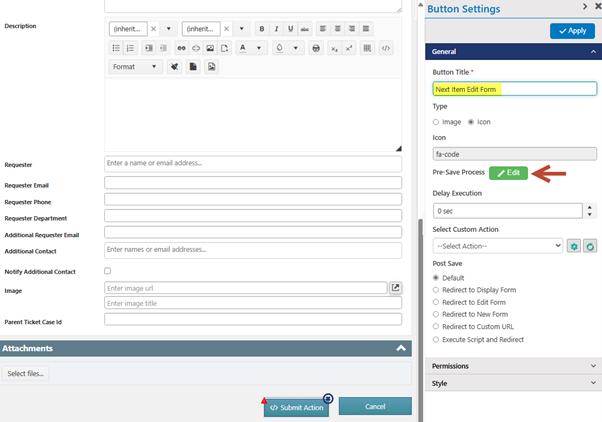
4. Click ‘Edit’ button and specify the ‘Pre-Save Process’ script à Click Ok to save the settings.
Script:
functionCallback(); 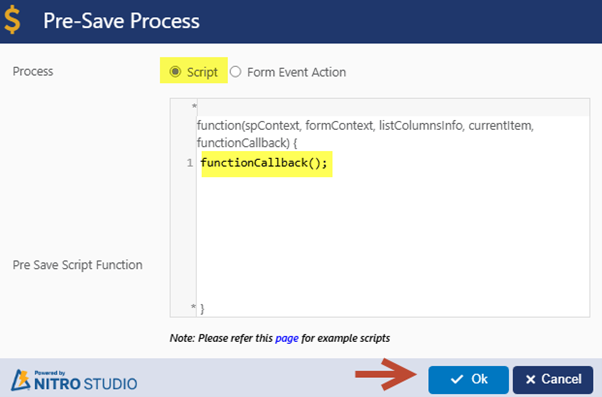
5. Under ‘Post Save’, select ‘Execute Script and Redirect’ option for the button -> Click ‘Edit’ button to specify the custom JavaScript, as shown below:
Script:
functionCallback(false, {"URLType": "nextedit"});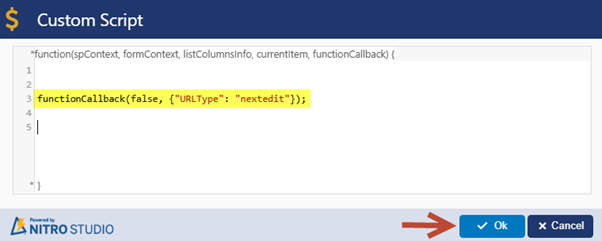
6. Click ‘Apply’ button and save the NITRO Forms.
‘Next item display form’: Configure Submit Action button to open display form for the next item available in Crow Canyon list view.
- Drag and drop second ‘Submit Action’ button onto the NITRO forms designer -> Configure button settings from the right-hand panel. Button title: “Next Item Display Form”.
- Click ‘Edit’ button and specify the ‘Pre-Save Process’ script -> Click Ok to save the settings.
Script:
functionCallback(); 
3. In the ‘Post Save’ section, select ‘Execute Script and Redirect’ option -> Click ‘Edit,’ and enter the following script:
Script:
functionCallback(false, {"URLType": "nextdisplay"});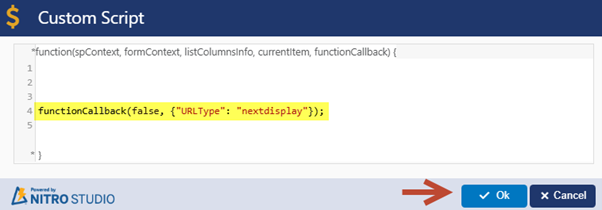
4. Click ‘Apply’ button and save the NITRO Forms.
‘Previous item edit form’: Configure Submit Action button to open edit form for the previous item available in Crow Canyon list view.
- Drag and drop third ‘Submit Action’ button onto the NITRO forms designer -> Configure button settings from the right-hand panel. Button title: “Previous Item Edit Form”.
- Click ‘Edit’ button and specify the ‘Pre-Save Process’ script -> Click Ok to save the settings.
Script:
functionCallback(); 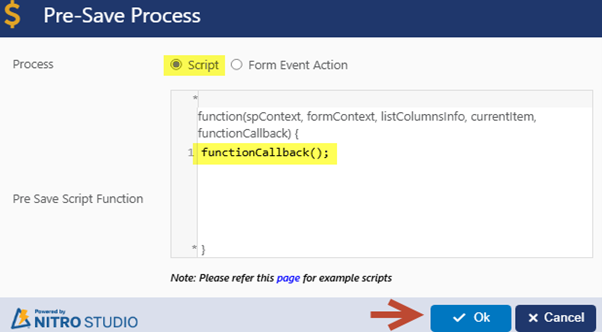
3. In the ‘Post Save’ section, select ‘Execute Script and Redirect’ option -> Click ‘Edit,’ and enter the following script:
Script:
functionCallback(false, {"URLType": "previous"});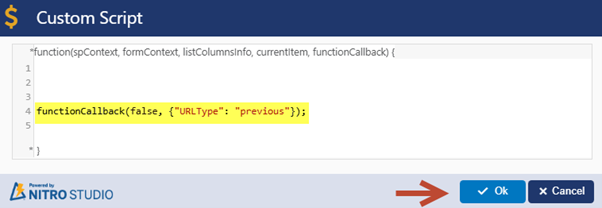
4. Click ‘Apply’ button and save the NITRO Forms.
Previous item display form: Configure Submit Action button to open display form for the previous item available in Crow Canyon list view:
- Drag and drop forth ‘Submit Action’ button onto the NITRO forms designer -> Configure button settings from the right-hand panel. Button title: “Previous Item Display Form”.
- Click ‘Edit’ button and specify the ‘Pre-Save Process’ script -> Click Ok to save the settings.
Script:
functionCallback(); 
5. In the ‘Post Save’ section, select ‘Execute Script and Redirect’ option -> Click ‘Edit,’ and enter the following script:
Script:
functionCallback(false, {"URLType": "previousdisplay"});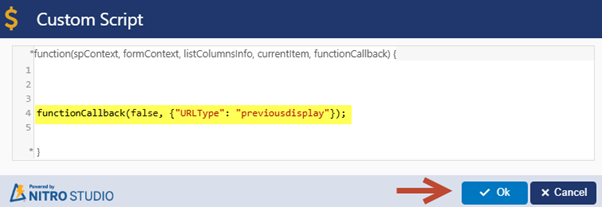
6. Click Ok -> Click ‘Apply’ -> Publish the NITRO Forms.
After completing all the steps, the configured buttons will appear as shown below:

Additional steps:
- Configure a Crow Canyon List View for the above list by referring to the application manual.
- Under the ‘Page Actions’ tab in the Crow Canyon List View, enable ‘Launch Form in a Dialog’ and save the settings.
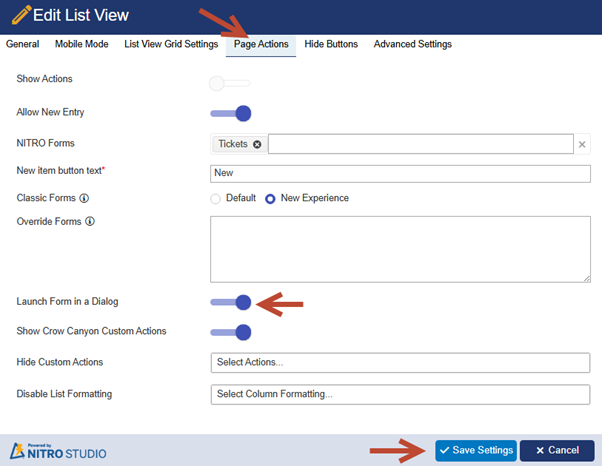
3. Add this list view webpart on a site page.