Applies to:
Crow Canyon NITRO activated sites in:
SharePoint Online – GCC Environment
Description
This article lists the fixes for common issues in NITRO Studio GCC High installation.
Symptom 1
On executing a NITRO Custom Action, an error message as stated below is received:
‘One or more NITRO script files are not up to date. Please clear browser cache files, reopen the site, and try again.’
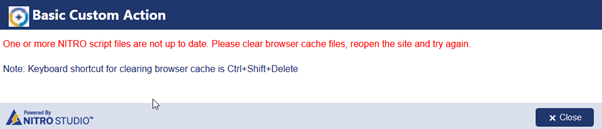
The issue persists even after clearing the browser’s cache.
Cause
One of the CDN script files has not been updated properly when applied using NITRO Studio tool.
Resolution
Upload the required file manually into CDN and purge. Following are the steps to deploy specific file(s) from the CDN package in to Azure portal CDN web application manually.
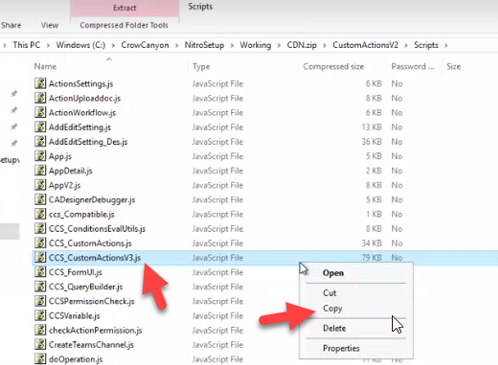
In this example, we are updating “CCS_CustomActionsV3.js” script file manually.
Detailed steps:
- Navigate to the path containing NITRO Studio setup file in the Azure Virtual Machine (generally it is ‘C:\CrowCanyon\NITROSetup’).
2. Open ‘C:\CrowCanyon\NITROSetup\Working\CDN.zip\CustomActionsV2\Script’ folder. Copy ‘CSS_CustomActionsV3.js’ file to a temporary location.
3. Navigate to Azure portal -> App Services -> Open the CDN web application that was created for ‘NITRO Apps (CDN)’ as a part of the original setup and copy the URL as shown below:
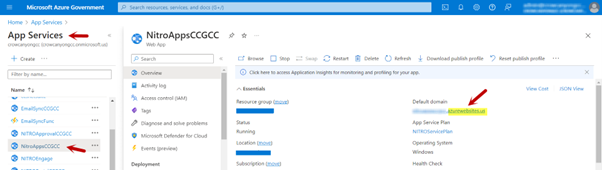
4. Edit the URL copied from #3 above:
- Add ‘.scm’ before ‘.azurewebsites’
- For example, if the copied URL in #3 is https://nitroappsoct25.azurewebsites.us then the modified URL will be https://nitroappsoct25.scm.azurewebsites.us
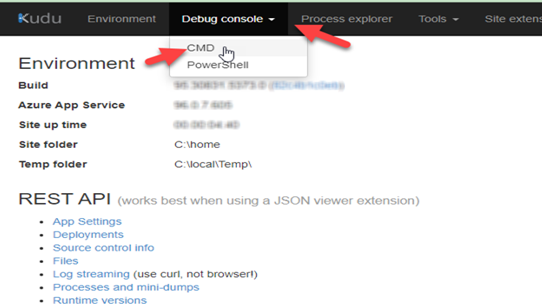
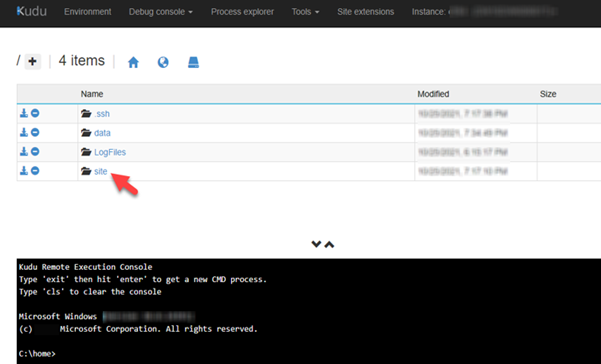
5. Open the modified URL in Google Chrome browser. This will open the environment details page.
6. From the ‘Debug console’ menu at the top, select ‘CMD’ as shown below:
7. A page displaying a grid will open on selecting the ‘CMD’ option. On that page, select ‘Site’ as shown below:
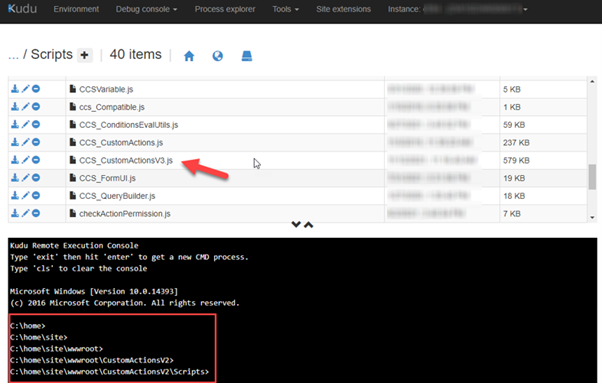
8. Navigate to ‘site/wwwroot/CustomActionsV2/Scripts’ location. In this location, all the script files will be visible. Among these script files, there will be ‘CCS_CustomActionsV3.js’ that needs to be replaced by the file copied in #2.
9. Drag and drop “CCS_CustomActionsV3.js” file saved into temporary location in #2 into the grid as shown below:
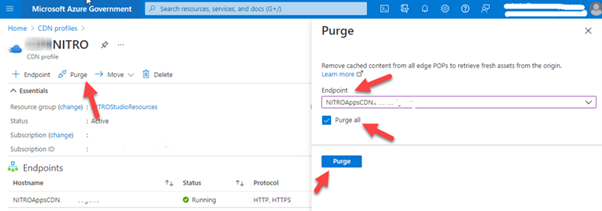
10. Open the Azure portal from the browser -> Open “CDN Profiles” -> Open the Crow Canyon CDN profile created as part of the original setup -> Click “Purge” button in the ribbon -> Select CDN end point created as part of the original setup in “Endpoint” dropdown -> Check “Purge all” checkbox -> Click “Purge” button. Wait until this step is completed successfully.
11. Once the purge is completed, clear the browser’s cache -> Restart the browser -> Open the site and try executing the NITRO Custom Actions.