Applies to: Crow Canyon NITRO activated sites in:
SharePoint Online and On-Premises 2013/2016/2019/SharePoint Server Subscription Edition
Description
In IT helpdesk application, parent-child relationship in tickets is a way to link multiple related tickets together in a hierarchical structure. This means one “parent” ticket represents a main issue or request, and several “child” tickets are created to address specific sub-issues, tasks, or related inquiries that contribute to the resolution of the parent.
This article describes steps to implement ‘Parent-child’ relationship between the items in Tickets list. Child Ticket will be closed when it is merged into the parent ticket.
List schema
| Display Name | Internal Name | Column Type |
| ID | ID | Default ID column in the SharePoint list |
| Parent Ticket | ParentTicket | NITRO Lookup Column |
| Child Ticket | ChildTicket | NITRO Associated Items Column |
| Is Parent Ticket | IsParentTicket | Yes/No column with default value as ‘No’ |
| Work Log | WorkLog | NITRO Discussion Column |
The name of all these columns can be changed as per the requirement.
Detailed steps
- Configure above columns in the Tickets list
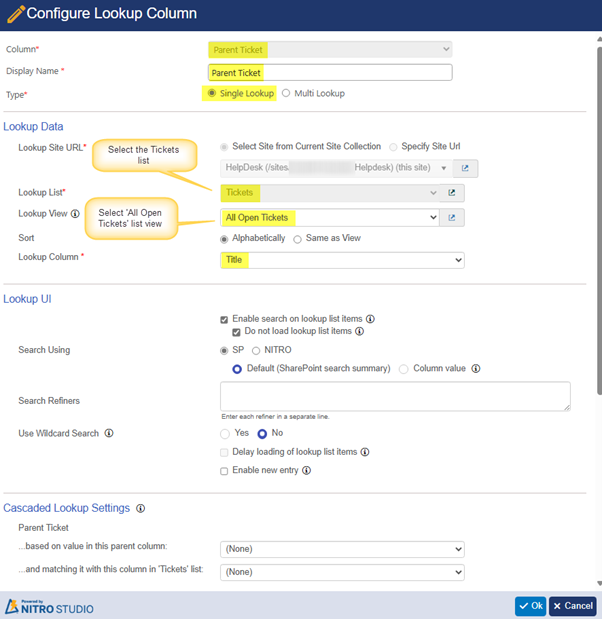
- Navigate to Crow Canyon NITRO Forms for the Tickets list -> Click ‘Create Column’ from the ‘FORM’ ribbon -> Click ‘NITRO Lookup Column’ and configure the ‘Parent Ticket’ column as shown below:
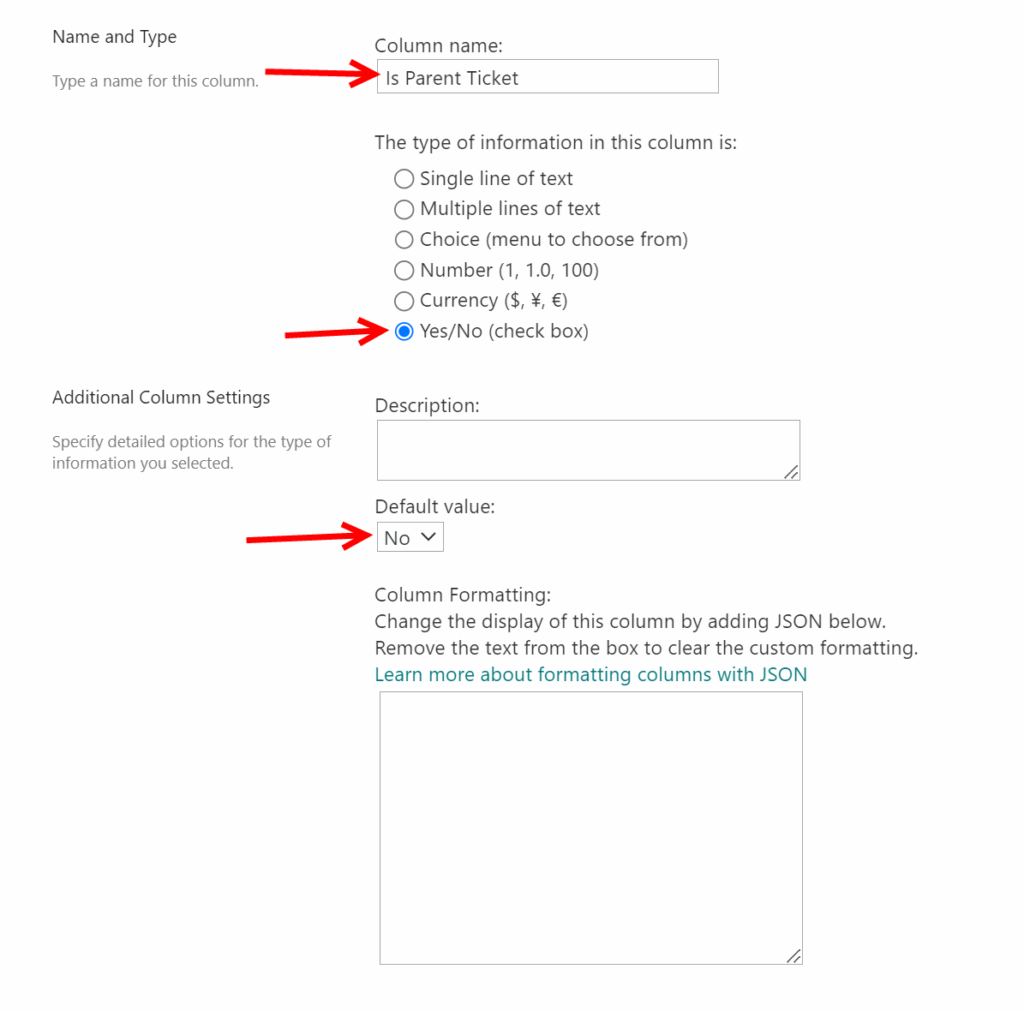
2. Create a ‘Yes/No’ type column and name it as ‘Is Parent Ticket’ with ‘No’ as default value.
Note: It is not required to add this column to the NITRO Forms as it will be used only for the condition(s) mentioned in subsequent steps below.
3. Create a ‘NITRO Associated Items Column’ titled ‘Child Tickets’ and configure it as shown below:
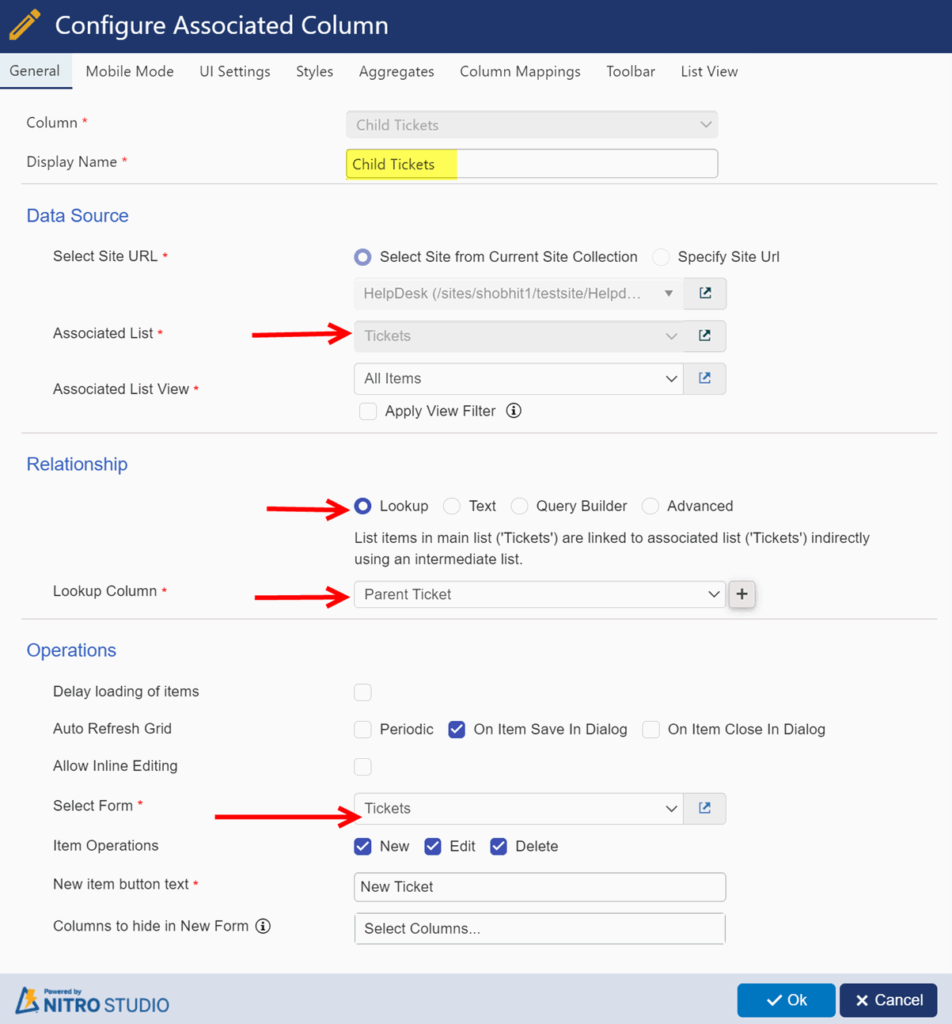
Click ‘Ok’ to save the configuration and add this column onto the NITRO Form.
4. Configure permissions for the ‘Child Tickets’ column such that it remains hidden for the child item(s) and is visible for the parent items.
To configure permissions, select ‘Child Tickets’ column -> Expand ‘Permissions’ section from column settings panel -> Click ‘Add’ and configure settings as shown below:
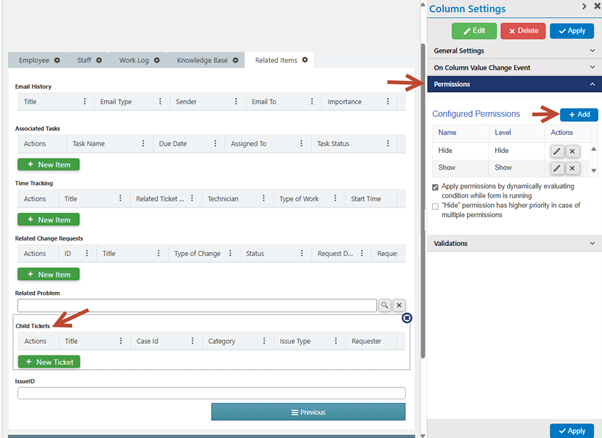
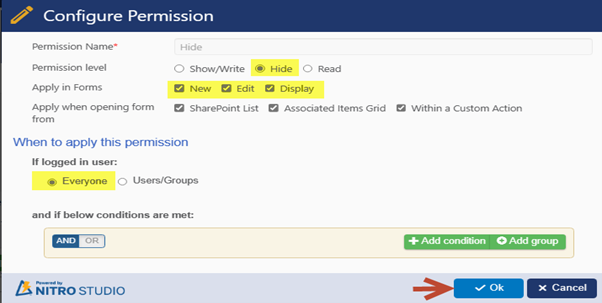
Configure ‘Hide’ permission for ‘Everyone’.
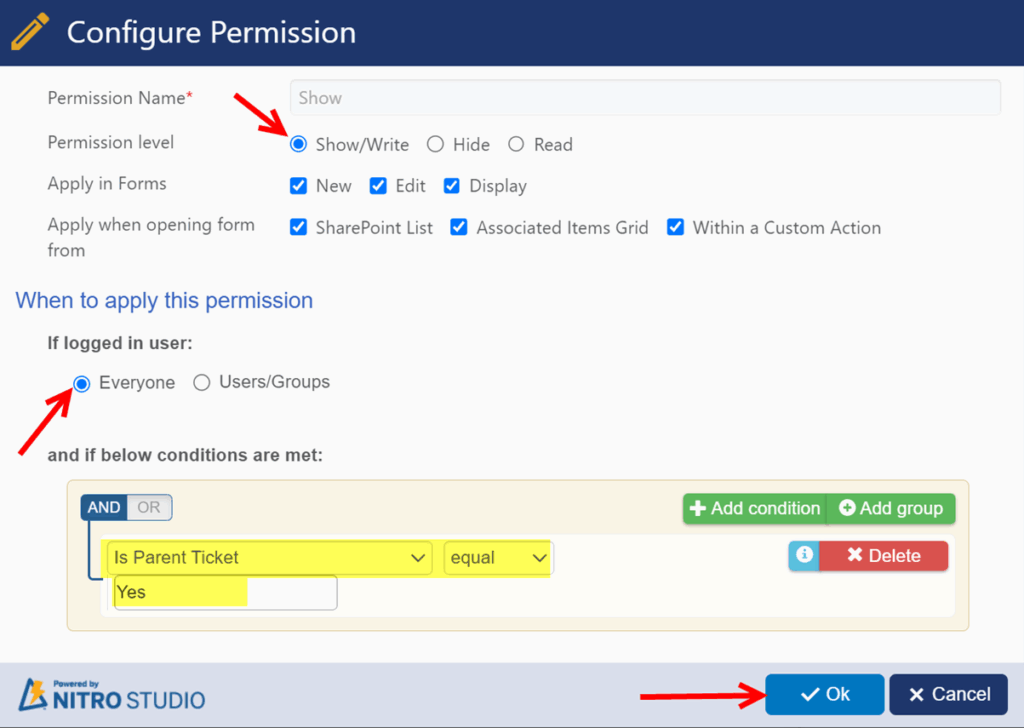
Configure ‘Show/Write’ permission for everyone. Add a condition to show this column only when the value of ‘Is Parent Ticket’ column is equal to ‘Yes’.
5. Check ‘Apply permissions by dynamically evaluating condition while the form is running’ setting -> Click ‘Apply’.
6. Publish the NITRO Forms.
- Configure a Custom Action for establishing ‘Parent – Child’ relationship between the Tickets:
- Navigate to Tickets list -> Click ‘Custom Actions’ from the list ribbon -> Click ‘New Custom Action’ -> Select ‘Tickets’ list -> Select ‘Designer’ experience -> Click ‘Ok’.
Flowchart of the custom action:
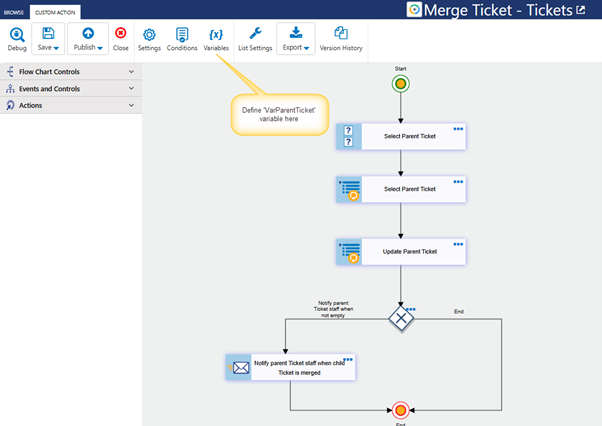
2. Define an empty variable: Click ‘Variables’ from the ‘CUSTOM ACTION’ ribbon -> Click ‘New Variable’.
Variable name -> Value
‘ParentCaseId’ -> (‘Default Value’ is empty)

3. ‘Parent Ticket Search’ Query List (Search) Action: Expand ‘Actions’ section from the left-hand panel -> Drag and drop ‘Query List (Search)’ action onto the canvas and configure as shown below:
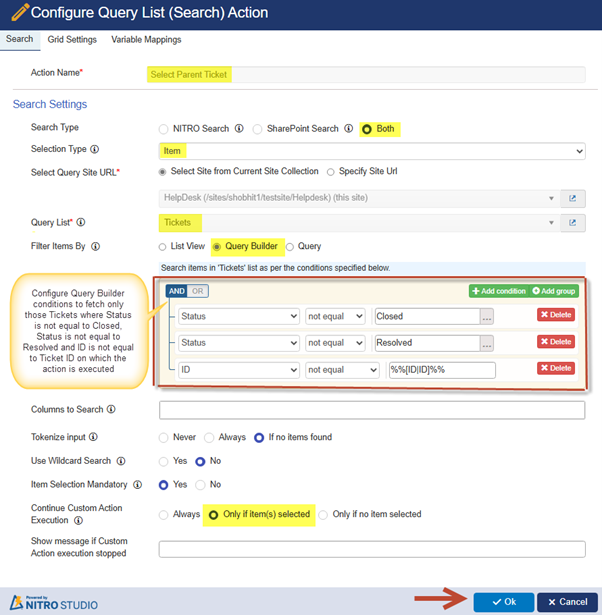
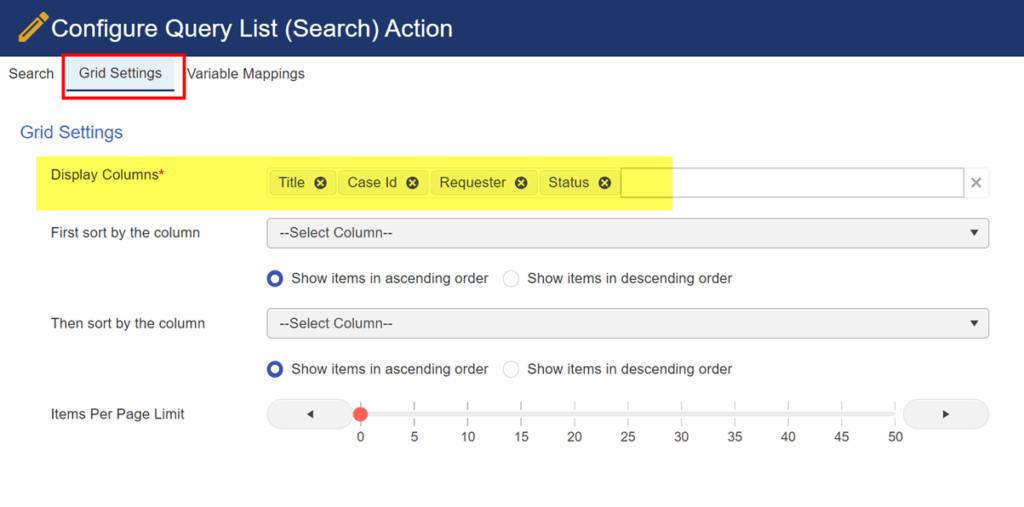
The ‘Grid Settings’ for this action can be configured as shown below:
The ‘Variable Mappings’ for this action can be configured as shown below:
Mapping: VarParentTicket -> Select Parent Ticket##[ID|ID]

4. ‘Select Parent Ticket’ update item action: Drag and drop an ‘Update List Item’ action onto the canvas and configure as shown below:
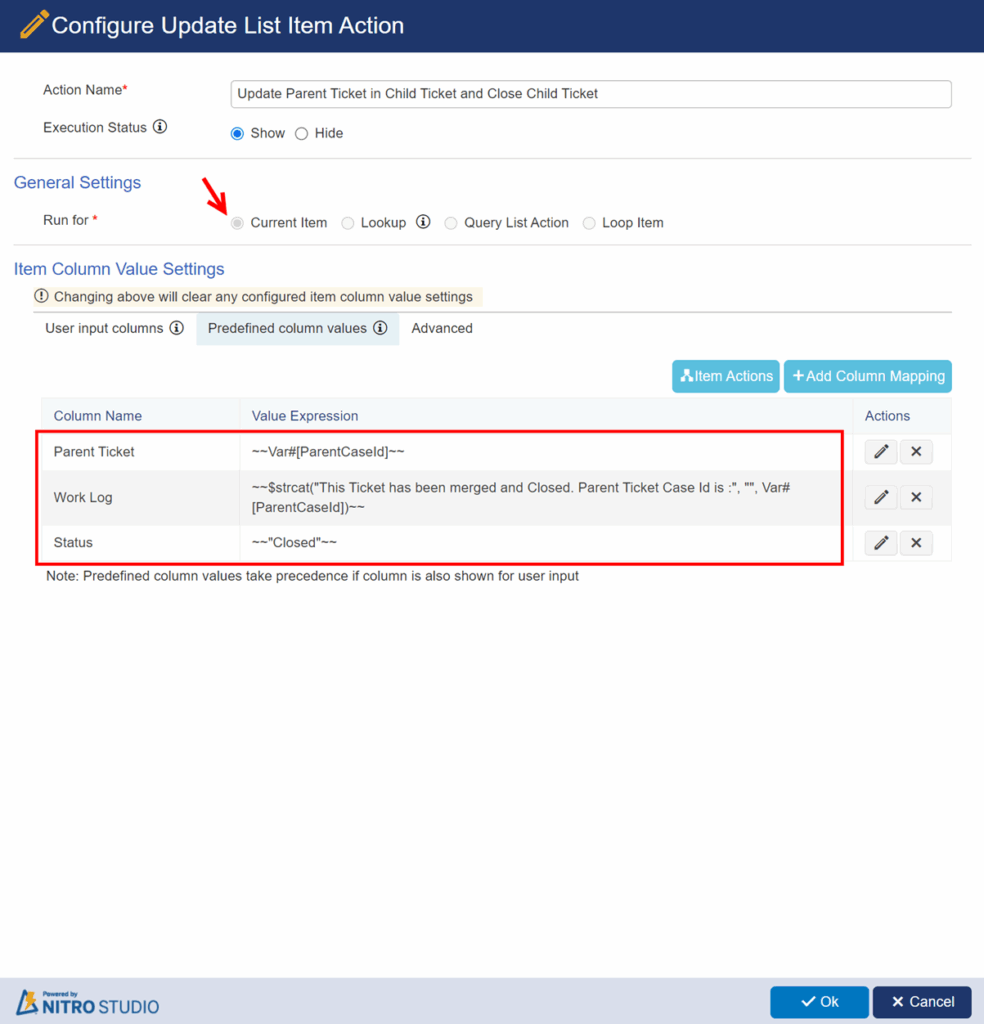
The above shown columns are mapped using expression builder as shown below:
‘Parent Ticket’ column mapping using expression builder:
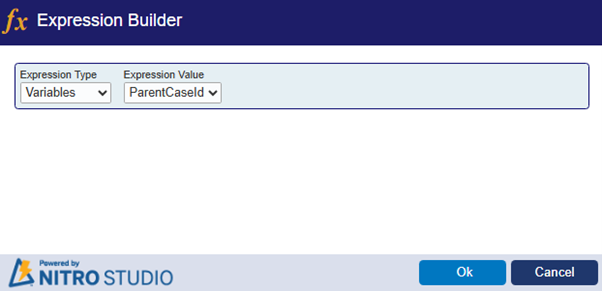
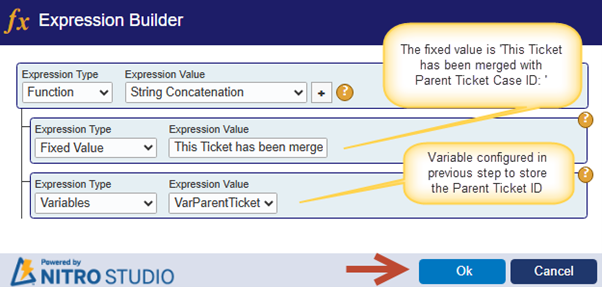
‘Work Log’ column mapping using expression builder:
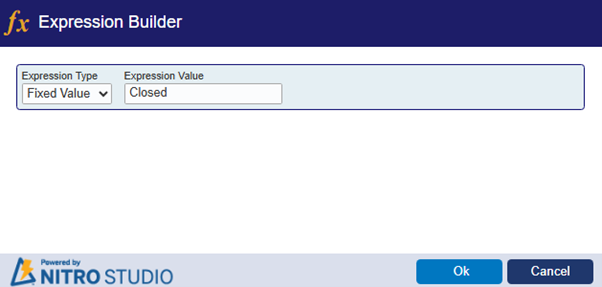
‘Status’ column mapping using expression builder:
5. ‘Update WorkLog in Parent Ticket’ update list item action: Add another ‘Update List Item’ action. Run this action for the ‘Lookup’ column ‘Parent Ticket’.
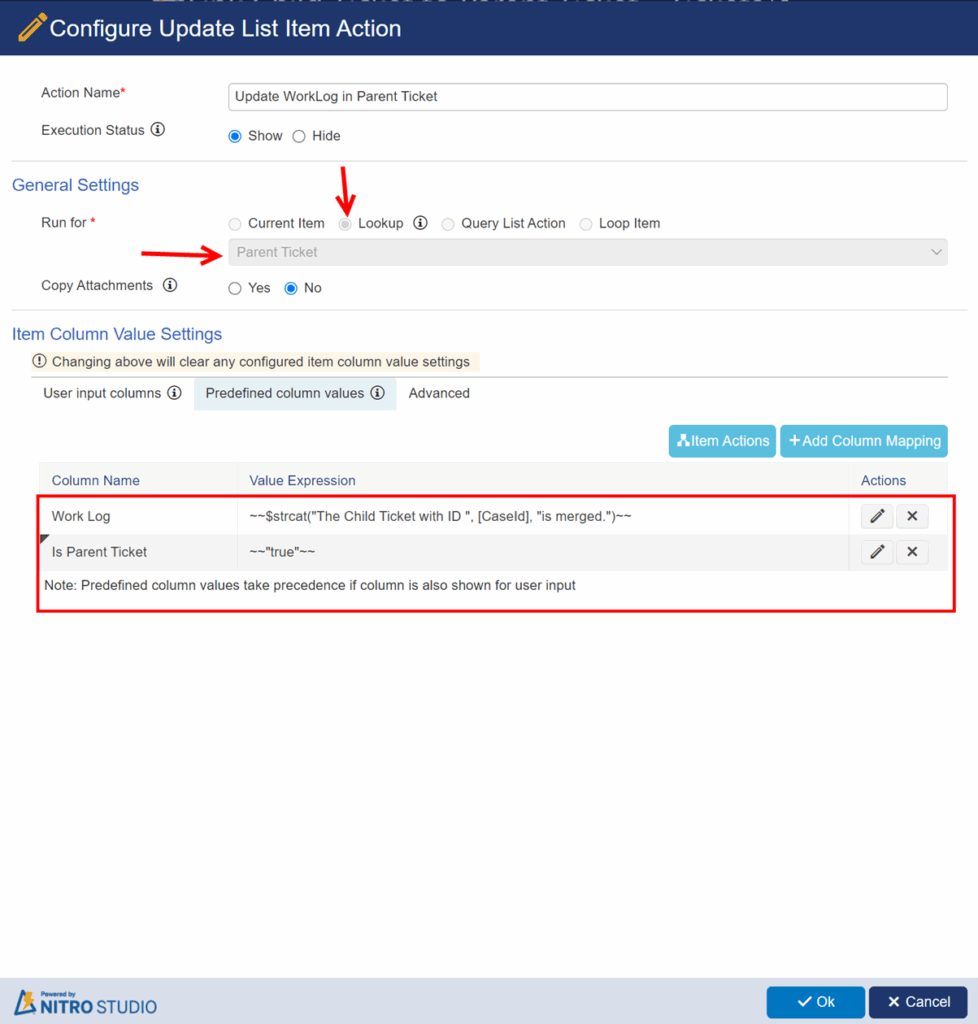
Columns are mapped using expression builder as shown below:
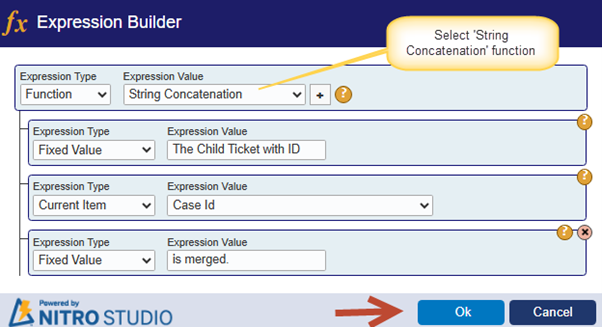
‘Work Log’ column mapping: For ‘Work Log’ column in the parent ticket to specify details of the merged child ticket:
‘Is Parent Ticket’ column mapping: To set the value of ‘Is Parent Ticket’ column to ‘Yes’ for the selected parent ticket:

7. Expand ‘Events and Controls’ section from left-hand panel -> Drag and drop ‘Gateway’ control onto the canvas as shown in the flowchart above:
8. Configure ‘Gateway’ settings as shown below:
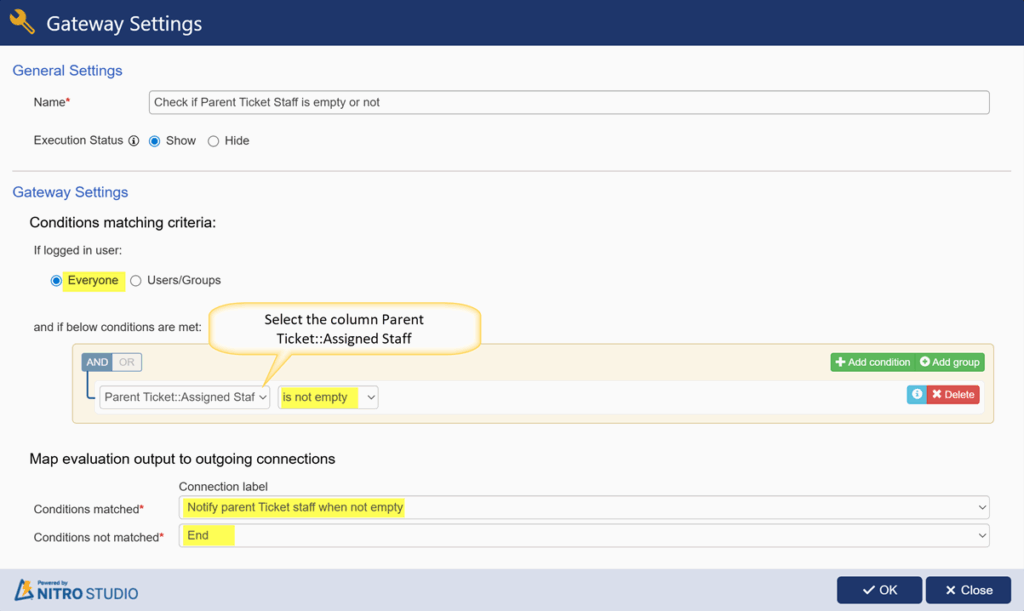
9. Drag and drop ‘Send Mail’ action onto the canvas. This is configured to notify ‘Assigned Staff’ of the parent ticket (if ‘Assigned Staff’ is not empty) when a child ticket is merged with the parent ticket as shown below:
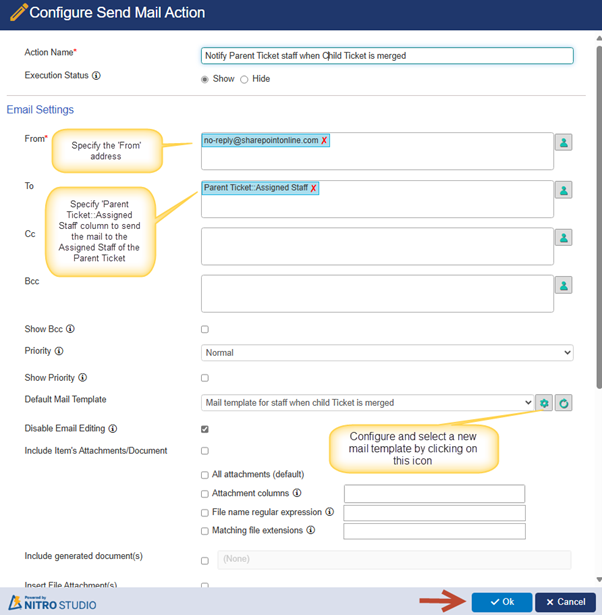
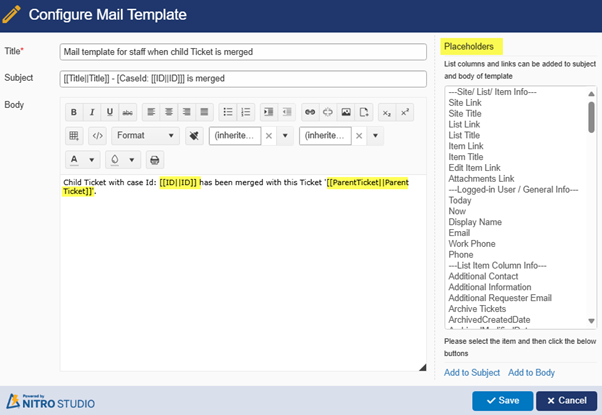
Sample mail template:
Example:
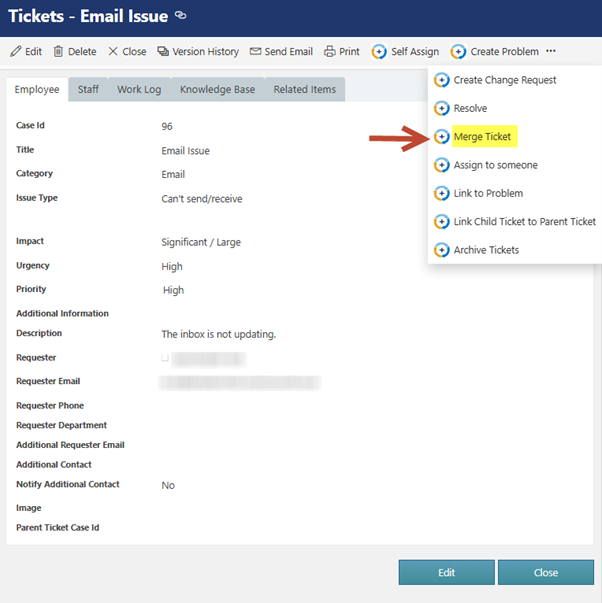
- Navigate to the Tickets list -> Open the Ticket display form that needs to be linked/merged to the parent ticket -> Execute the ‘Merge Ticket’ custom action.
Ticket List data:

2. Search for the required ticket that should be selected as the parent ticket.
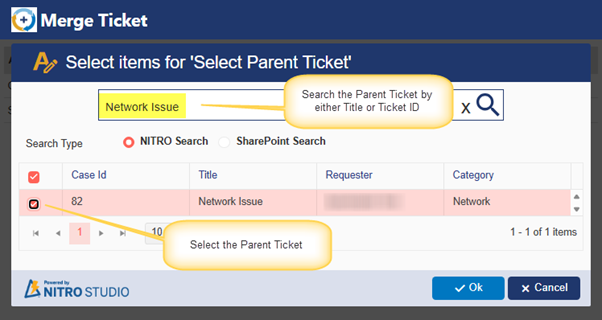
3. After selecting the parent ticket, the custom action will execute successfully as shown below:
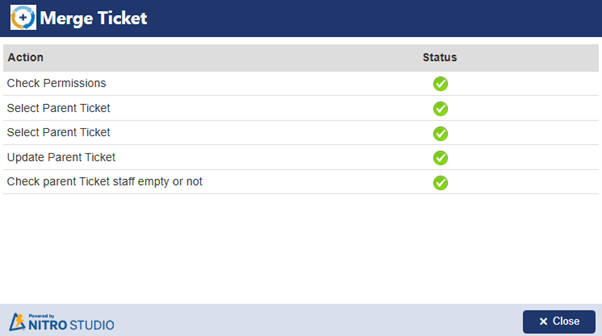
Sample Output:
In the above example, after successful execution of the custom action, child ticket’s ‘Work Log’ column value is updated, and the ‘Parent Ticket’ column value is set to the selected parent ticket.
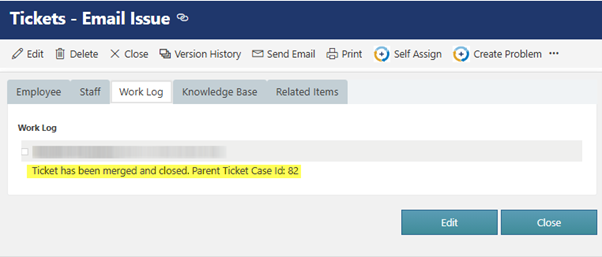
Title and Id of the parent ticket are mapped to the child ticket as shown below:
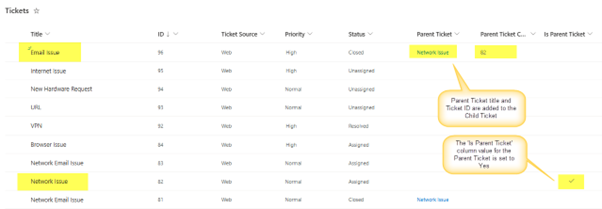
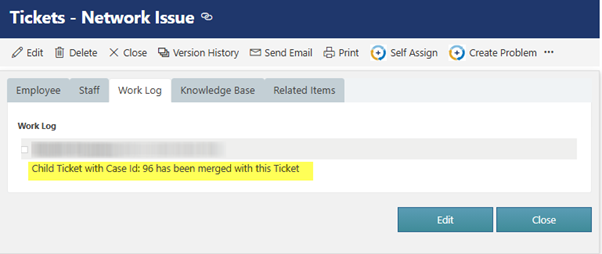
Parent ticket’s ‘Work Log’ column value is updated.
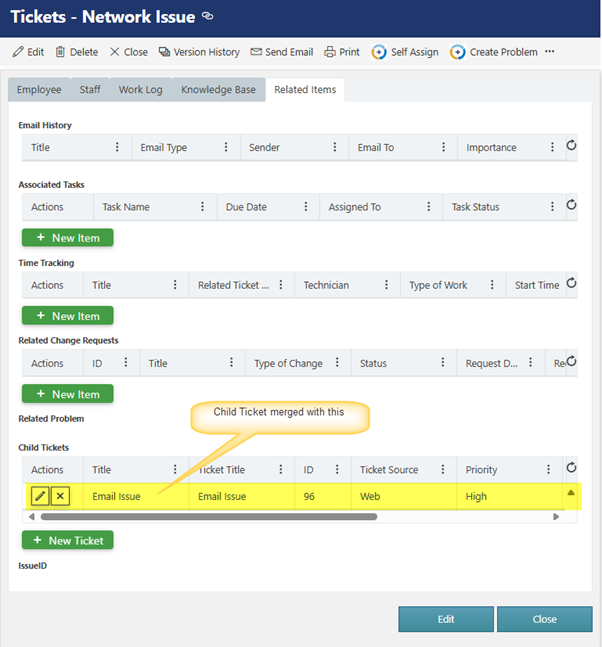
‘Child Tickets’ associated column shows the child ticket merged with this parent ticket as shown below:
