This action sends an email to the Teams channel. This appears as a notification in the Teams channel. If you have not already, you'll need to follow the steps in this article to enable the Teams API for NITRO in order to use this action.
.
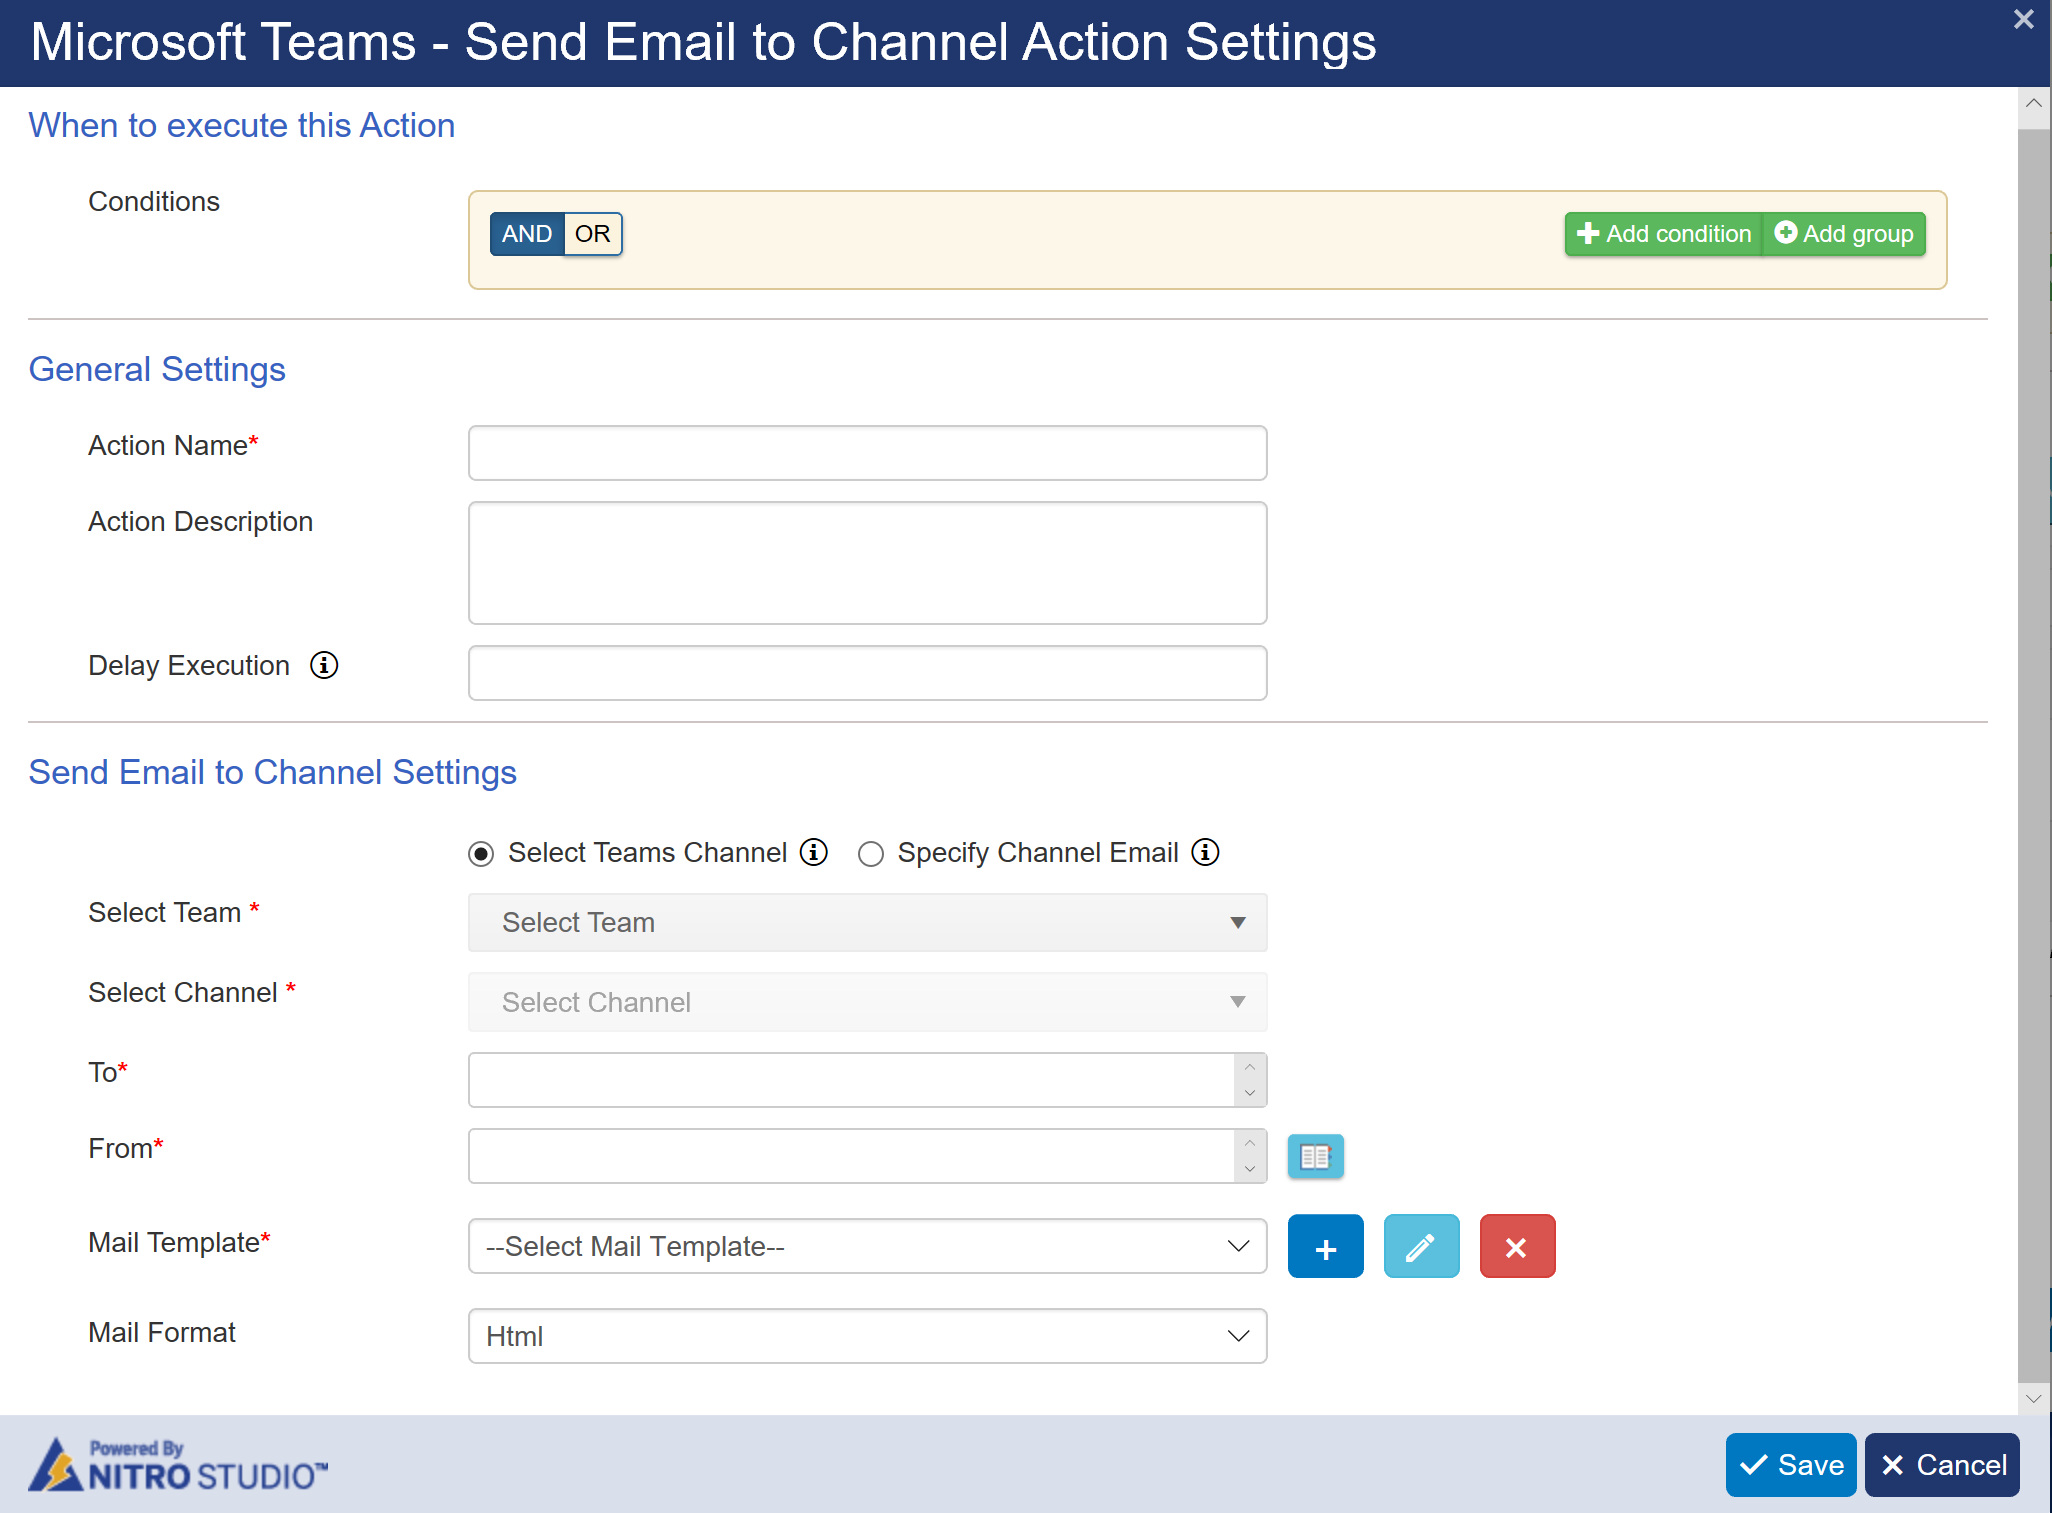
General Settings
Action Name: enter a name for this action
Action Description: Describe the action (for future reference)
Delay Execution: Set a time in milliseconds to delay the execution of this action
Send Email to Channel Settings
Select Teams Channel: let's you directly select the Team and channel. The "To" email address field is automatically filled out.
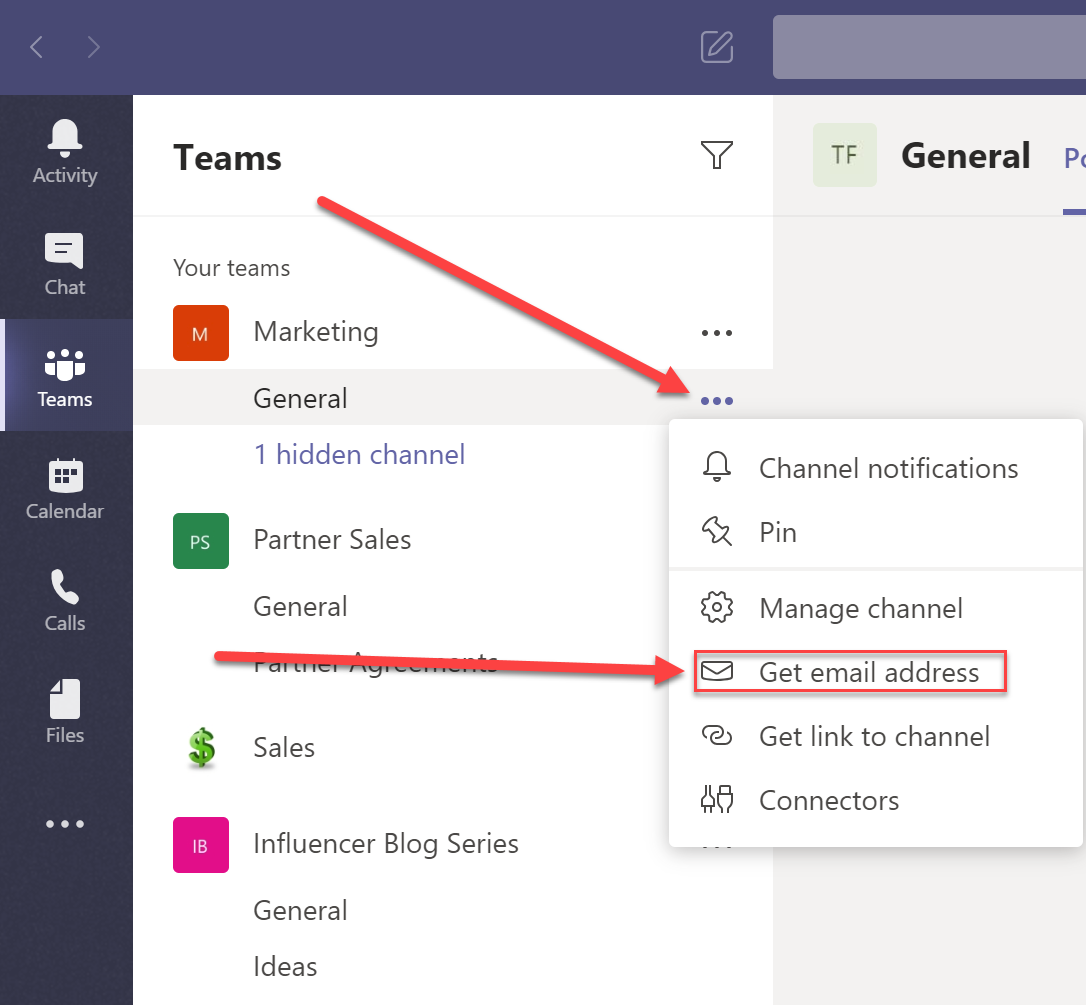
Specify Channel Email: In case you can't access the Team and/or channel you can directly add the channel's email address. The address is found by clicking on the ellipsis (...) next to the channel name. Then click on Get Email Address to see the email address for the channel:
"From" can hold only one user or email address
Mail Templates
Use the "Mail Template" dropdown list to select a mail template. If no mail templates have been configured in the NITRO Workflow app, click the Create button to create a mail template. The Edit and Delete buttons can be used to edit or delete an existing NITRO Workflow mail template.
![]() Create a Mail Template -- Note that the mail templates created here apply only to the NITRO Workflows app and are not used elsewhere in NITRO Studio.
Create a Mail Template -- Note that the mail templates created here apply only to the NITRO Workflows app and are not used elsewhere in NITRO Studio.
![]() Edit a Mail Template -- a template must be selected in the drop list in order to edit it.
Edit a Mail Template -- a template must be selected in the drop list in order to edit it.
![]() Delete a Mail Template -- a template must be selected in the drop list in order to delete it.
Delete a Mail Template -- a template must be selected in the drop list in order to delete it.
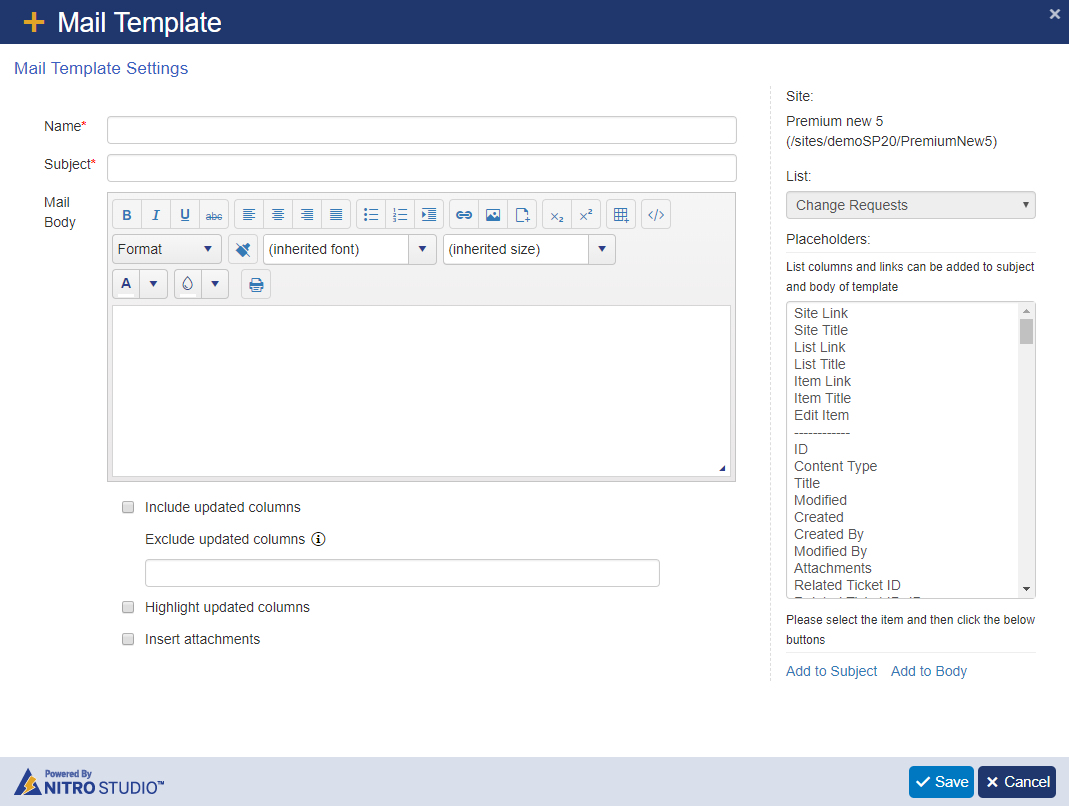
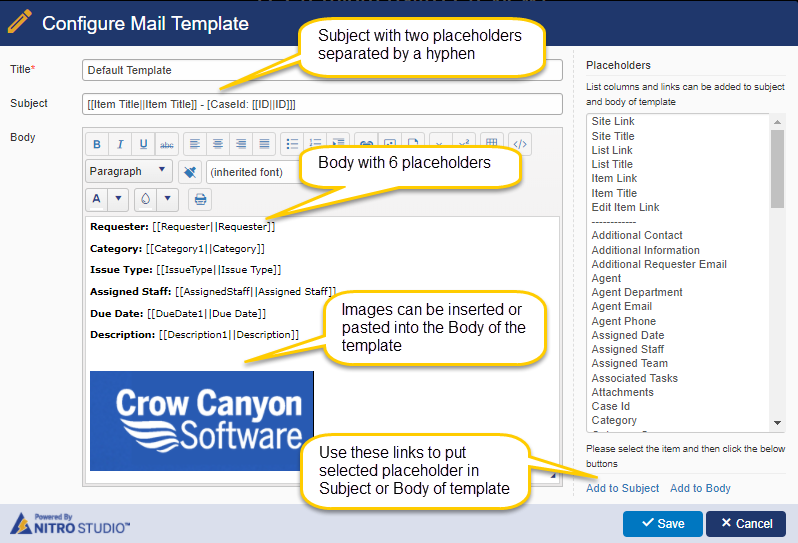
Title: the name of the Template
Subject: the Subject of the email. This can have Placeholders in it.
Mail Body: the Body of the email, which can include rich-text formatting. This can have Placeholders in it.
Include updated columns: any columns that have been updated will be included in the email.
Exclude update columns: do not include the updated columns designated in the box.
The format to identify the excluded columns is: [[Column internal name || Column display name]]
If multiple columns: [[Column1 internal name||Column1 display name]] [[Column2 internal name||Column2 display name]] ... (etc.)
Highlight updated columns: any updated columns that are included in the email will be highlighted.
Insert attachments: puts the item's attachments into the email.
PLACEHOLDERS
Variables can be added to the Subject or Body of the email. The "Placeholder" variable is selected from the list on the right, and the "Add to Subject" or "Add to Body" below the list will put in the corresponding place.
The placeholders include Site and Item information as well as all the fields in the list where this mail template is being created.
"Site Link", "List Link", "item Link", and "Edit Item Link" will put a clickable URL in the email. "Site Title", "List Title", and "Item Title" will put the name as text, not as a clickable link.
Here is an example Template with placeholders in it: