Applies To
Crow Canyon NITRO activated sites in SharePoint Online
Description
Crow Canyon NITRO components like Bots, Workflows and Custom Actions can connect to Microsoft Teams for various operations. For these operations NITRO components need to connect to Teams and this article describes the steps for the same.
There are two options for Teams connection:
- Crow Canyon Teams API: This API is created by Crow Canyon and you can grant the required permissions so that it can be used by NITRO components. This API is only used for Teams operations configured in NITRO components in your SharePoint sites and not used in any other way
- Custom API: If you cannot use Crow Canyon Teams API then you can create your own Azure AD app with required permissions. You can refer Microsoft documentation for creating the app. Crow Canyon can also assist in this process as part of professional services. After creating the app note the required information like Id and secret and configure it as described below
Currently supported operations for Microsoft Teams from NITRO components are given below:
- Send an adaptive card to:
- Notify user with custom message having placeholders from SharePoint list item
- Update an item
- Invoke a NITRO Workflow
- Create a new channel under an existing Team
- Send an email message to a channel
- Post a message to a channel
Note that new operations for Teams are being added to NITRO components continuously.
Detailed Steps
- Setup Teams connection in NITRO
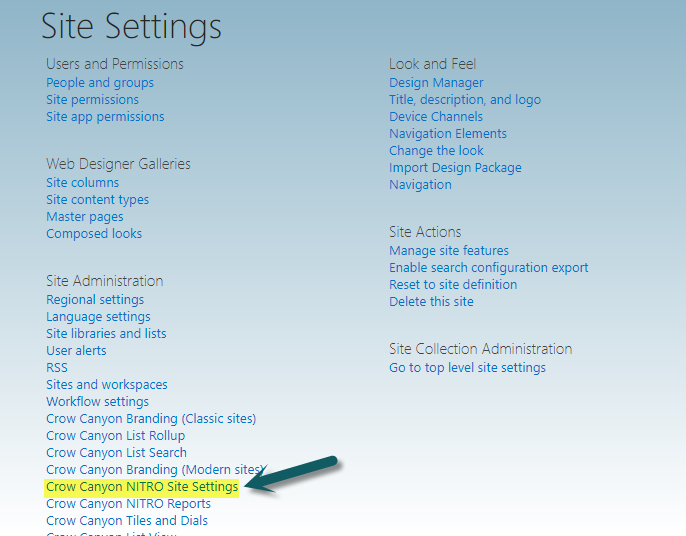
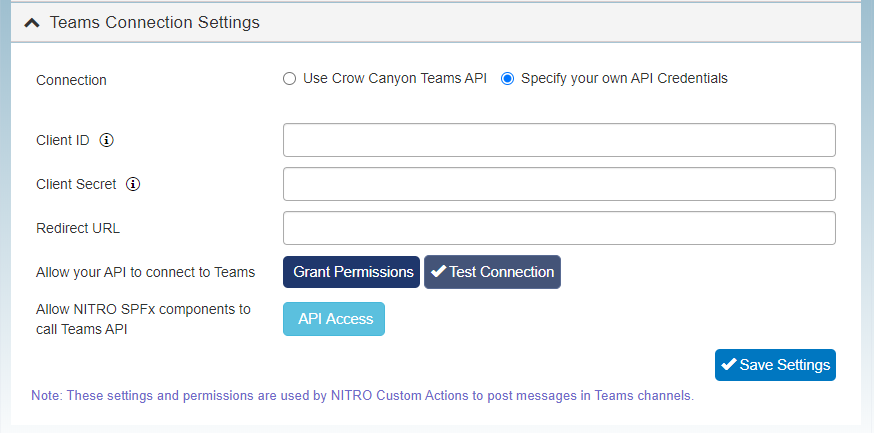
Navigate to Site Settings -> Crow Canyon NITRO Site Settings. Under Site Administration -> expand ‘Teams Connection Settings’ section.
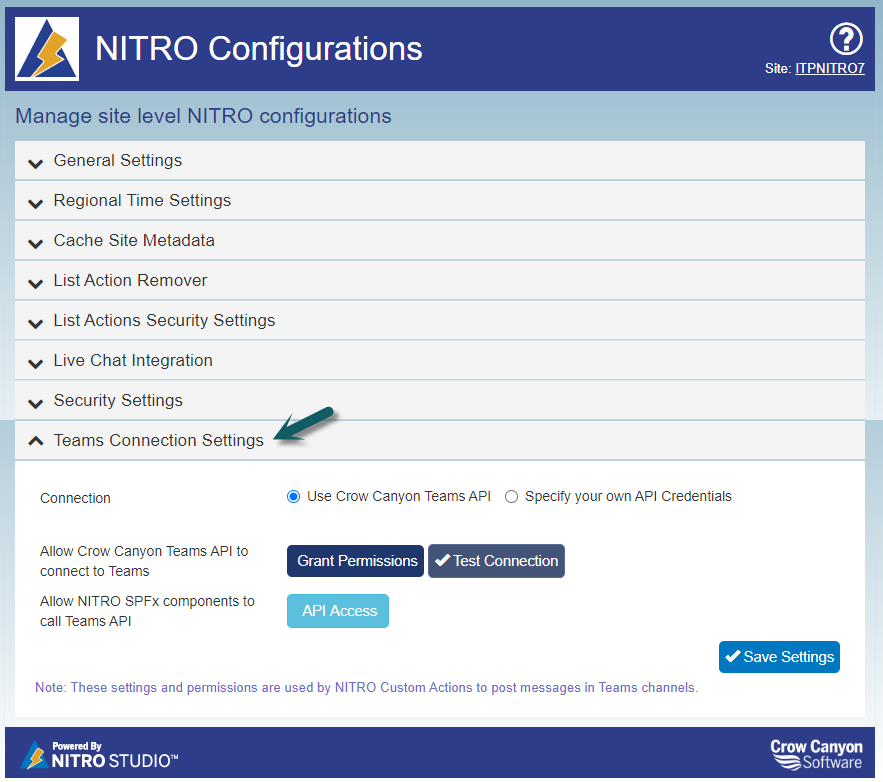
Select the required connection type.
Crow Canyon Teams API:
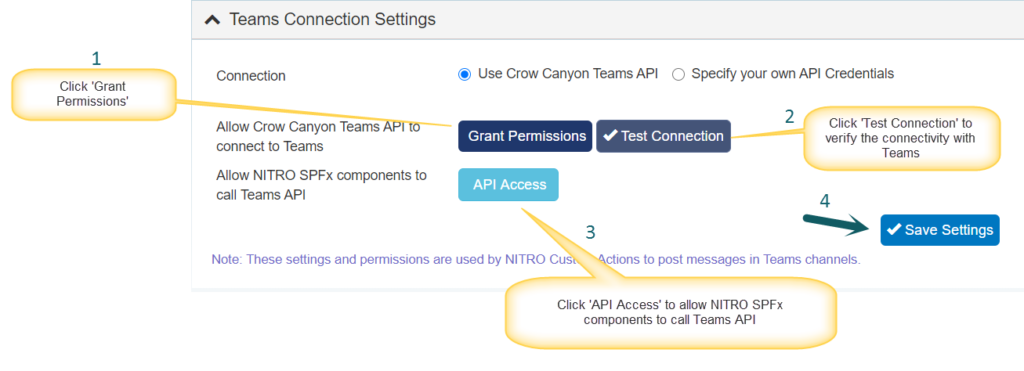
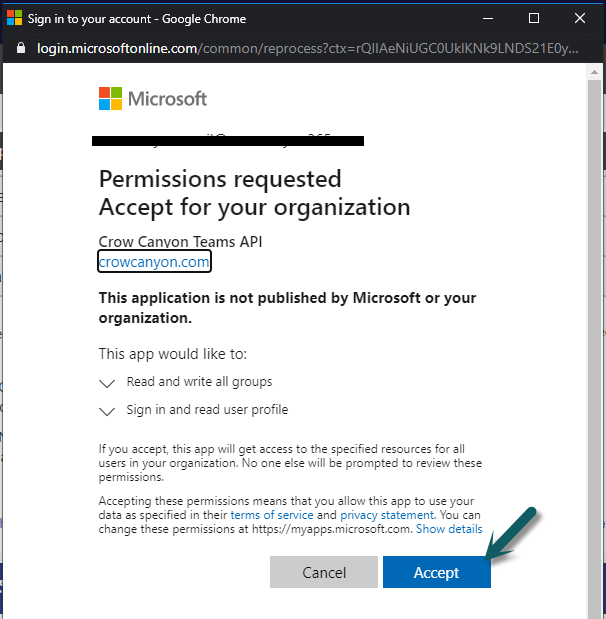
2. Clicking “Grant Permissions” button will open a pop-up. Please use an account with administrator privileges for your Office 365 subscription to grant the required permissions. Click “Accept” button to grant permissions.
3. Click “Test Connection” to check the Teams connection.
4. Save the settings.
API Access
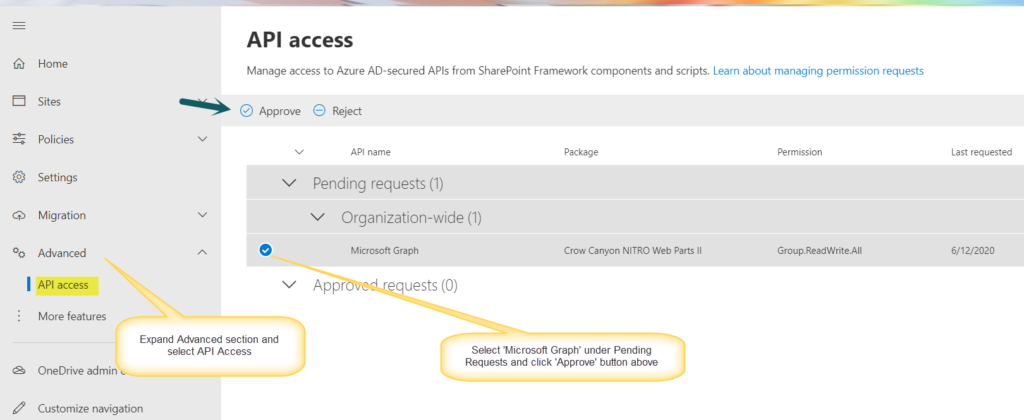
Click “API Access” to allow NITRO SPFx components to call Teams API. This will open the SharePoint admin page. Refer image below for approving the API access. If this is already approved then you can ignore this step. If you do not see the highlighted item below, please refer the steps given after image.
Pre-requisites for API Access:
- NITRO Modern UI components should be installed in site and up to date.
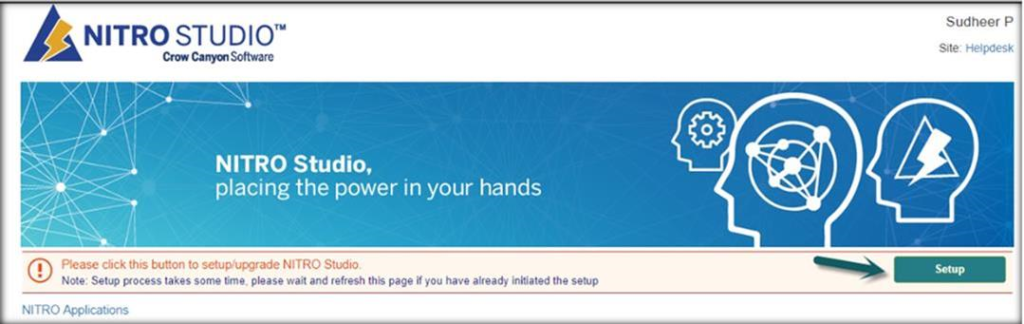
Navigate to root site -> Site Contents -> Crow Canyon NITRO Studio -> Click ‘Setup’ button in the NITRO Studio panel
2. NITRO Studio should be up to date in site.
From the NITRO Studio Admin page, click on “Update” button for the activated sites to get the latest NITRO Studio features in the site.
3. If you still do not see the highlighted item on admin page, please perform below steps.
- Navigate to the app catalog site of your SharePoint tenancy
E.g. https://contoso.sharepoint.com/sites/Apps/ - Navigate to “Apps for SharePoint” library
- Search for ‘Crow Canyon NITRO Web Parts II’ component (CrowCanyonNITROWebPartsII.sppkg)
- If you do not have this component, then contact Crow Canyon support
- Do the Check-out and Check-in for ‘Crow Canyon NITRO Web Parts II’ component
Check Out:
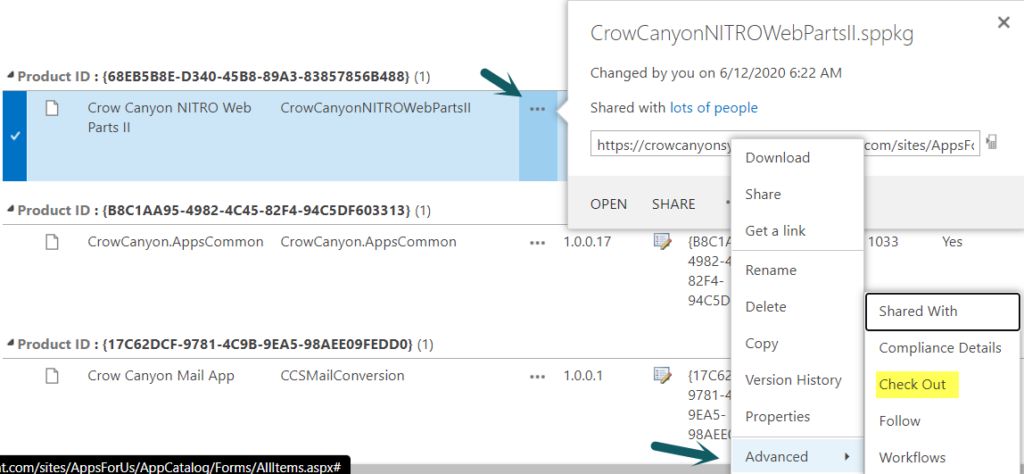
Check-In:

6. After this operation, refresh the API access page in SharePoint admin and then approve the request
Specify your own API Credentials
Specify the ‘Client ID’, ‘Client Secret’ and ‘Redirect URL’ as per your custom Azure AD app. Rest of the steps are same as above.
Please refer this article for sample use case.