Applies to: SharePoint Online
Description
This article describes the steps to configure three level cascading feature in Tickets list.
Summary of Steps
- Configure List Schema
- Configure lookup settings in NITRO forms
- Configure Cascaded Lookup settings in Issue Type list
Detailed Instructions
1. Configure List Schema
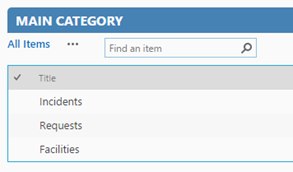
1. Create “Main Category” list. Go to Site contents –>Add an App –> choose Custom List template, create a list and name it as “Main Category”.
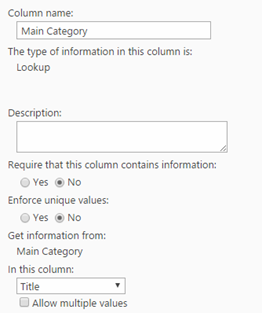
2. Create Main Category lookup columns in Tickets, Category and Issue Type lists. see list schema below
Category list:
| Column Name | Column Type |
| Title | Single line of text |
| Main Category | Lookup |
Issue Type list:
| Column Name | Column Type |
| Title | Single line of text |
| Main Category | Lookup |
| Category | Lookup (It will be created as part of Crow Canyon application) |
Tickets list:
| Column Name | Column Type |
| Title | Single line of text |
| Main Category | Lookup |
| Category | Lookup (It will be created as part of Crow Canyon application) |
| Issue Type | Lookup (It will be created as part of Crow Canyon application) |
Sample screenshot of Main Category lookup column:
2. Configure lookup Settings in NITRO forms
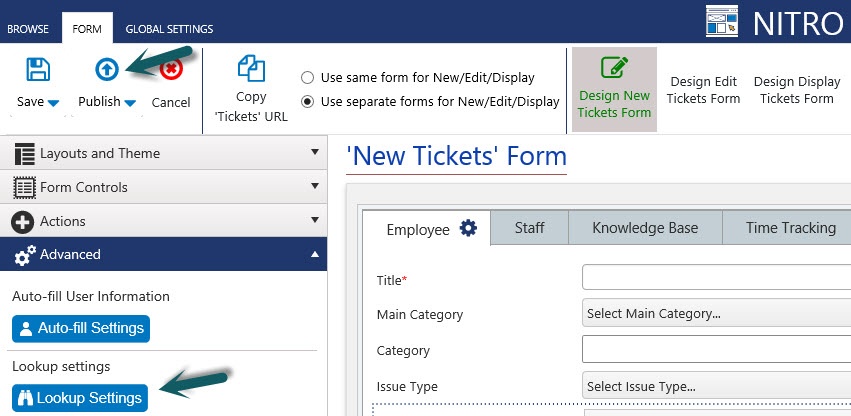
After creating the Main Category lookup columns in Tickets, Category and Issue Type lists, add the “Main Category” column to the NITRO forms. Go to Tickets list settings -> Crow Canyon NITRO Forms -> Add “Main Category” column to all New,Display and Edit forms and then configure lookup column settings like shown below.
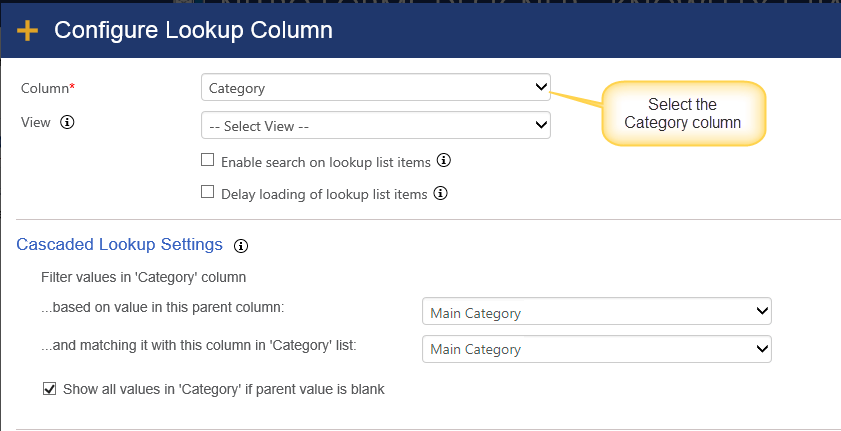
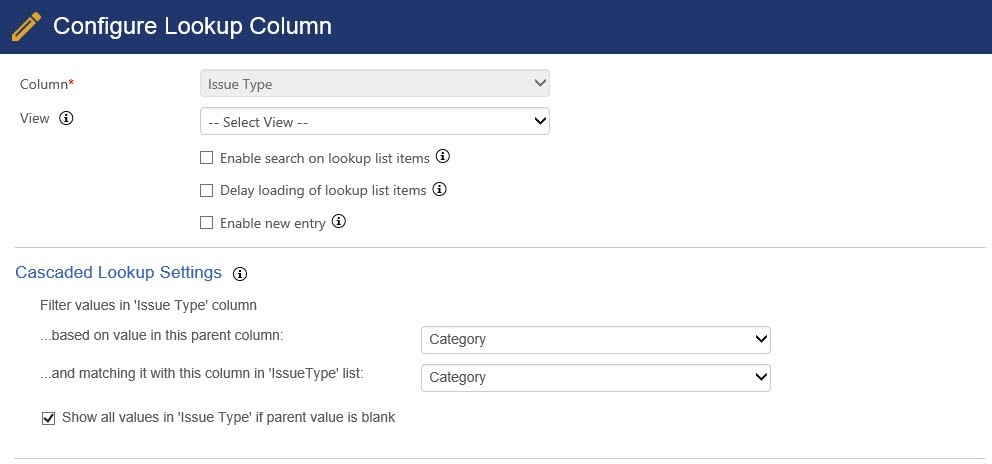
Go to Advanced Section in the left hand side panel -> Lookup Settings -> Configure lookup settings for the Category and Issue Type columns in New and Edit forms as shown below. After configuring the lookup settings, publish the forms.
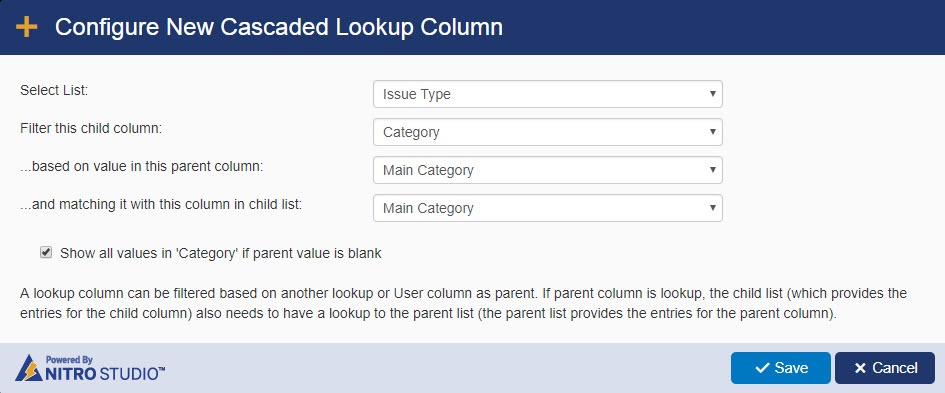
3. Configure Cascaded Lookup settings in Issue Type list
Go to Application Administration -> Crow Canyon NITRO Apps -> Crow Canyon NITRO Studio -> Cascaded Lookup and configure filtering like shown below.