Basic settings for Ticket Satisfaction Survey:
‘Requester’ will receive a Survey link when a ticket is closed. Survey notification goes to the corresponding requester on every ticket close in this basic scenario.
There are two different configurations that needs to be done
1. Add custom script to Survey list New Form
2. Configure Workflows using Workflow Manager App
Add custom script to Survey list New Form
This setting will help capturing the Ticket Id from Survey link and populate ticket id in Survey form so the link/relation is maintained between survey and ticket.
- Download the custom Crow Canyon script that goes to Survey list form from CCSIDPopulatorV1.2
- Upload custom script “CCSIDPopulatorV1.2.js” file into “Site Assets” document library in service area site. This step can be skipped if the file already present.
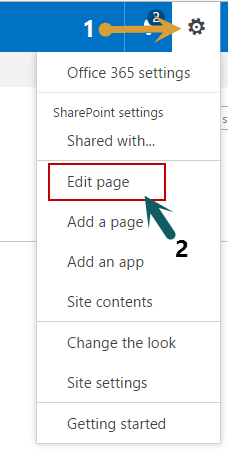
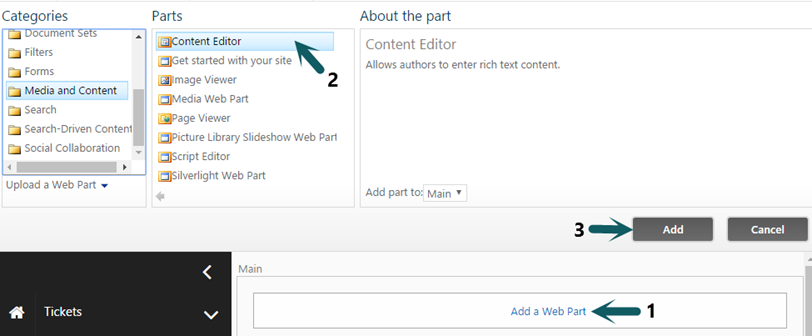
- Copy ‘CCSIDPopulatorV1.2.js’ script file URL, open ‘Service Satisfaction Survey’ list and change URL from overview.aspx to newform.aspx, edit page, add content editor web part, add content link with the script URL, save. See sample screenshots below.

Edit newform.aspx page
Add “Content Editor” to newform.aspx page, Edit web part and add ‘CCSIDPopulatorV1.2.js’ script file URL under ‘Content Link’ and save
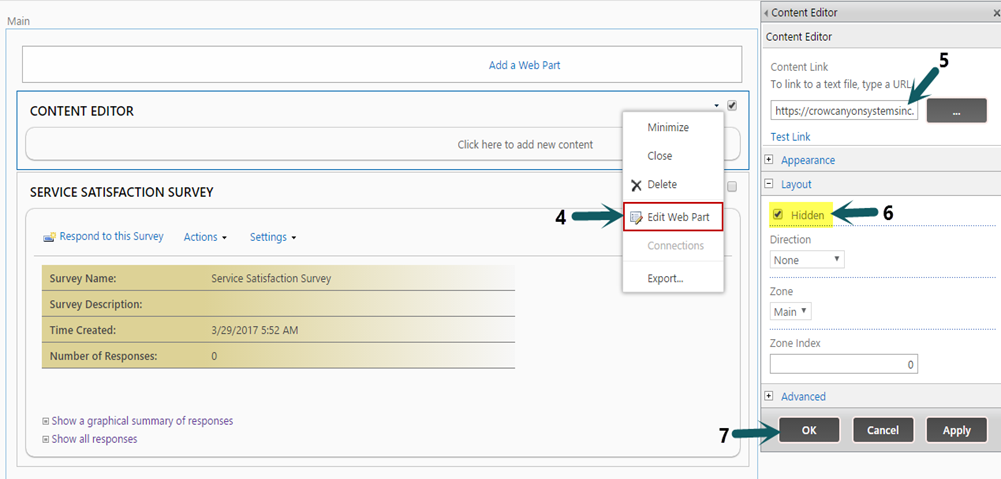
Stop editing the page
Configure Workflows using Workflow Manager App
This setting will send notification to Requester with a link to Survey on ticket close
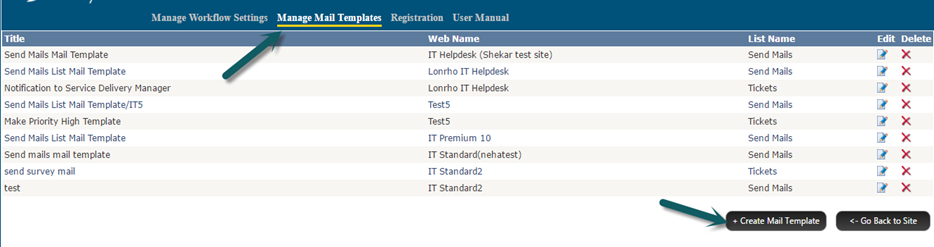
Create Mail Template on ‘Tickets’ list
Go to Workflow Manager App, Manage Mail Templates, click on Create Mail Template and configure as shown in below screenshots
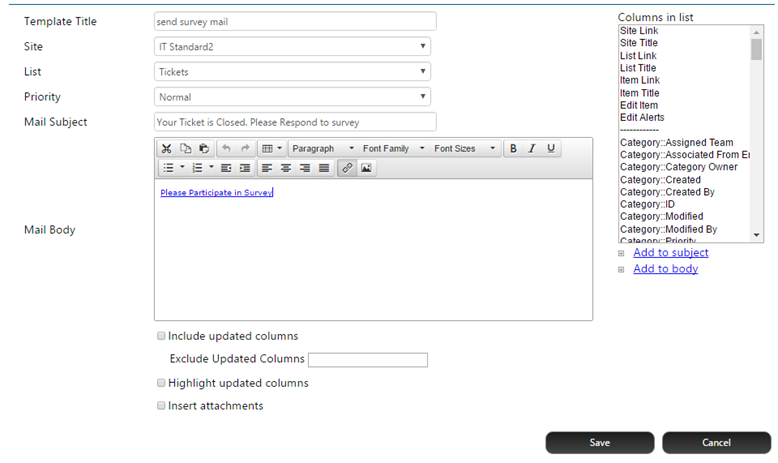
Mail Subject and Body can be configured as per the needs and the important piece is to configure the Survey link so that the ticket linking is maintained and user is navigated back to the desired page after submitting the survey.
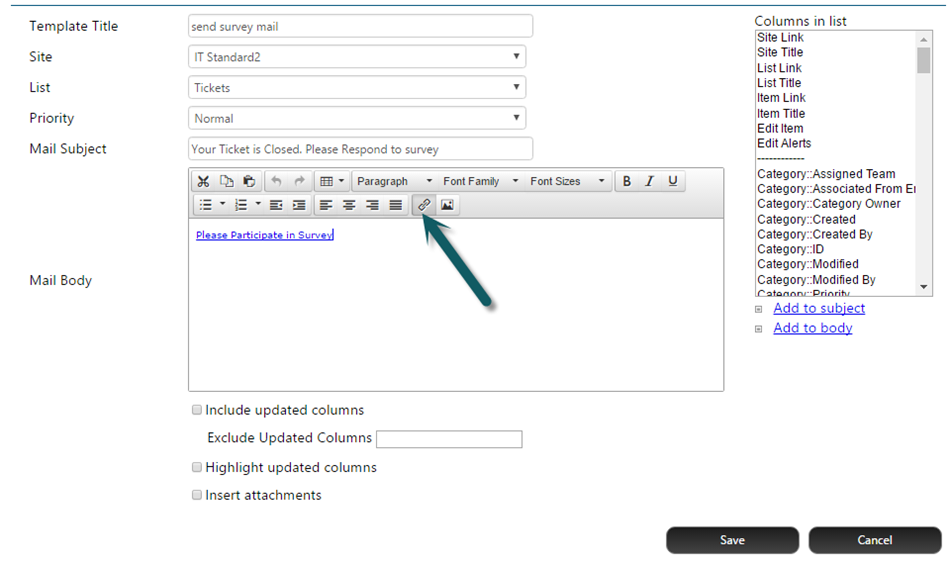
To configure link to survey, click on ‘Insert/edit Hyperlink’ button from the top menu bar of the ‘Mail Body’ section
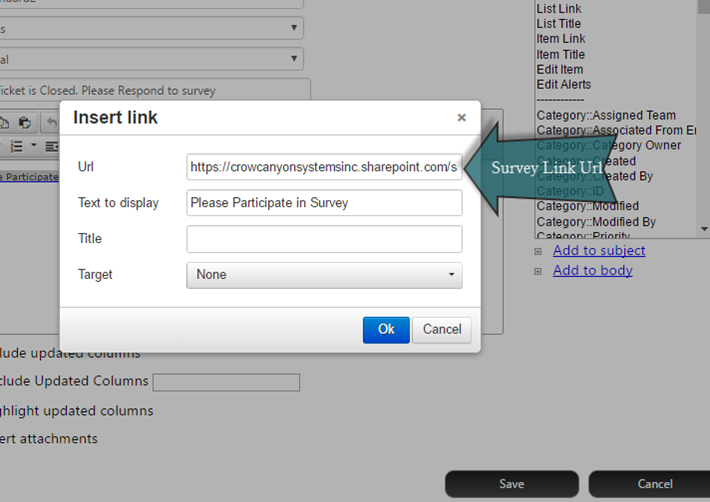
Give survey link URL in the “Url” section of the dialog box.
There are two cases exist here:
1. Use the Service Satisfaction Survey list default New Form URL
- This option cannot be used is the redirection to employee portal is configured for end users
- Syntax: “Survey” list new form URL?TID=[[ID || ID]]&Source=”Desired URL”
- Example: https://abcdefg123.sharepoint.com/sites/helpdesk/IT/Lists/Service%20Satisfaction%20Survey/newform.aspx?TID==[[ID||ID]]&Source=https://abcdefg123.sharepoint.com/sites/helpdesk/configportal/SitePages/Index.aspx
2. Use the employee portal Survey new form URL
- This option is assuming the employee portal is already configured for Survey new form
- Syntax: “Survey” new form URL in portal&Lookup field internal name=[[ID || ID]]
- Example: https://abcdefg123.sharepoint.com/sites/helpdesk/IT/configportal/SitePages/NewForm.aspx?pid=1&Related_x0020_Ticket_x0020_ID=[[ID || ID]]
Note: “Related_x0020_Ticket_x0020_ID” in above example URL is the internal field name of ticket lookup in Survey list
Give the desired text in the ‘Text to display’ section.
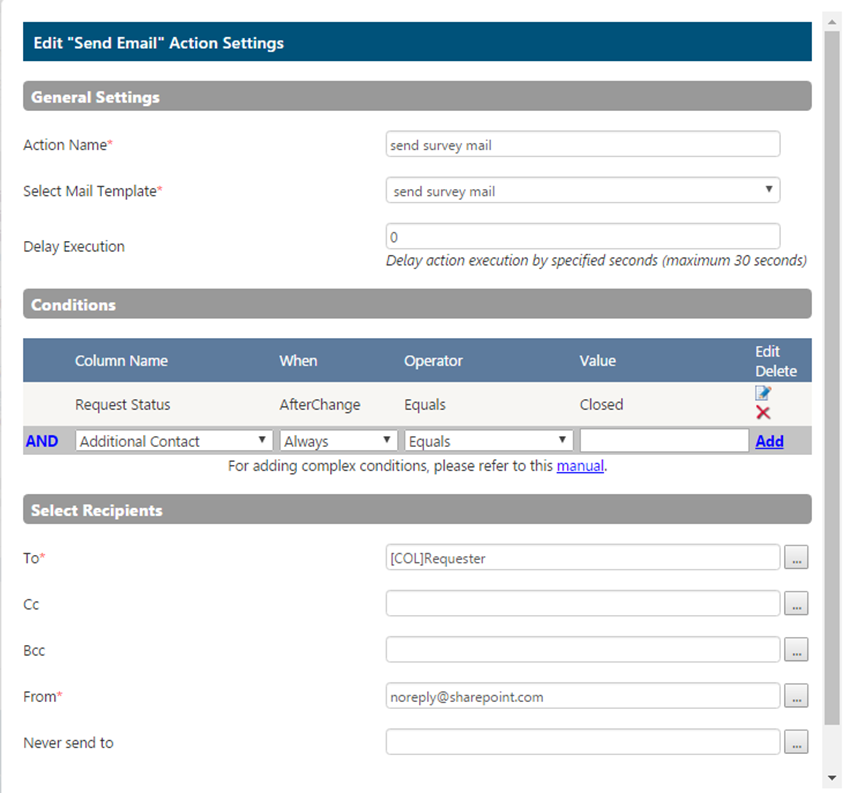
Configure Workflow on Tickets list
This workflow will send the mail to requester with a link to survey list form
Create a workflow on ‘Tickets’ list, on “an item modified” event
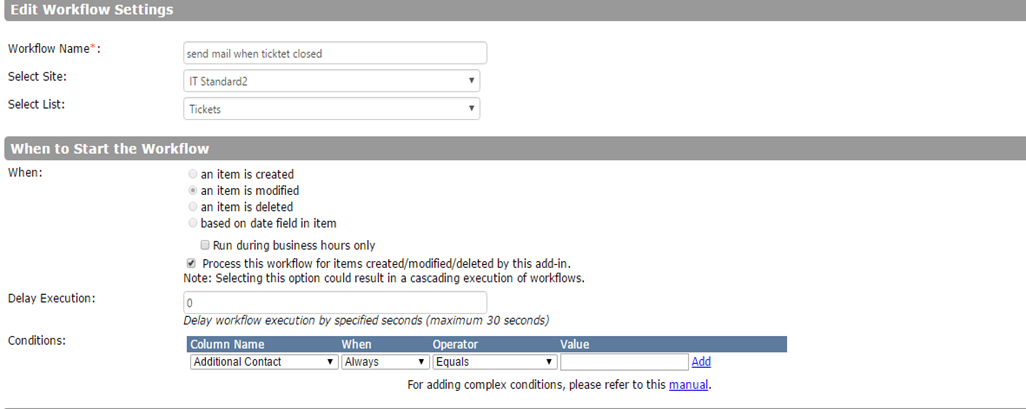
Create a ‘Send Mail’ action with conditions as shown in below screenshots