Import Data from Excel to SharePoint List Items
Applies to: SharePoint Online and On-premises
Crow Canyon Excel-to-SharePoint import tool
This tool provides a UI where you can select the source Excel file and the target SharePoint list and then map the Excel columns to SharePoint list fields. The tool will read information from the Excel file and create, update, or delete items in the selected SharePoint list as per the field mappings. Please refer to the Notes section at the end for guidelines on data for specific types of SharePoint columns.
Key Capabilities:
1. Create items in SharePoint list based on Excel file data. Map Excel file columns to SharePoint list items fields.
2. Update existing list items in a SharePoint list based on key field mapping. Create new item if no match found per key field mapping
3. Delete SharePoint list items based on key field mappings.
Instructions to CREATE items in SharePoint list using Excel-to-SharePoint Import tool
1. Download “Excel-to-SharePoint import tool” from ExcelToSharePoint Import tool
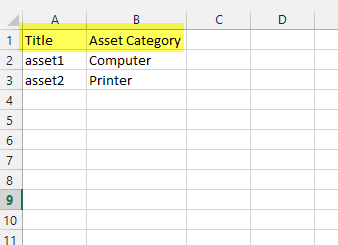
2. Prepare an Excel sheet with the data you want to move into SharePoint. The Import Tool can only read the first worksheet in the Excel file. The first row in the Excel sheet should have the column titles.
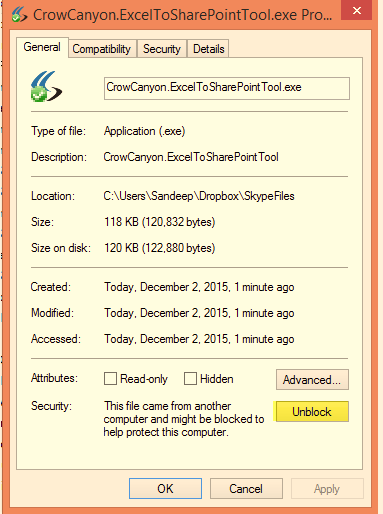
3. Unzip the download and copy the tool to one of the local drives of a computer where Excel is installed. Right click on the tool, open Properties and click on Unblock in the Security section towards the bottom. Click OK to close the Properties screen.
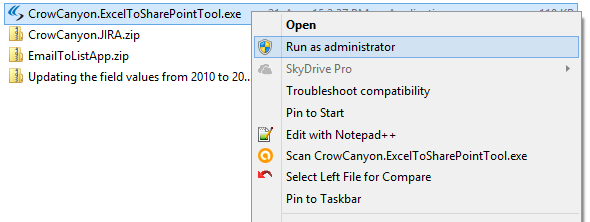
4. To run, right-click on “CrowCanyon.ExcelToSharePointTool.exe” and choose “Run as administrator”.
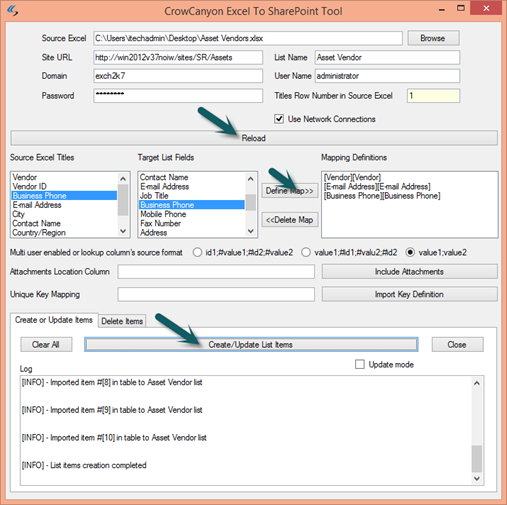
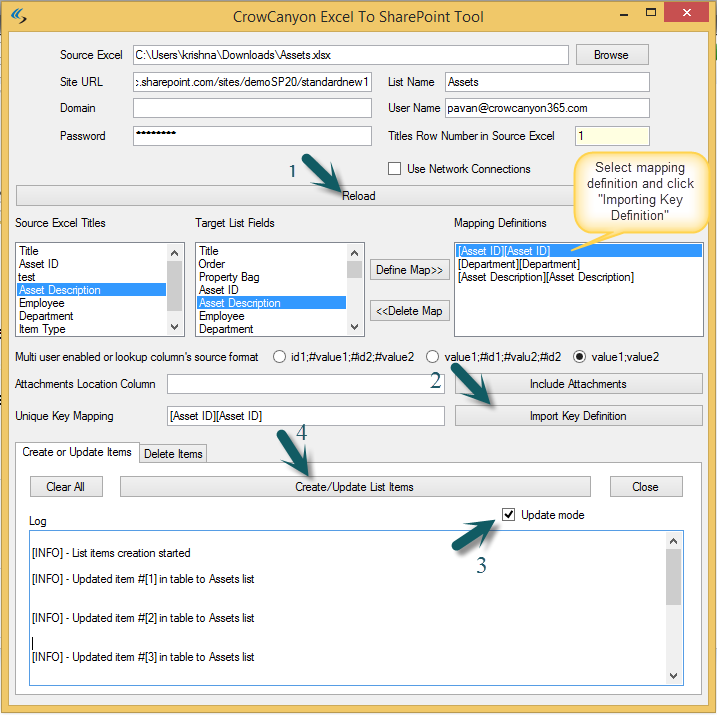
5. Fill the text boxes as shown in screenshot below.
- Source Excel: Browse to the Excel file that has the data to import
- Site URL: Enter the site URL that has the SharePoint list in to which the data will be imported
- List Name: Enter list name of where the data will be imported
- Domain: Enter domain name (leave blank if on Office 365)
- User Name: Enter user name
- Password: Enter password
- Use Network Credentials: Check this box for On-prem sites, but leave unchecked for Office 365
- Attachments Location: If one of the Excel sheet columns has attachment locations, select that column from “Source Excel titles” list box and click “Include Attachments” button.
- Unique Key mapping: If the Excel file has data that was already imported and you want to update the data, select a column mapping from “Mapping Definitions” list box and click “Import Key Definition” button. Make sure that this column has unique identifier value in Excel. If this is configured, our tool will first verify if SharePoint list already has an item with that unique field value in Excel column, and will update the matching SharePoint list item. If no match is found, it will create a new item.
6. After making all the selections needed, click on “Load/Reload” button. It will load Excel column names and SharePoint list fields in to the corresponding list boxes
7. Map the fields as to how you want to import the data
8. After mapping, click on “Create/Update List Items” button
Instructions to UPDATE items in SharePoint list using Excel-to-SharePoint Import tool
1. Run Crow Canyon Excel To SharePoint Tool (Run as Administrator).
2. Browse to find the Excel sheet that has data for SharePoint items to update. In Excel sheet, there should be a column with values to uniquely identify items in SharePoint. For example, a column with value of unique Id of each item in SharePoint.
3. Provide required details Site URL, List Name, User Name and Password and click “Reload”.
4. Select a Unique Key Mapping definition so that it will fetch the SharePoint list items based on Unique key. See below image, in this example CaseId is the Unique key mapping in Excel and SharePoint list to fetch the items.
5. Click “Create/Update List Items” which will update all the SharePoint list items matching from Excel sheet with given field mappings.
Instructions to DELETE items from SharePoint list using Excel-to-SharePoint import tool
1. Run Crow Canyon Excel To SharePoint Tool (Run as Administrator).
2. Browse to find the Excel sheet that has data for SharePoint items to delete. In Excel sheet, there should be a column with values to uniquely identify items in SharePoint. For example, a column with value of unique Id of each item in SharePoint.
3. Provide required details Site URL, List Name, User Name and Password and click “Reload”.
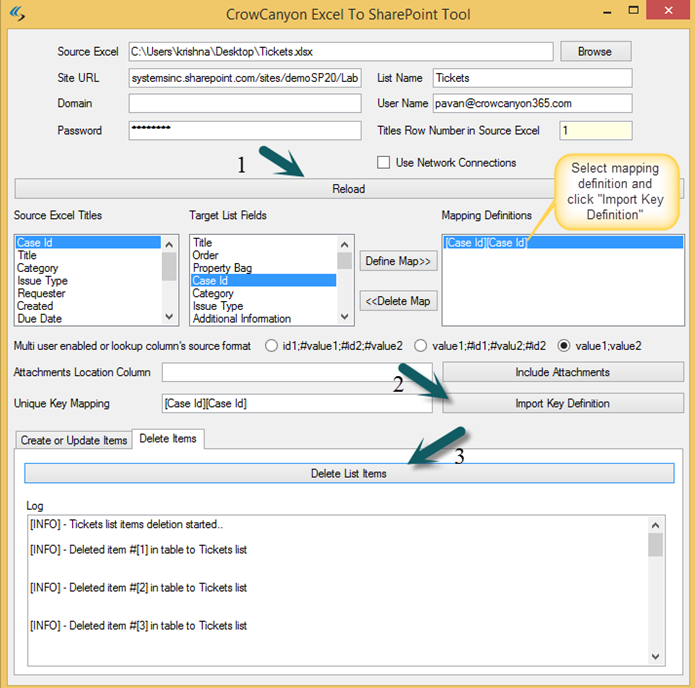
4. Select a Unique Key Mapping definition so that it will fetch the SharePoint list items based on Unique key. See below image, in this example CaseId is the Unique key mapping in Excel and SharePoint list to fetch the items.
5. Click “Delete List Items” which will delete all the SharePoint list items matching from Excel sheet.
Usage notes and troubleshooting hints
- Excel-to-SharePoint tool needs an Excel file that has single sheet of the data
- First row contains the titles and data is from second row onwards
- There should be no blank rows/columns at the end of the excel sheet data
- There should be no duplicate column headers in the excel file content
- Data needs to be in the simple text format (Rich text/colors etc. may break the import functionality)
- If we are mapping any Excel file column to a SharePoint “Lookup” field, make sure that all possible options exist in the lookup list in SharePoint. Otherwise, tool cannot resolve lookup column value and that will leads to missing value for that column in SharePoint item
- Similarly, if the target field is choice field, make sure the choice field options in SharePoint has all possible values
- For any Excel column that is mapped to SharePoint person or group column type, tool supports two different types of values of the user. One, display name and second, login name(domain\login). If the value in the Excel is the display name of the user in SharePoint, then it is case sensitive so make sure that value is proper. In either case, there should be no extra spaces before/after the value in Excel.
- If you have configured Multi-Factor Authentication for SharePoint or Office 365, it does not allow Office client applications to access SharePoint with regular password. Please refer this article to create app passwords and connect to the tool with new password.
- In case of using Modern Authentication for O365 SharePoint, above tool will not work, please refer this article to import list items from CSV using NITRO Workflows.
- SharePoint Default fields like “Created”, “Created By”, “Modified”, “Modified By” and “ID” are not supported in field mappings of this tool. These are special fields that are updated by SharePoint automatically when item is created/modified