Show SharePoint generated unique ID in the item forms
Title: To show SharePoint generated unique Id of list item in the display and edit form of the item
Applies to: SharePoint On Premises 2013, 2016, SharePoint Server Subscription Edition and Online.
Description:
SharePoint item forms don’t show the ID column value for the items. In order to show this value, a single line of text column can be created and populated with the SharePoint generated ID value using Crow Canyon Workflow Manager App. This column can then be permissioned using Crow Canyon Forms to show as a read-only column in Edit form and the Display form of the item
Implementation:
Let’s assume we want to call this new column as Case Id
- Go to the list in which the Case Id need to be created to show the ID value of the item
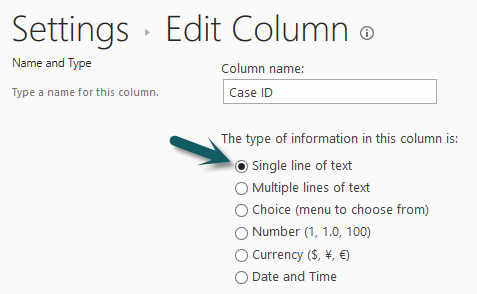
- Create a single line of text column (‘Case ID’) in the list.
- Add the column to tabs using the forms manager “Tabs and Tab Settings” option available in the list settings.
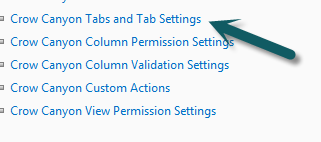
Please refer http://www.crowcanyon.info/manuals/webparts/setting_up_tabs.htm for instructions to add columns to the tabs in the forms for On Premises
Please refer https://www.crowcanyon.info/nitro/appmanual_v1/forms-manager.html for instructions to add columns to the tabs for SharePoint Online using Crow Canyon Forms Manager App
Please refer https://www.crowcanyon.info/nitro/appmanual_v2/creating-nitro-forms.html for instructions to add columns to the tabs that uses Crow Canyon NITRO Forms.
Now Go to Site actions –> Crow Canyon Workflow Manager.
- Create a workflow using our Crow Canyon workflow manager on item created event as shown below.
- For SharePoint Online –> open Crow Canyon NITRO Workflows App and create a workflow as shown below
Note: If a workflow already exists on Item creation event for the list that has update item action in it for the same item, we should add this column mapping to the existing column mappings for the Update Item action in the workflow instead of creating a new workflow. This is recommended to avoid multiple updates on the same item that can lead to item save conflicts
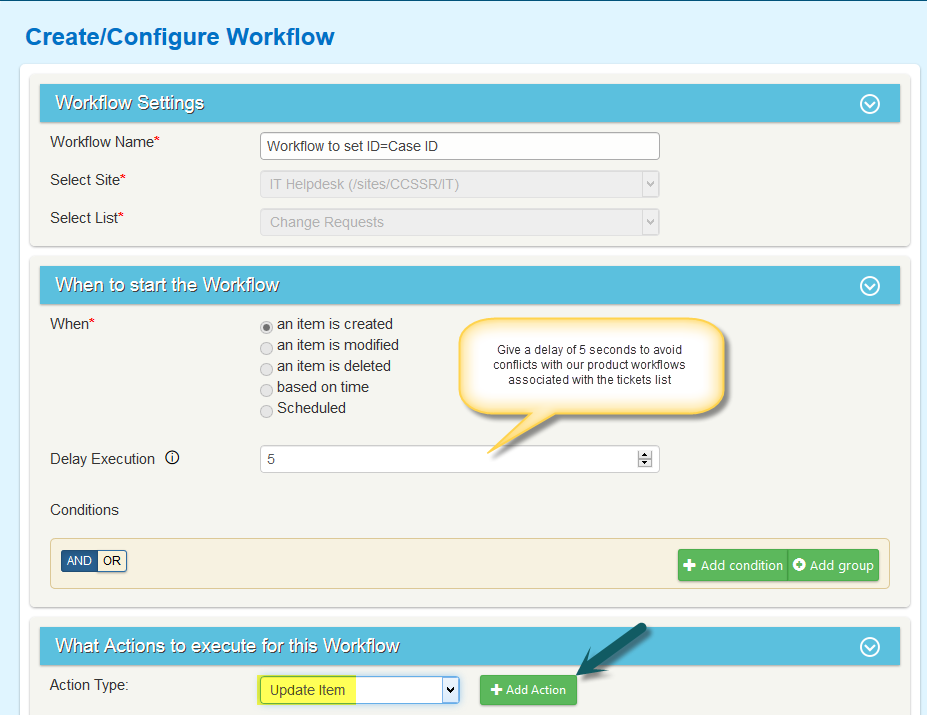
- Choose action type as “Update Item” and hit +Add Action button and configure as below
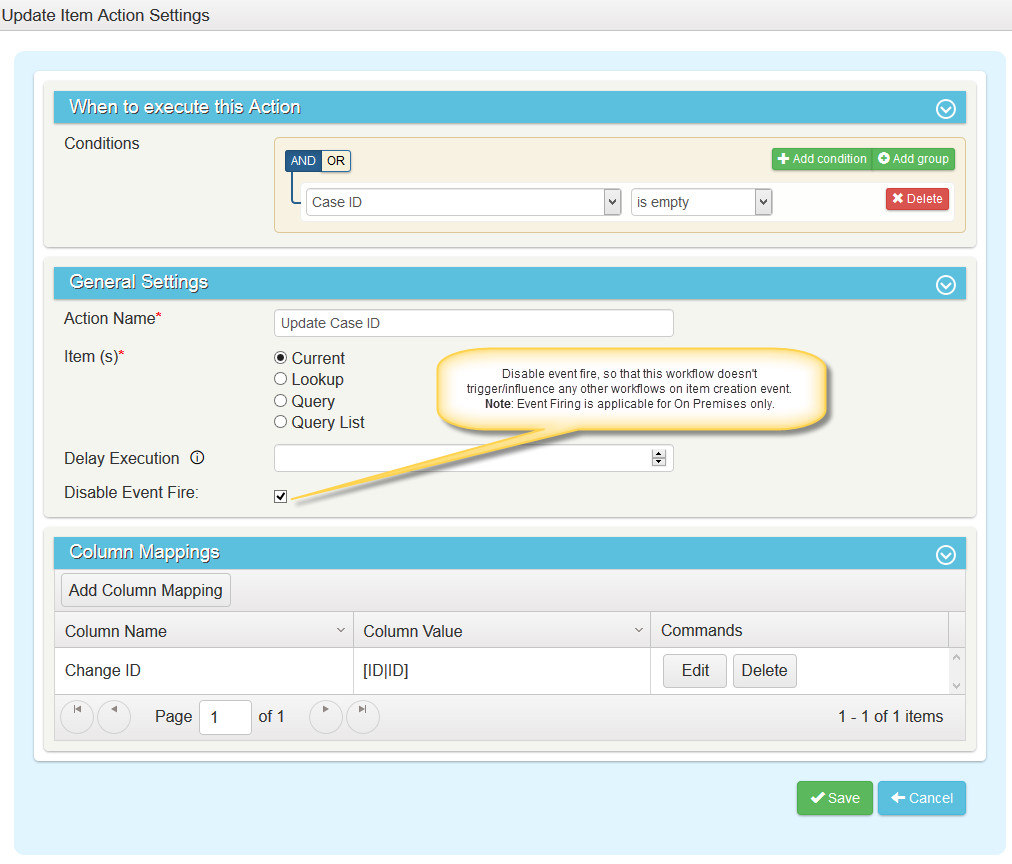
- Once these configurations are done, we need to hide this ‘Case ID’ column in new and edit Forms and show as Read only in display form. We can configure column permissions to achieve this as shown below for On premises that use Crow Canyon column permissions
- Please refer http://www.crowcanyon.info/manuals/webparts/tab_permissions.htm and http://www.crowcanyon.info/manuals/webparts/column-permissions.htm to know more about configuring the column permissions. Please refer sample configuration from below screenshots
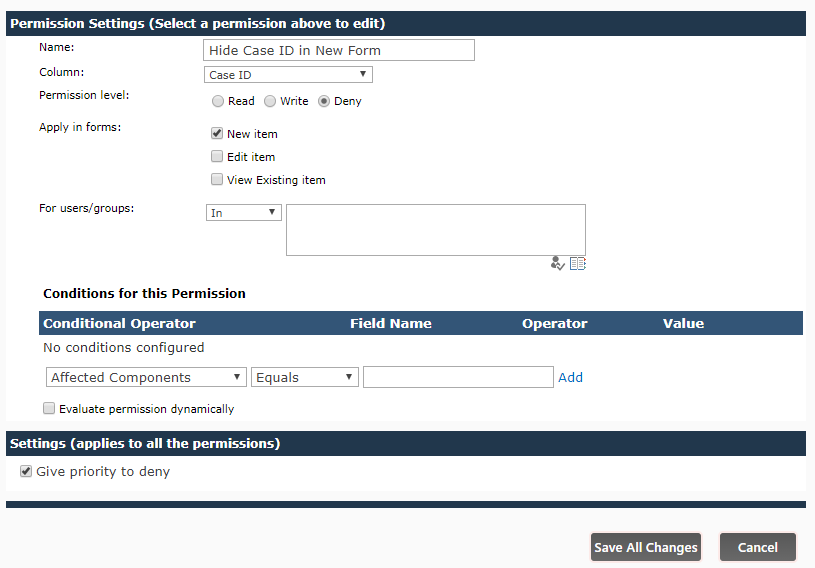
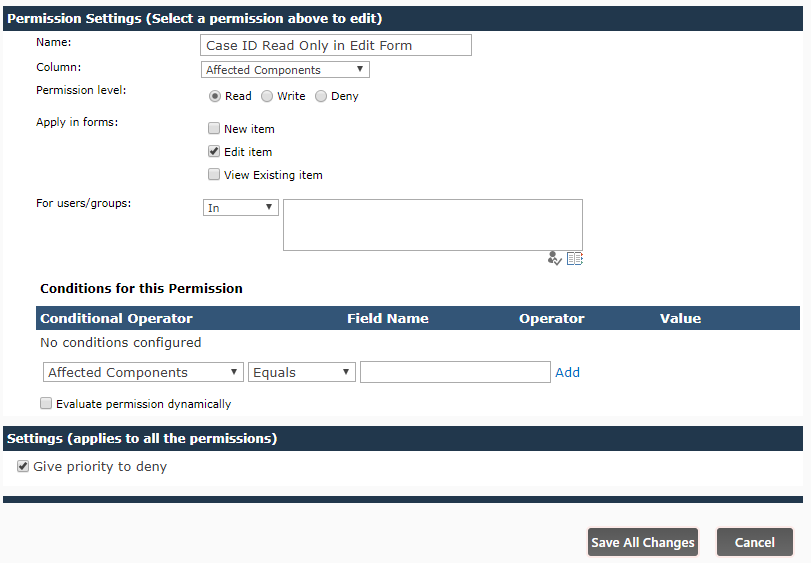
- For SharePoint Online, please refer https://www.crowcanyon.info/nitro/appmanual_v1/forms-manager.html if the forms manager is used in configuring the forms for our application
- Please refer https://www.crowcanyon.info/nitro/appmanual_v2/using-enhanced-list-forms.html if the NITRO forms are used in our application.
- Please note that the above steps will populate “Case Id” for new items only. If there are some existing items, we have to manually update the value of the Item “ID” to “Case Id” column using datasheet/quick edit mode


