Description
This article describes troubleshooting steps for possible issues in Employee Portal.
You can also refer this article for frequently asked questions about the Portal: https://www.crowcanyon.help/article/197
Case 1: Item Creation Failed
Applies to: SharePoint Online and On-premises (2013, 2016, 2019)
Employee Portal Version: Portal site created through ‘Power Portal App’
Issue: Error shown while creating Ticket from Portal – “Field or Property does not exist”:
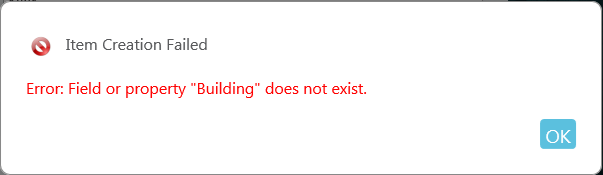
Cause: The cause of the issue is that number of lookup (lookups + person or group) columns in the tickets list exceeds the lookup threshold limit in Central Administration (fixed as 12 lookups in SP Online).
Fix: To avoid this, we can increase the lookup threshold limit in SharePoint Central Administration for the required web application for On-premises as described below.
SharePoint Online:
For SharePoint Online case or if you cannot increase the threshold then delete any unused lookup / person or group columns from the list. You can also convert lookups to NITRO Lookups fields to get around this threshold. See our manual for more information: https://www.crowcanyon.info/nitro/appmanual_v2/lookup-settings.html
SharePoint On-premises:
To increase lookup threshold in, follow below steps:
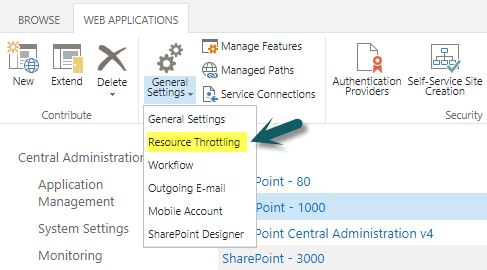
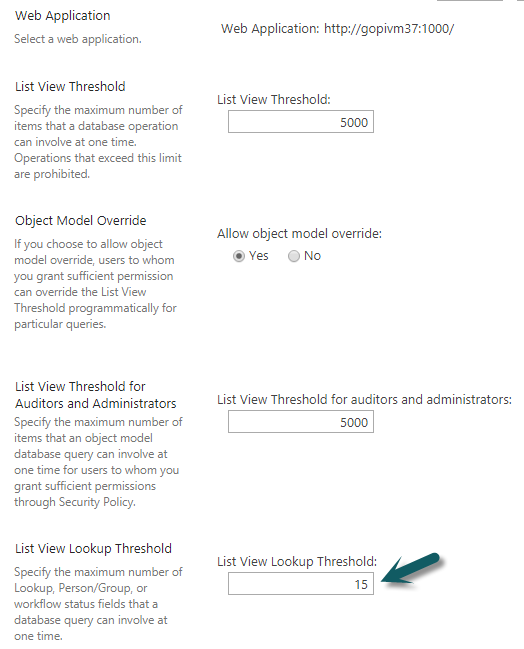
Go to SharePoint Central Administration –> Application Management –> Manage Web application –> Select the web application and click “Resource Throttling” from General Settings and increase the lookup threshold limit see screenshot below:
Case 2: “Portal Settings” button is not visible for users who are members of ‘Site Owners’ group
Applies to: SharePoint Online and On-premises (2013, 2016, 2019)
Employee Portal Version: Portal site created through ‘Power Portal App’
Portal settings button is shown to users having manage-web permissions on portal site. Generally, ‘Site Owners’ group has this permission, and this button is visible for users who are members of this group.
Issue: “Portal Settings” button is not visible even though user has Manage Web Site permissions (via Site Owners group).
Cause: This is an environment specific issue, and it is not clear why permission check is not giving the correct result for logged-in user.
Resolution: Configure new menu link for portal settings page with permissions to show only for owner’s group. This provides similar functionality as the standard portal settings button.
Instructions
- Go to “Configure Portal Settings” page by navigating to below URL:
URL: ##Portal Site URL##/SitePages/AddEditSettings.aspx
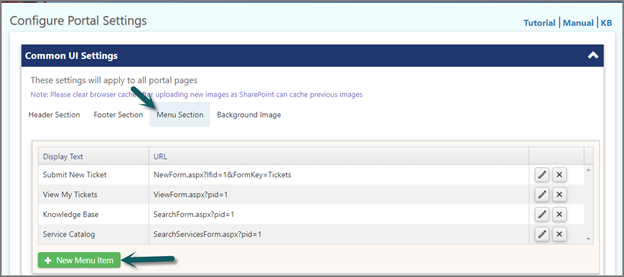
Example: https://contoso.sharepoint.com/sites/Helpdesk/IT/Portal/SitePages/AddEditSettings.aspx - Navigate to “Menu Section” tab under ‘Common UI Settings’ section and click “New Menu Item” as shown below:
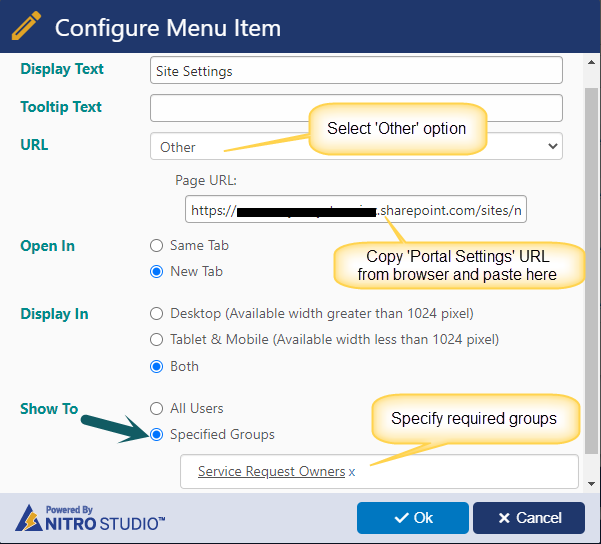
- Configure new menu item link and save the settings. URL to be used is same as in step #1 above.
Sample Output

Case 3: User gets a prompt for credentials on clicking ‘Service Catalog’ link in the Portal
Applies to: SharePoint On-premises (2013, 2016, 2019)
Employee Portal Version: Portal site created through ‘Power Portal App’
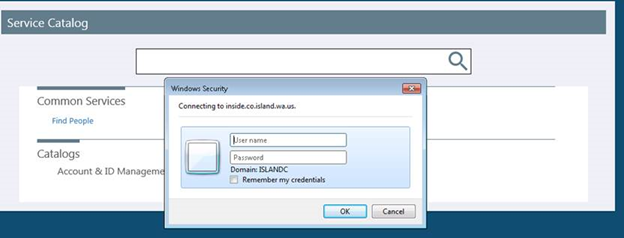
Issue: User gets a prompt for credentials on clicking ‘Service Catalog’ link in the Portal.
Cause: This issue can happen if user does not have ‘Browse Directories’ permission on root site of the site collection.
Resolution: Grant ‘Browse Directories’ permission on root site of the site collection for end users group.
Instructions
Standard “Read” permission level does not contain this permission. So, we need to create a custom permission level and then grant this permission to end users group.
- Create a custom permission level.
- Grant newly created custom permission level to end users group.
Detailed steps
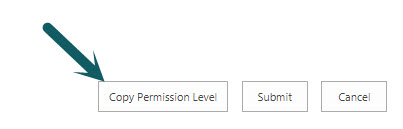
- Navigate to root site of the site collection (in which portal site exists) -> Site Settings -> ‘Site permissions’ under ‘Users and Permissions’ section -> Permission Levels -> click ‘Read’ permission level -> click ‘Copy Permission Level’ and create a new permission level as shown below:
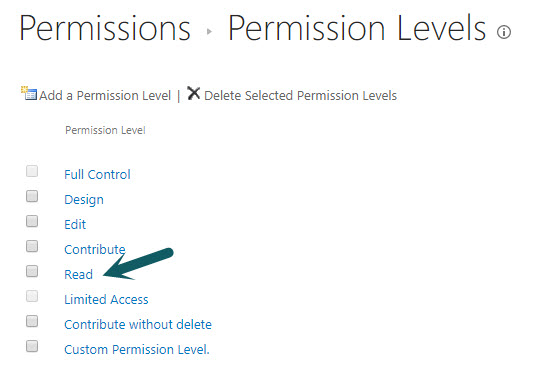
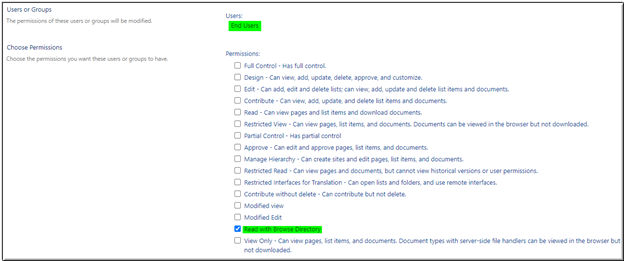
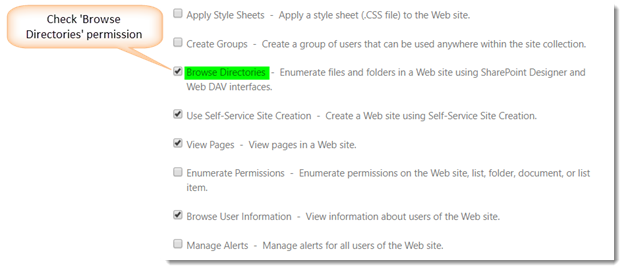
Name the new permission level as ‘Read with Browse Directory’ and select the ‘Browse Directories’ permission.
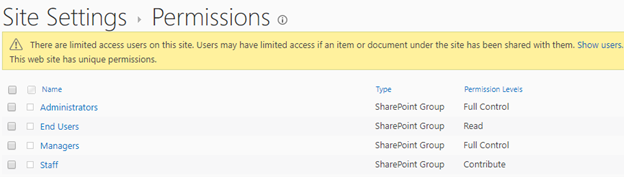
- After creating the new permission level, assign it to end users group. In this example, we have assigned custom permission level to ‘End Users’ group.
Go to ‘Site permissions’ page -> select the end users group and click ‘Edit User Permissions’ from the ribbon.
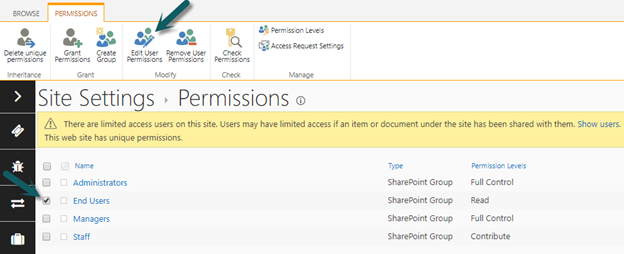
Select the new permission level ‘Read with Browse Directory’ and save settings.