Applies to: SharePoint online and On-Premises
Description
Every SharePoint list has three forms: New, Edit and Display. These are used to create a new item in list, edit an existing item and see the details of an existing item respectively.
In NITRO terminology a combination of these three is called a ‘Form’. NITRO allows multiple ‘Forms’ on a list with each having its own set of form features such tabs/sections, columns, validations, permissions, lookup and associated list settings, e-signature etc. That is, on the same underlying list and columns we can have different types of forms as per the business requirement.
Within each ‘Form’, we can use a single configuration to define the New, Edit and Display forms. If there are slight variations then column permissions can be used to differentiate the forms. For example, a tab can be hidden from the New form by using the condition ‘ID is Empty’ if rest of the tabs and fields are same for all three. Alternatively, we can create separate configuration for New/Edit/Display forms for the same ‘Form’ if there is significant difference in the form layout or functionality.
For New/Edit/Display, we can use the NITRO system designed form that just includes all the visible fields in a simple layout or use the custom design to define the form as required with all the features mentioned above.
In this article, we have described different possible scenarios and also sample use cases.
Typical Scenarios
| S. No. | Form Configuration | Description |
|---|---|---|
| 1 | Single ‘Form’ with same form for New/Edit/Display and using Custom Design | This is the most common scenario where standard SharePoint forms are replaced with NITRO forms for enhanced functionality. It is used where list items are essentially of same type and can be managed with a single form. If any variation is required on the form based on the item data, then that is done using column and tab level permissions |
| 2 | Single ‘Form’ with same form for New/Edit/Display and using System Design | This can be used for simple lists with few fields. Here system designed simple form is sufficient and extra features are not required. This can be used in cases like Associated Items. For example when creating associated Tasks for a Ticket |
| 3 | Single ‘Form’ with different form for New/Edit/Display and using Custom Design | If there is significant difference between New/Edit/Display forms then it is better to design separate forms. Advantage of this approach is that each form can have a totally different set of form features (like tabs, columns, permissions etc.). Though, this can be achieved with use of conditions in column and tab permissions, having separate forms gives more flexibility and keeps the form configurations simple. However, if you make a change in say New form and need the same change in Edit form as well, then you will need to change configurations for both forms separately |
| 4 | Multiple ‘Form’s with same/different form for New/Edit/Display and using Custom Design | This is required when same list is used to store different types of items. These items will have few common attributes and many different attributes that will depend on the type of item. For e.g. in a Request Management solution, same ‘Request’ list is used to store substantially different types of requests like a request for name correction vs. an related to salary. Here different set of New/Edit/Display forms can be created for different types of requests. Layout and columns shown in the forms will be as per the data required for the specific request types. Within each request type, same or different forms can be used for New/Edit/Display depending on how much variation is required in these forms. Please note that, NITRO Forms automatically uses the correct form to edit and display the item depending on which form was used to create the item |
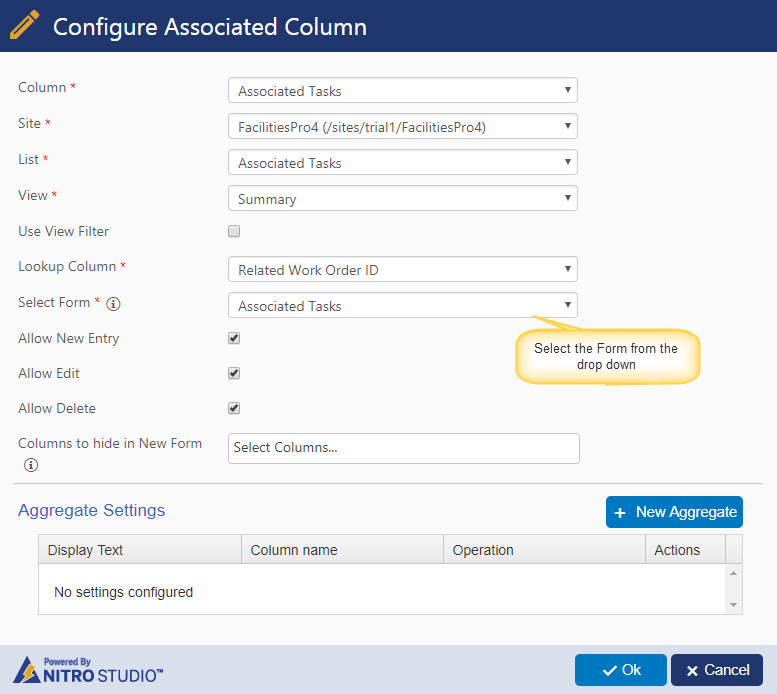
| 5 | Associated Items | NITRO Forms support showing the associated or linked items on the Form. For example, for a Task list with lookup to Request list, the Request item form can show all the related Tasks associated with current request item. Also, new Tasks can be created for current item and existing ones edited. If you need a separate form for Tasks list for this scenario, then configure a new Form for Task list with required configurations and specify it in the associated item settings of Request list form. |
Important things to note
- Every list has default Form with the name of the list. In Nitro/Portal forms, list items will be opened in the same Form that is used to create them
- Every Form has its own unique identifier. This unique identifier is saved in the item when it is created from the particular New form. When opening the item in Display/Edit form, this identifier is used to open in corresponding form
- In case there is no Form with the saved identifier, then default Form is used to open the item (scenarios like Form is deleted after creating some items using that Form)
- Please note that for a list, we need to use same Form name in Portal and back end NITRO Forms settings to ensure that the end users and technicians are seeing the correct forms
- If we create an item in Portal with a form key which is not configured in back end forms for same list, then in back end site item will be opened with default Form
Create multiple ‘Forms’
To create multiple ‘Forms’, go to Nitro Forms/Portal Forms –> “Manage Forms” button in ribbon –> Click “+New Form” button to create new Form

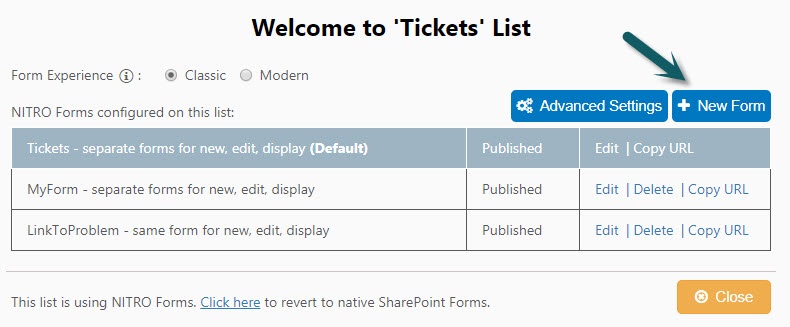
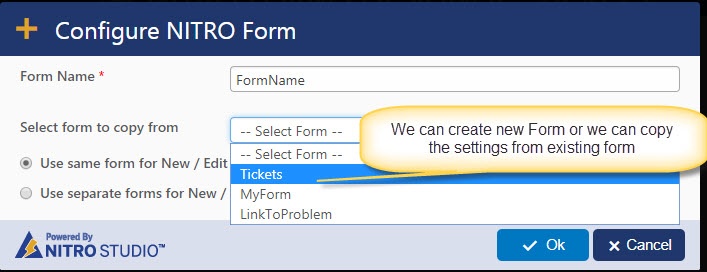
After creating new Form, we can customize the forms (New/Display/Edit) as per the requirement.
Different areas to consider the form selection to open an existing item when there are multiple forms
1. Portal list views
In Portal List view page configurations, we can select the Display form and Edit form page settings in page actions sections.
Go to Portal Site –> Portal Settings –> Portal Pages –>List View Page
For example we have two Forms G1 and G2. If we create item using G1 Form new form, the item will be always opened with G1 Form display/edit forms irrespective of the configurations in view settings. This view settings will be considered only if the G1 related display/edit forms are not available. Also if the ticket is created in back end and if we are opening it from Portal then also the configured Form will be opened if the similar Form key does not exist in portal forms.
2. Edit button in display form
Edit button from item display form will open the default Form that is used for created them.
3. Associated Items
We can select the Form from associated item column settings (see screenshot below).
Go to Portal Settings –> Portal Forms –> Edit the list forms –> Associated item Settings
How to create new item links for different forms in portal (quick links, top links) and back end (quick launch)?
In Portal Site
Portal Top link creation
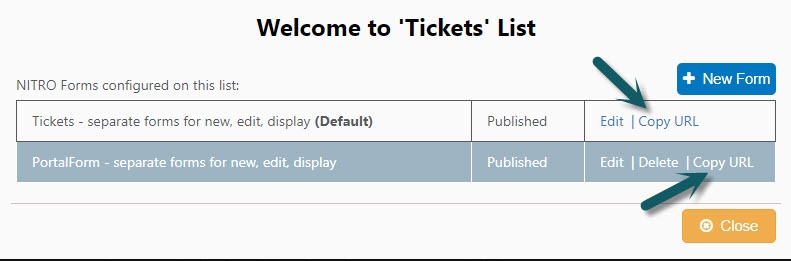
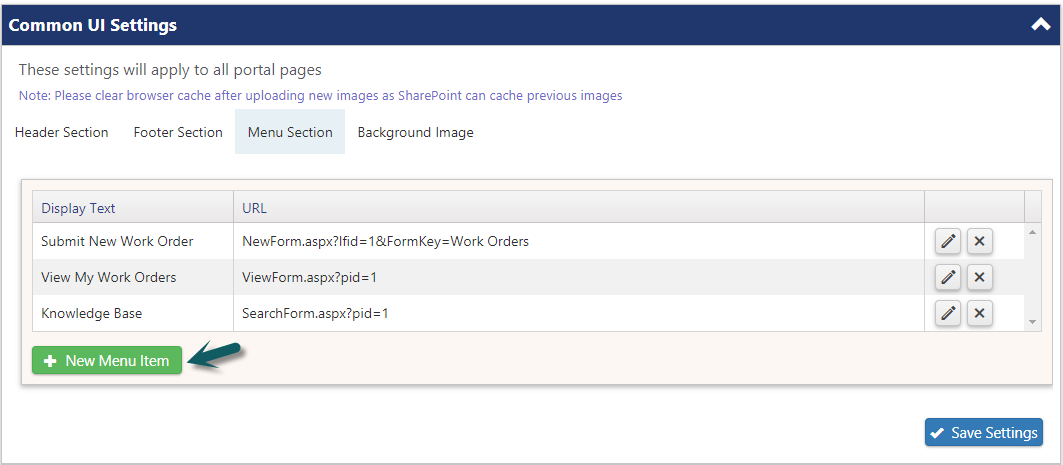
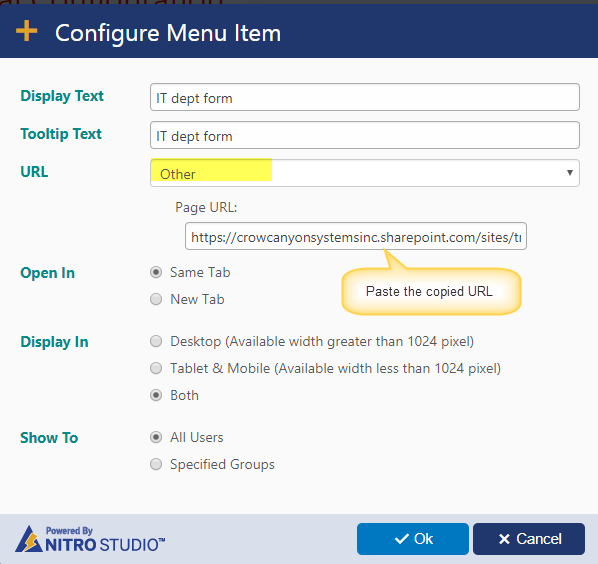
1. Copy the new Form URL and create links in Menu sections
To copy the new Form URL, Go to Portal Settings –> Portal Forms –> click on “Manage Forms” in the ribbon –> click on copy URL as shown below
Next, go to Portal Settings –> Common UI Settings –> New Menu Item link –> Select URL type as “Other” and paste the copied URL and save settings
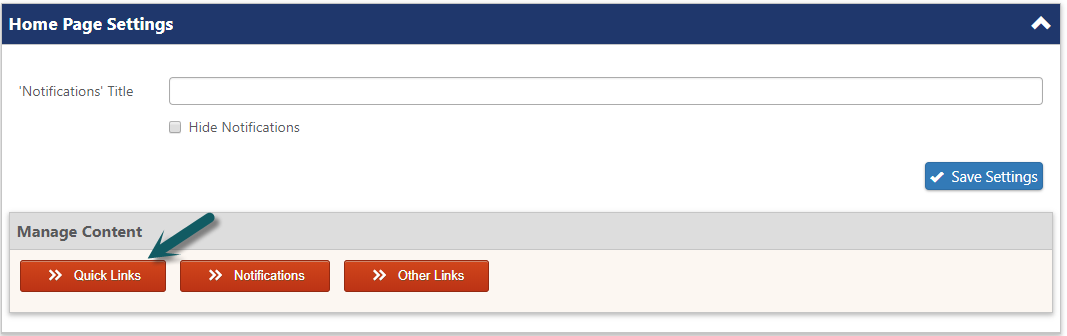
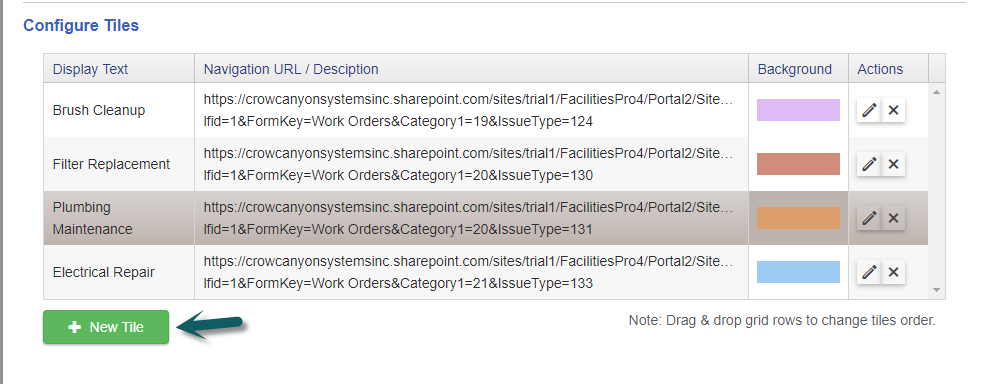
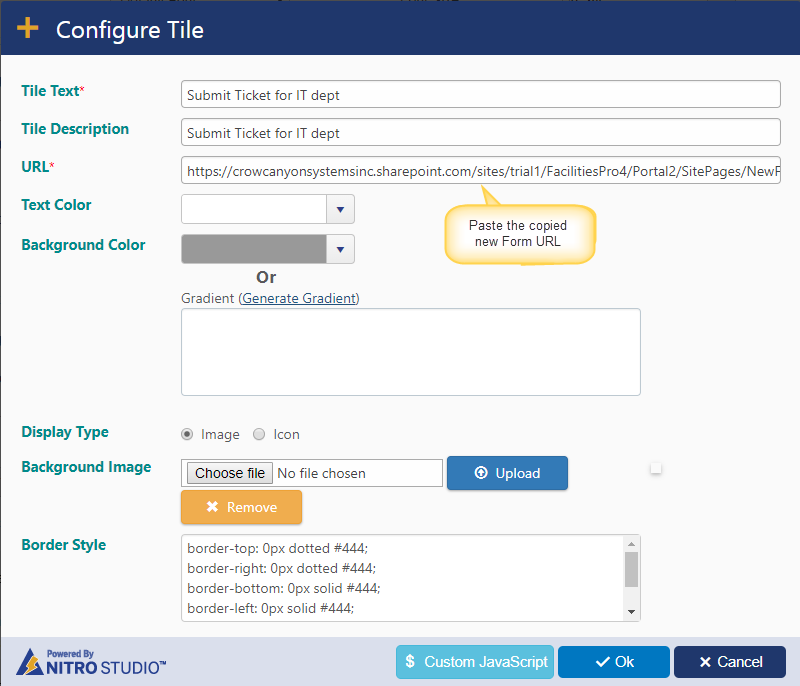
Quick Tile configuration
Copy the new Form URL, refer instructions in Portal Top link creation section to copy the desired form URL
Go to Portal Settings –> Home page settings –> Quick Links –> Click on New Tile under Configure Tiles section –>
In Back end site
Copy the new Form URL and Configure the URL in Quick Launch
Go to List Settings –> Crow Canyon Nitro Forms –> Select the form under “Select a form to design” –> Forms Settings and copy the URL
Next, create new quick launch link
Go to Site Settings –> Quick Launch links –> Configure the new link
How to make a form as default Form?
By default any list come up with one default Form with the name of the list and there is no way to make other Form as default.
How to configure such that “Use a specific form to create item from Crow Canyon Custom Actions but the created item should always be opened with default form”?
Go to back end site –> List Settings –> Crow Canyon Custom Action settings –> Edit the Custom Action –> Edit the Add Item action and unselect the check box “Use this Form to display/edit item from the site” and save the settings such that irrespective of the Form used to create the item from custom action, it always opens with default Forms.
Sample Use Cases
1. There are three different departments and each department has its own set of columns in addition to common columns. To make the separation of departments, we can configure multiple forms
Use Crow Canyon NITRO Forms and configure different desired Forms.
2. How to provide the validations ability in Crow Canyon Custom Actions?
In Custom Actions, it is not possible to make the column as required. If we would like to make the column as required in Custom actions (Update Item actions), we can configure new Form and add the required columns to form and set the column as required in the form. Select the configured Nitro form in Custom Actions update item action. Similarly, we can configure any desired validations in the new Forms and invoke the form from custom action.
Go to Custom Actions settings –> Edit Update list Item action–> Select the configured Nitro form with desired validations in the settings.