Applies to: SharePoint Online
Description
As part of the standard standalone Crow Canyon Purchasing application, it is configured such that “Received Quantity” can be updated from the Purchase items and once all the purchase items are received then Purchase Order status sets to “Fulfilled” automatically. If the Crow Canyon Assets module is also purchased, to integrate the Purchasing application with Assets application, follow this article to configure the integration.
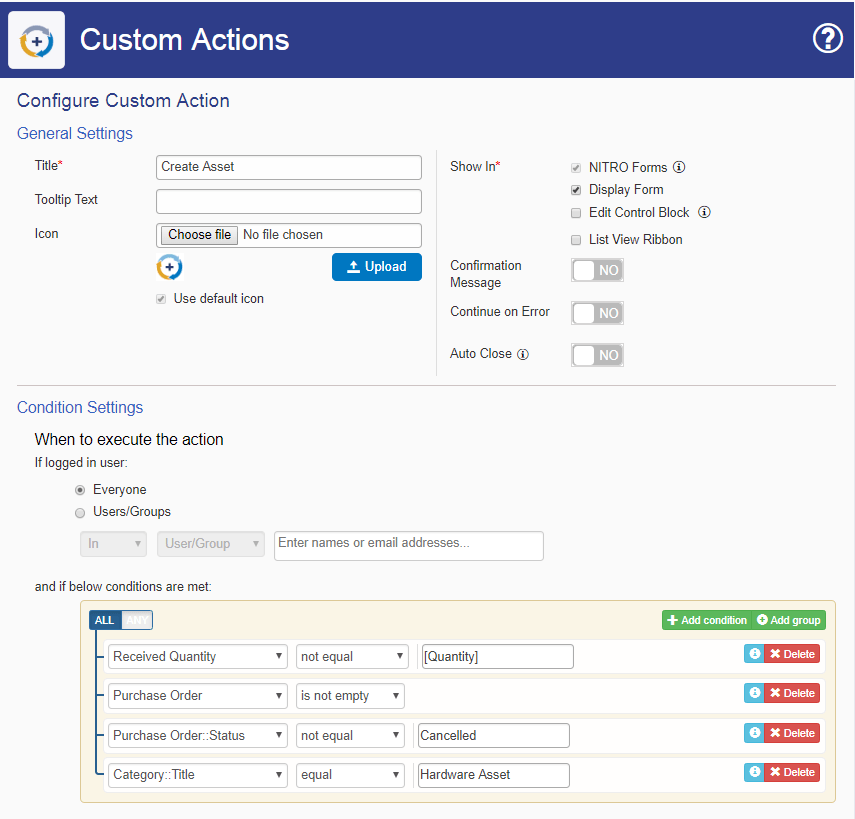
This article describes the steps to configure “Create Asset” custom action when the Purchase Category is “Hardware Asset” in Purchase Items list form. This Create Asset action auto links the Asset with the corresponding Purchase Order and also increases the “Received Quantity” by one in purchase item every time when a new Asset is generated from the Purchase Item and status of Purchase Item (“Partially Received”) and Purchase Order (“Partially Fulfilled”) will be updated automatically. Once the Assets are created for all the purchase items it sets the Purchase Order status to “Fulfilled”.
Pre-requisites
- Crow Canyon standard Purchasing and Assets applications
Summary of Steps
- Configure the required schema
- Create ‘Related Purchase Order’ NITRO lookup column in the Assets list.
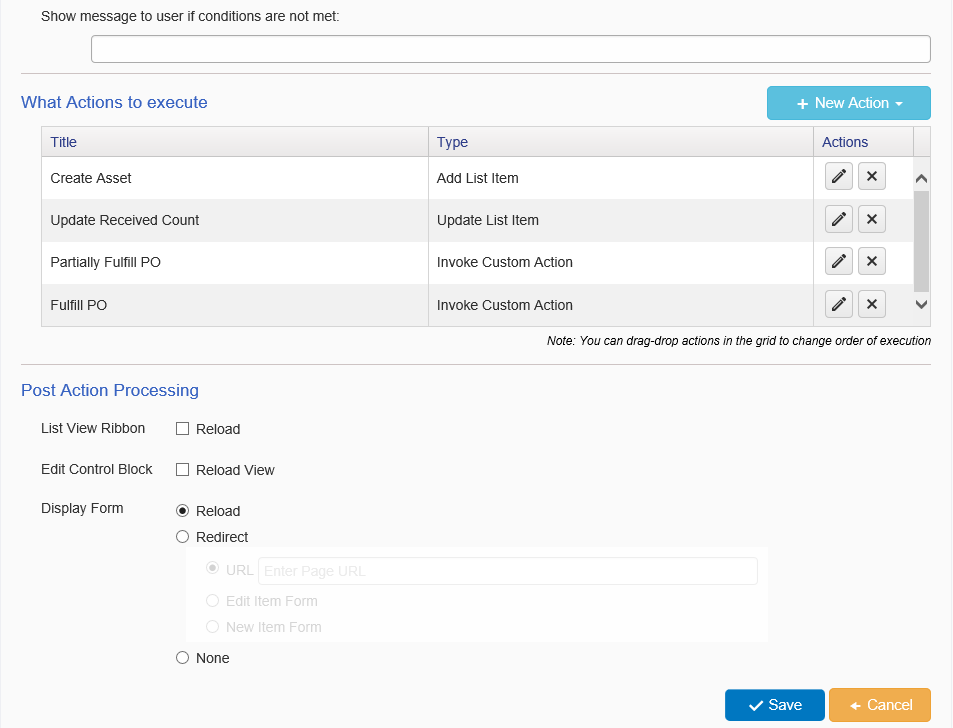
- Configure “Create Asset” Custom action in “Purchase Items” list
- Action1: “Add Item” action to create Asset
- Action2: “Update Item” action that increases the “Received Quantity” on every Asset creation
- Action3: Invoke “Partially Fulfill PO” custom action on Purchase Order
- Action4: Invoke “Fulfill PO” custom action on Purchase Order
- Update “Update Received Quantity” custom action in Purchase Items
- Standard application comes with “Update Received Quantity” which will update the received quantity in Purchase items for all categories. Update this custom action to show for all the purchase categories other than Hardware Asset since we have created “Create Asset” custom action for the Hardware Asset type purchase categories.
Detailed Instructions
1. Configure the required schema
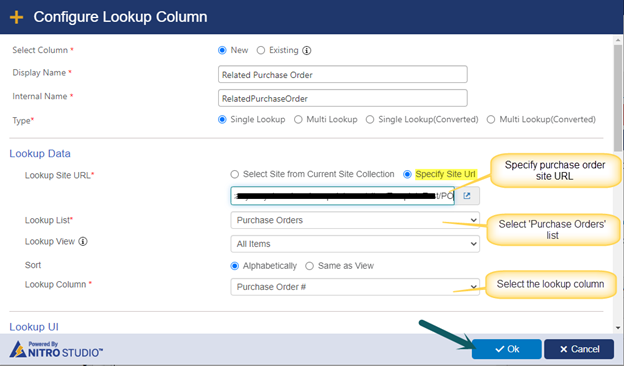
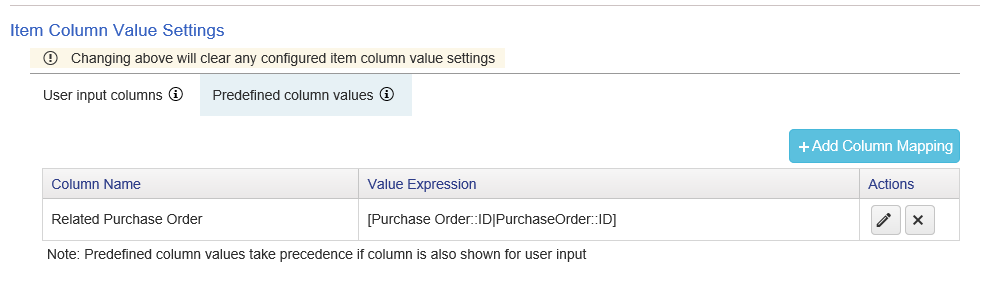
a. Create ‘Related Purchase Order’ NITRO lookup in ‘Assets’ list
Navigate to Assets site –> Application Administration –> Configure Lists –> ‘Configure Assets’ –> ‘Crow Canyon NITRO Forms’ –> Click ‘Create Column’ button from ‘FORM’ ribbon –> Configure ‘NITRO Lookup Column’ as shown below:
2. Configure “Create Asset” custom action in “Purchase Items” list
Go to Purchase Order site, go to “Application Administration”, click “Configure Purchase Items” under Configure Lists section. Click on “Crow Canyon Custom Actions” and configure the actions as shown in below screenshots.
Action 1: “Add Item” action to create Asset
Add New Action of type “Add item” as shown in below screenshot.
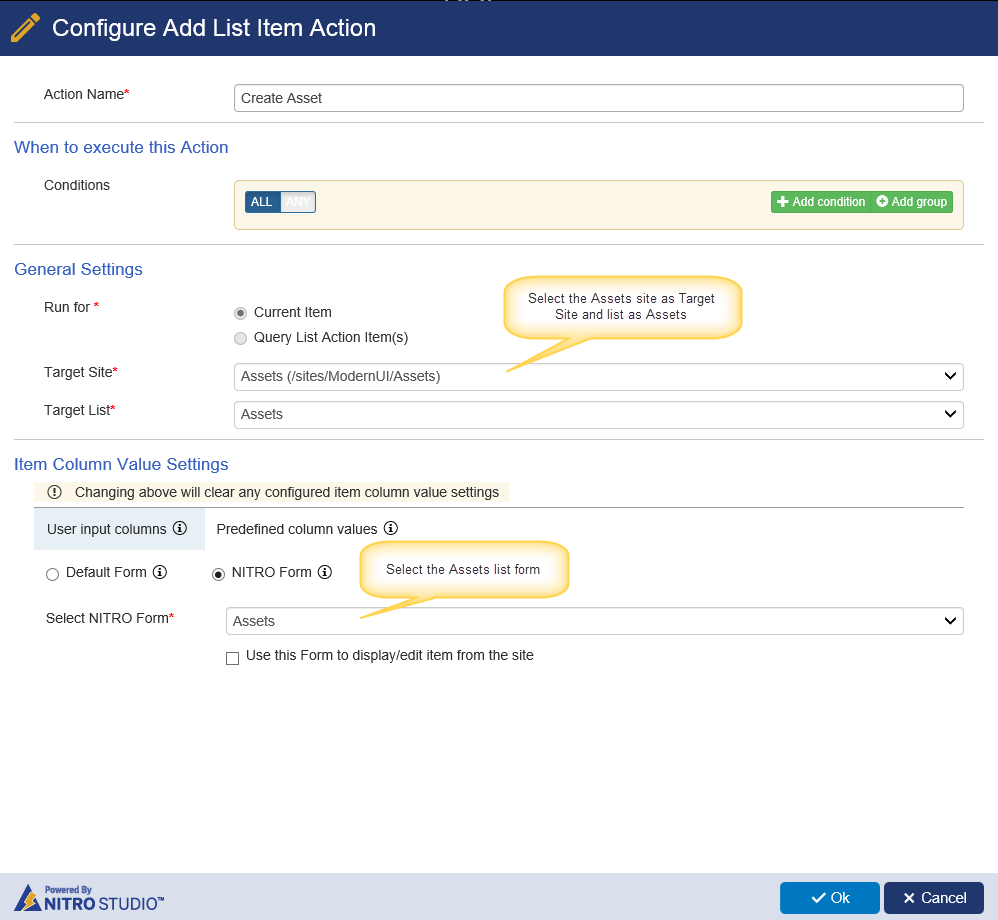
Predefined column values
Action 2: “Update Item” action that increases the “Received Quantity” on every Asset creation
Add New Action of type “Update item” as shown in below screenshot.
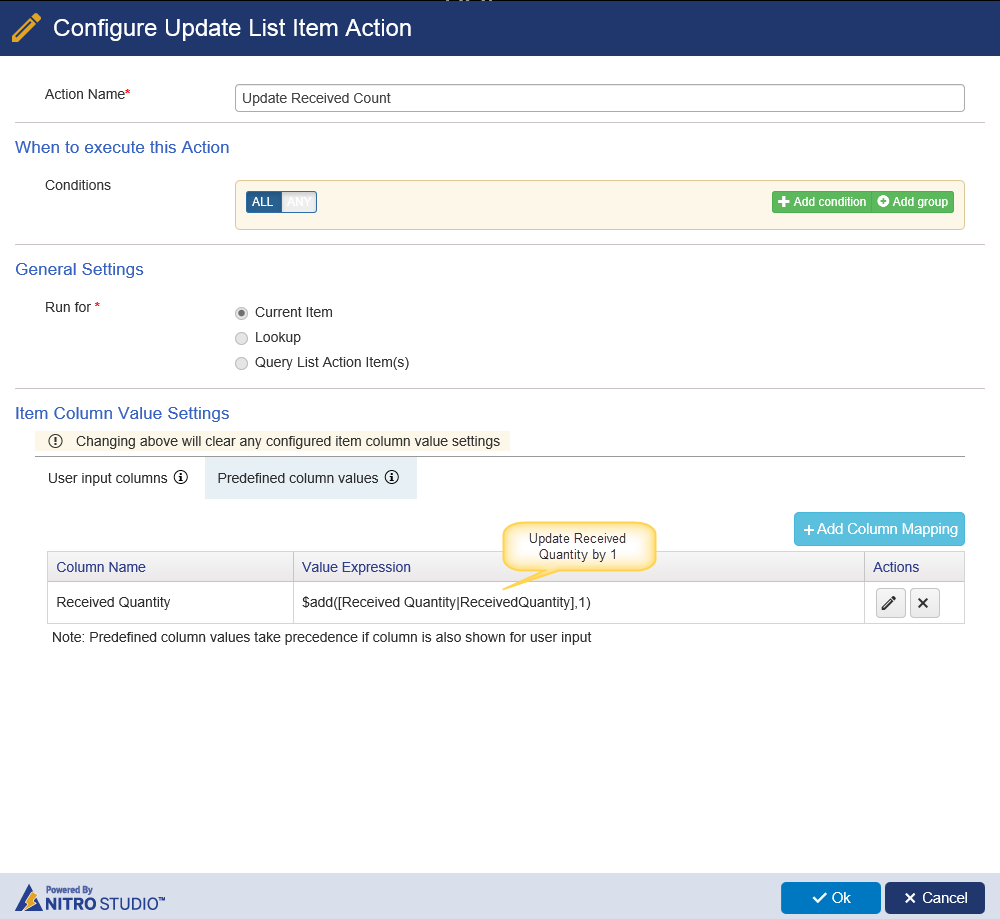
Value Expression: $add([Received Quantity|ReceivedQuantity],1)
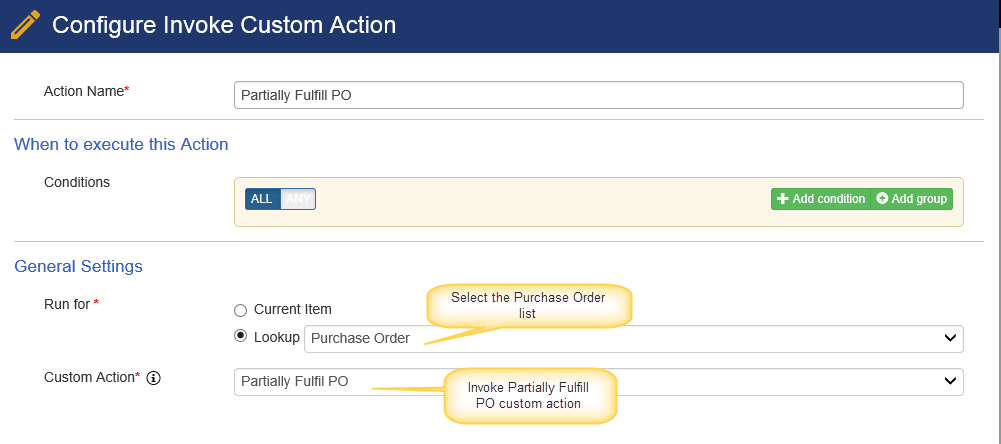
Action 3: Invoke “Partially Fulfill PO” custom action on Purchase Order
This custom action sets the status of the Purchase Order to Partially Fulfilled when any one of the related Purchase Item’s Received Quantity is not equal to the quantity ordered.
Note: By default “Partially Fulfill PO” custom action comes with standard application installation and there is no change required in this action. We can just invoke it from this action 3 that we are configuring now.
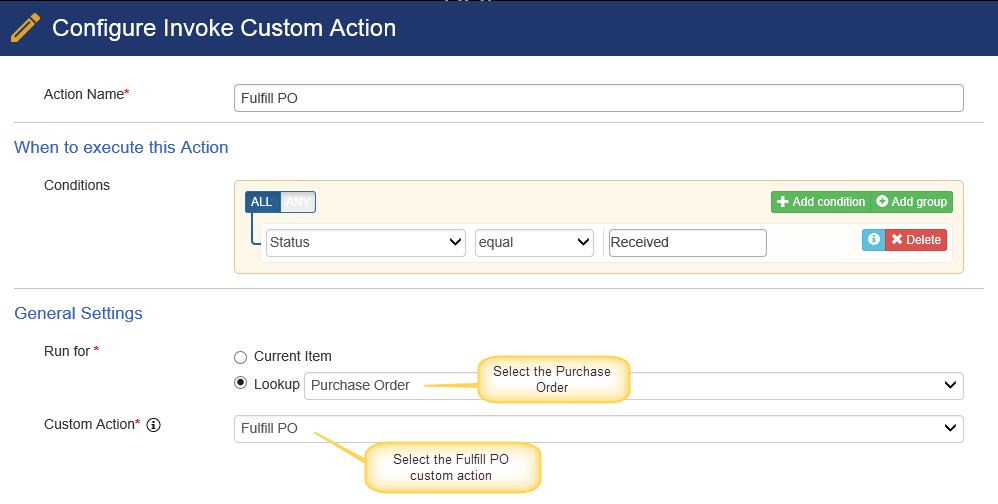
Action 4: Invoke “Fulfill PO” custom action on Purchase Order
This custom action sets the Purchase Order status to “Fulfilled” when all the related Purchase Items are received.
Note: By default “Fulfill PO” custom action comes with standard application installation and there is no change required in this action. We can just invoke it from this action 4 that we are configuring now.
3. Update “Update Received Quantity” custom action in Purchase Items
Go to Purchase Items list –> List Settings –> Crow Canyon Custom Actions –> Edit the “Update Received Quantity” custom action and add condition like shown below.

Note: No changes are required for the actions