Applies to: SharePoint Online and On-Premises
Description
Crow Canyon Service Request application has auto-assignment feature that works based on Category and Issue Type of the Ticket. Sometimes, we may want to use a different criteria for auto-assignment. For example, for the same Category and Issue Type different staff need to be assigned based on the requester’s location. Here requester’s location can be read from AD/User profile and populated automatically in the Ticket by NITRO Forms.
This article describes the steps to auto-assign Tickets based on a different criteria i.e. combination of Category, Issue Type and Requester Location column values. You can use a different combination of columns as per your business process.
Please note that this article assumes that Requester Location column value is available on the Ticket form. Using NITRO Forms user information filler settings, it will be auto-filled based the SharePoint logged-in user. And along with location other attributes like email, phone and department can also be auto-filled. Or these attributes can be entered manually in the Ticket.
Summary of steps
- Create a list to store mapping of Category, Issue Type and Location to the user to whom Ticket should be assigned
- Add entries to the mapping list created in above step
- Disable standard auto-assignment feature
- Configure auto-assignment functionality using Crow Canyon NITRO Workflows
Detailed Instructions
1. Create a list to store mapping of Category, Issue Type and Location to the required Assigned Staff
Create a mapping list called “Assignment Utility” with the list schema as described below. This list is used to maintain the Assigned Staff for all the possible Category, Issue Type and Location combinations. Note that you can give a different name to this list as required.
Subsequent steps will use this list to read Assigned Staff from this list based on the Ticket Category, Issue Type and Requester Location and then assign the Ticket to the corresponding staff.
Category
Internal Name: Category
Display Name: Category
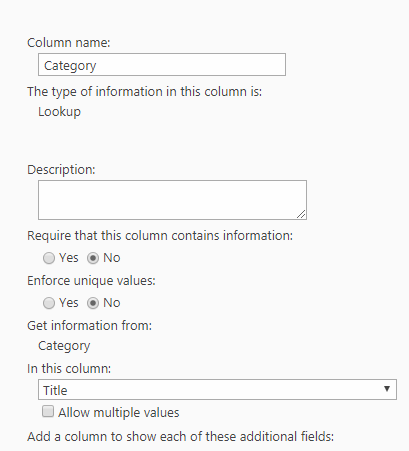
Issue Type
Internal Name: IssueType
Display Name: Issue Type

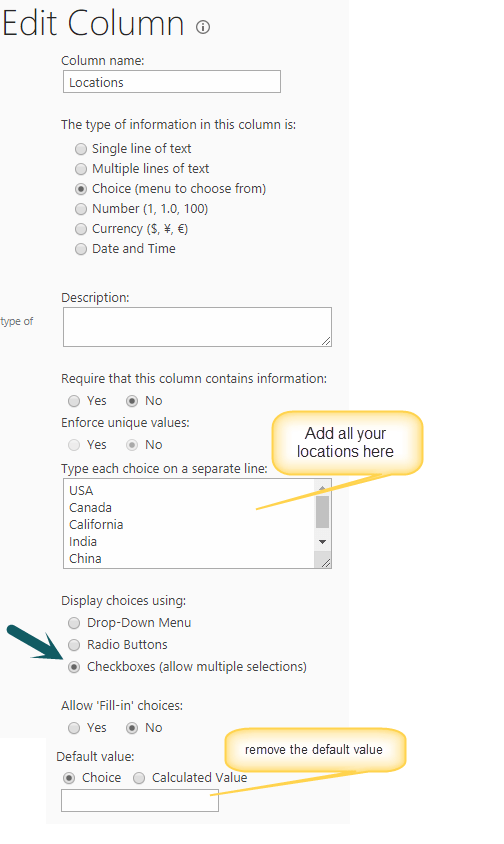
Locations
Internal Name: Locations
Display Name: Locations
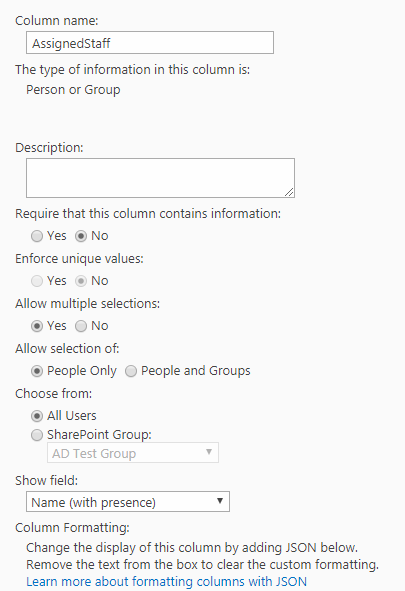
Assigned Staff
Internal Name: AssignedStaff
Display Name: Assigned Staff
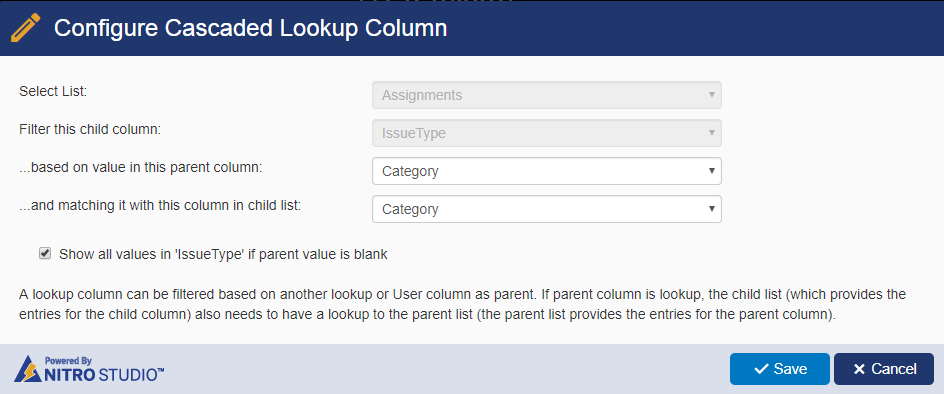
2. Configure cascading functionality between Category and Issue Type columns
Issue Type values need to filtered based on selected Category. After creating the columns, please follow below steps for this:
If you are using SharePoint Online:
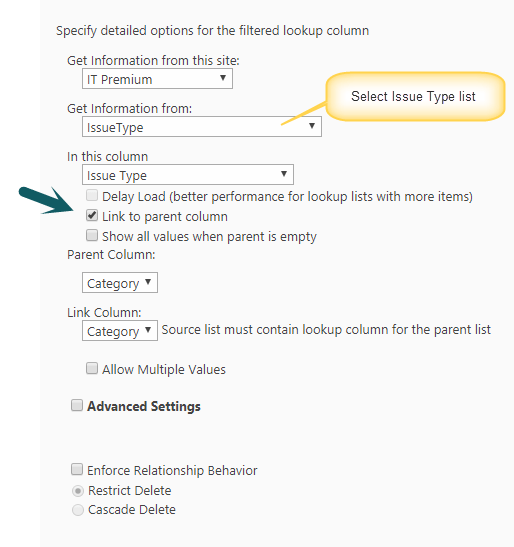
Go to Application Administration -> Crow Canyon NITRO apps –> Cascaded Lookup and configure the lookup settings as shown below:
If you are using SharePoint On-Premises:
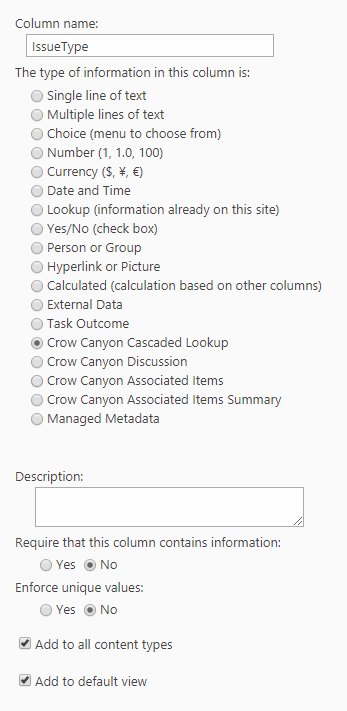
Go to Site Contents -> Assignment Utility list -> List Settings -> Create column -> Create Issue Type cascaded lookup column like shown below.
Note: If you have already created the “Issue Type” lookup column, delete the column and then recreate with Crow Canyon Cascaded lookup column like shown below.
3. Add entries to the mapping list (i.e. Assignment Utility)
Create items for every possible Category, Issue Type and Requester Location combination with the associated Assigned Staff.

3. Disable standard auto-assignment feature
Go to Issue Type list and remove Assigned Staff column values for all the Issue Types.
4. Configure auto-assignment functionality using Crow Canyon NITRO Workflows
Note: Crow Canyon Workflow Manager functionality is same in both SharePoint Online and On-premises and there are only minor differences in the UI. Below images are from SharePoint online and you can follow the same even if you are using SharePoint On-premises.
Create a workflow on item creation event in Tickets list as shown below
Action 1:
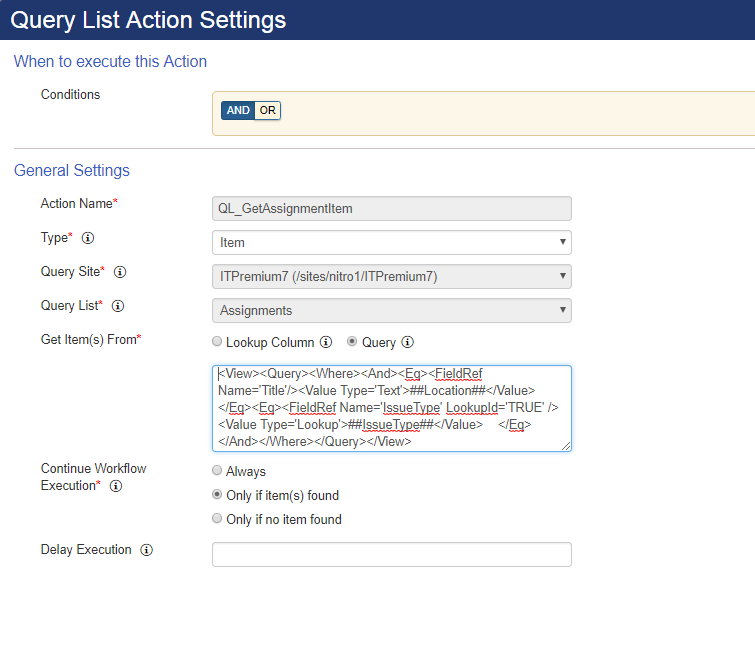
Create a Query list action to get the ‘Assigned Staff’ value from Assignment Utility list based on the selected Requester Location, category and Issue Type combination.
Note: We do not need to consider the Category in the CAML Query as the cascading feature is already configured in the assignment utility.
<View>

<Query>

<Where>

<And>

<Contains>

<FieldRef Name='Locations'/>

<Value Type='Choice'>##RequesterLocation##</Value>

</Contains>

<Eq>

<FieldRef Name='IssueType' LookupId='TRUE' />

<Value Type='Lookup'>##IssueType##</Value>

</Eq>

</And>

</Where>

</View>

</Query>
Note: In the CAML query, please modify the “RequesterLocation” (highlighted) with internal of the “Requester Location” column in “Tickets” list. Go to Tickets list -> List Settings -> Edit “Requester Location” column and find the internal name at the end of the URL.
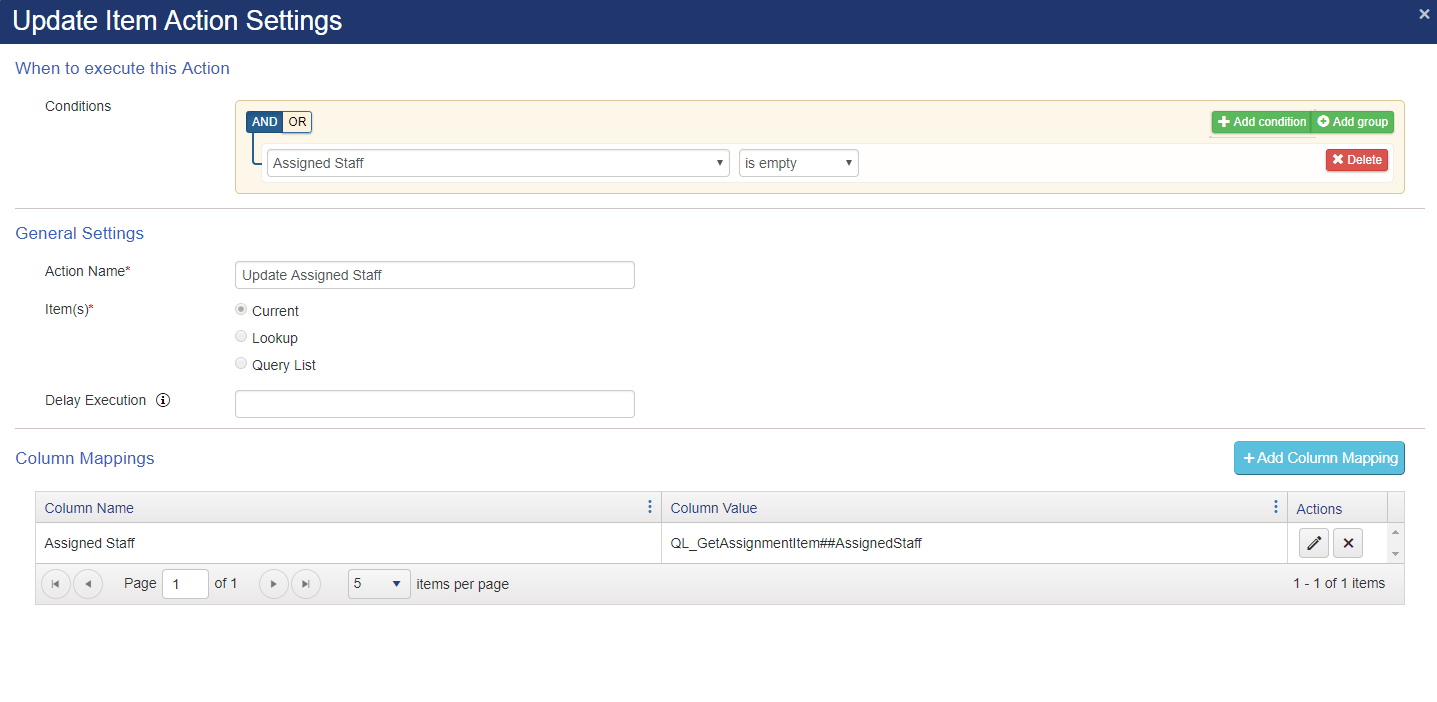
Action 2:
Configure an update item action to assign the tickets
Column Mapping: QL_GetAssignmentItem##AssignedStaff
Note:
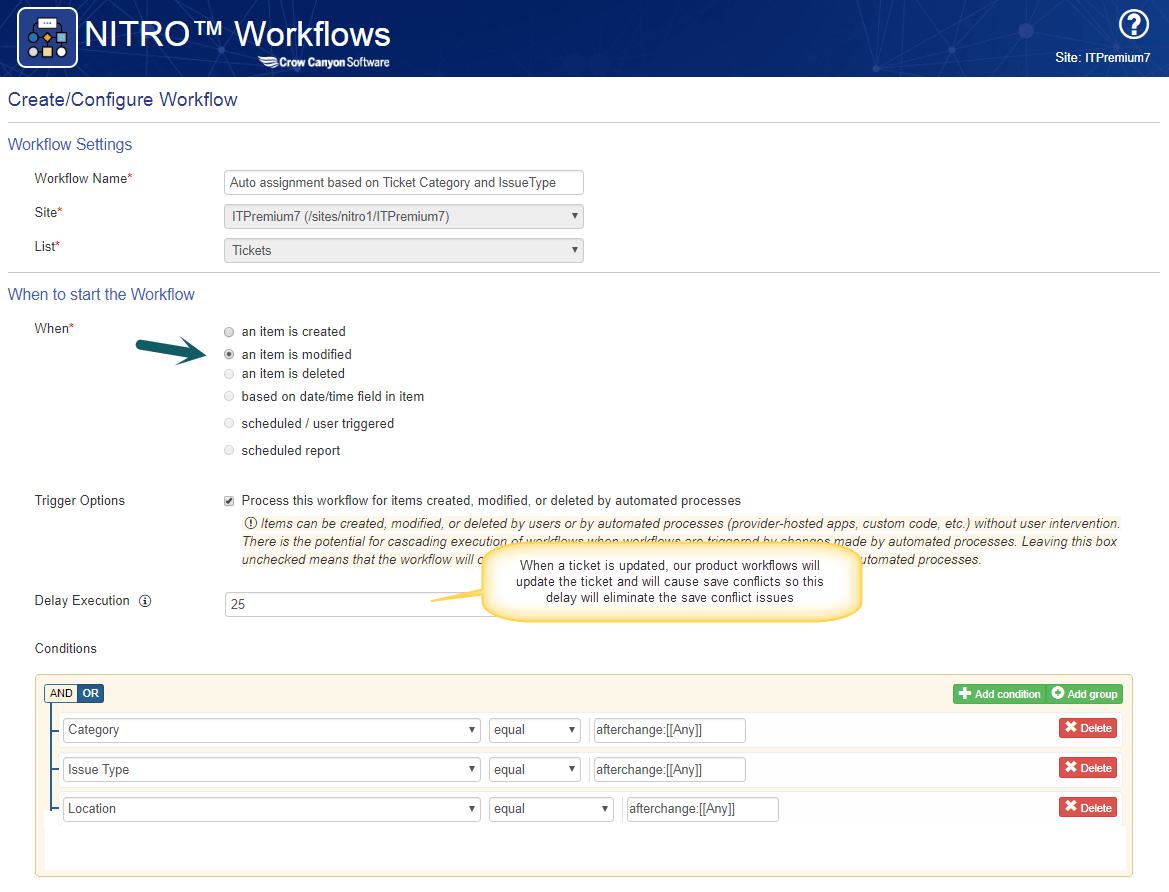
If we would like to assign (or re-assign) the Ticket when the Ticket’s Category or Issue Type or Requester Location is updated then configure the workflow on item update event as shown below:
Workflow Actions are same as above.