Applies to: SharePoint Online and On-Premises (NITRO)
Description
This article describes configuring a two-level approval process using Crow Canyon Custom Actions. This article considers the list schema as described below (Tickets list, Category list, Approver Definition list and Approval Tasks). Same approach can be used to configure approvals in any application like Purchase Order, Request Management etc. Also, if more approval levels are required then similar instructions can be followed to add additional levels.
In this example, if a Ticket list item is created with a particular category for which approval is required then approval flow is initiated. Approver is assigned a task and a notification is sent so he/she can approve/deny the approval request. Once the approver takes the decision by updating the task, Ticket approval status is updated and Ticket requester is notified.
Summary of steps
1. List Schema
- Category list
- Create Approver Definition list
- Create Approval Tasks list
- Create required fields in Tickets list
2. Configure Custom Actions for approval process
Summary of steps is given here, detailed steps are in this article
Tickets list
Submit for Approval
This action will initiate the approval process. Based on the selected Category, it will query the approvers in the Approval Definition list, create required task for approver and updates the Ticket approval status.
- Action 1: QL_Approver Definition
- This action will get the approvers from Approver Definition list based on the selected Category in the Ticket.
- Action 2: Approve
- This action will approve the Ticket either “the level 2 approval task is approved” or “level 1 task is approved but level 2 approver is empty in the definition”.
- Action 3: Submit for level 2 Approver
- This action will create the task for level 2 approver when level 1 approver approve.
- Action 4: Update Ticket Approval Status II
- This action will update the Ticket approval level when level 1 approver approve.
- Action 5: Submit for Level 1 Approver
- This action will create the task for level 1 approver
- Action 6: Update Ticket Approval Status I
- This action will update the approval level and approval status in the Ticket when level 1 task is created
Approval Task list:
Approve
This action approves the current task and updates the Ticket approval status/level. In this action we will invoke the “Submit for Approval” custom action configured in the Tickets list that processes the next level approval.
Deny
This action sets the approval status of the Ticket to Denied.
3. Configure workflows for auto notification
Summary of steps is given here, detailed steps are in this article
Workflow 1: Notify approver on task creation
Workflow 2: Notify Requester on Ticket Approve/Deny
4. Configure NITRO forms for the lists
- Tickets list
- Approval Tasks list
Detailed Instructions
1. List Schema
To configure the approval feature, we need to create certain lists and fields as per the requirement, below are the details of schema that supports our current approval scenario.
Category list
This article assumes that Category list is present in the application site and Tickets list has a Category lookup column. By default, Crow Canyon standard product comes with Category list and a Category lookup column in Tickets list.
Approval Definition list
Create a list with custom list template and name it as ‘Approval Definition’ and then create below required fields in this list.
- Category (Lookup pointing to Category list)
- Internal Name: Category
- Display Name: Category
- Purpose: Used to query the approvers in the custom action
- Level 1 Approver (‘Person or Group’ column type with ‘People Only’ option)
- Internal Name: L1Approver
- Display Name: Level 1 Approver
- Purpose: Used to define level 1 approver for this type of Category
- Level 2 Approver (‘Person or Group’ column type with ‘People Only’ option)
- Internal Name: L2Approver
- Display Name: Level 2 Approver
- Purpose: Used to define level 2 approver for this type of Category
Approval Tasks list
Create a task list with Tasks list template and name it as ‘Approval Tasks’ list and then create below required columns in this list.
- Delete Related Items, Predecessor, Start Date columns from the list.
- Rename “Task Status” column to “Approval Decision” and remove default choice values and add below values
- Approved
- Denied
- Approval Level (Choice: Level 1, Level 2)
- Internal Name: ApprovalLevel
- Display Name: Approval Level
- Purpose: Indicates the current approval level
- Related Ticket (Lookup pointing to Tickets list)
- Internal Name: RelatedTicket
- Display Name: Related Ticket
- Purpose: It indicates the approval process for the related Ticket
- Comments (Multiple lines of plain text)
- Internal Name: Comments
- Display Name: Comments
- Purpose: To capture the approver comments and will be copied to related Ticket.
Tickets list
Create below columns in Tickets list
- Approval Status (Choice)
- Internal Name: ApprovalStatus
- Display Name: Approval Status
- Purpose: Indicates the current approval state of the Ticket
- Choice values
- Not Required
- Pending Approval
- Approved
- Denied
- Approval Level (Choice: Level 1, Level 2)
- Internal Name: ApprovalLevel
- Display Name: Approval Level
- Purpose: Indicates the current approval level of the Ticket
- Approval Date (Date and Time)
- Internal Name: ApprovalDate
- Display Name: Approval Date
- Purpose: To capture the Ticket approval date
- Approval Tasks (Multiple lines of text field)
- Internal Name: ApprovalTasks
- Display Name: Approval Tasks
- Purpose: To show the approval tasks in the Ticket
- Approval Comments (Multiple lines of text version enabled column)
- Internal Name: ApprovalComments
- Display Name: Approval Comments
- Purpose: To capture the approvers comments in the Ticket
2. Configure Custom Actions for approval process
Please refer this article to configure approval functionality using Custom Actions
3. Configure workflows for auto-notification
Please refer this article to configure workflows for notification emails
4. Configure NITRO forms for the lists
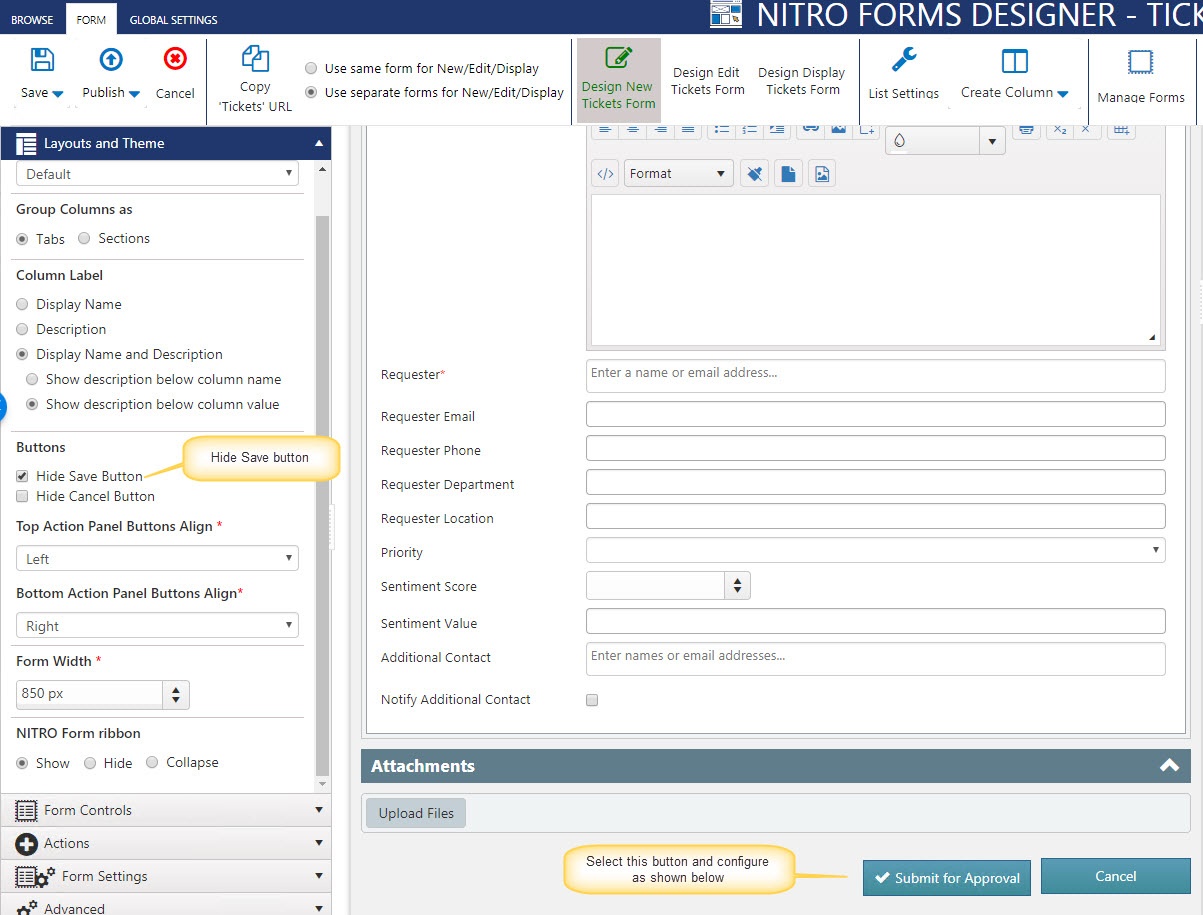
Tickets list
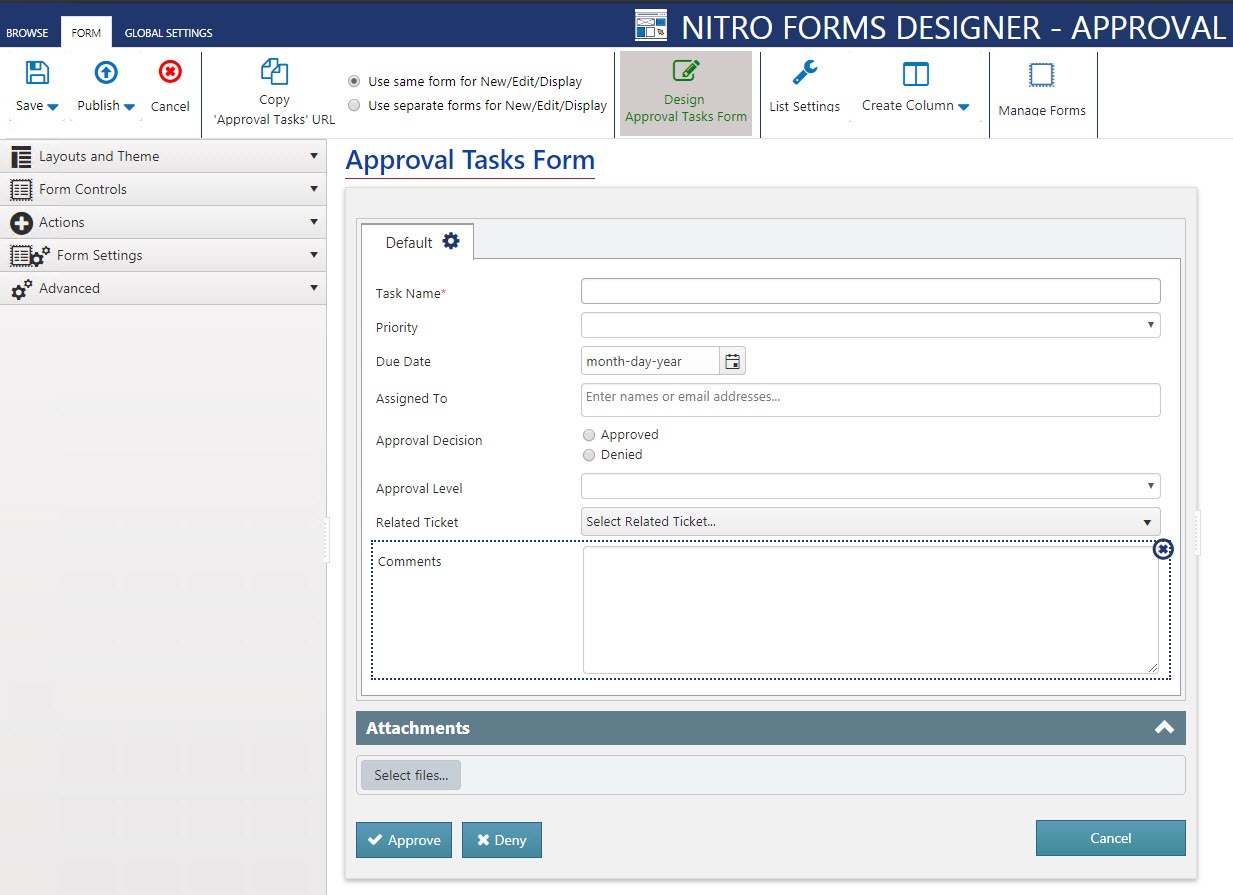
New Form
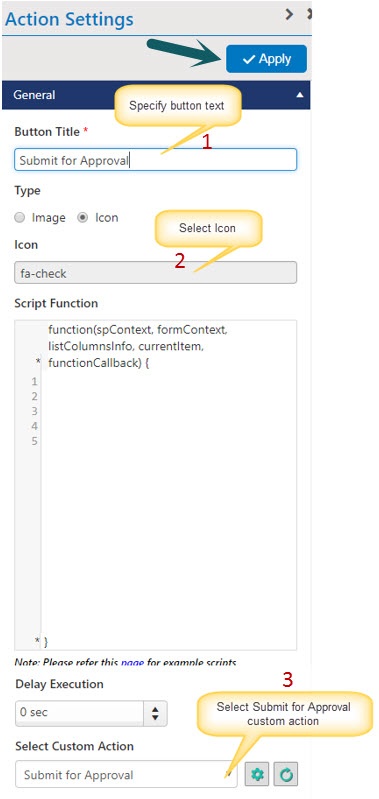
Hide save button in New Form and Configure Submit action as shown below. Drag and drop the “Submit action” on bottom of the form and configure as shown below:
Edit Form
Configure the “Submit for Approval” custom action button same as in New Form (refer above instructions)
Create Approval tab and configure the tab as shown below.
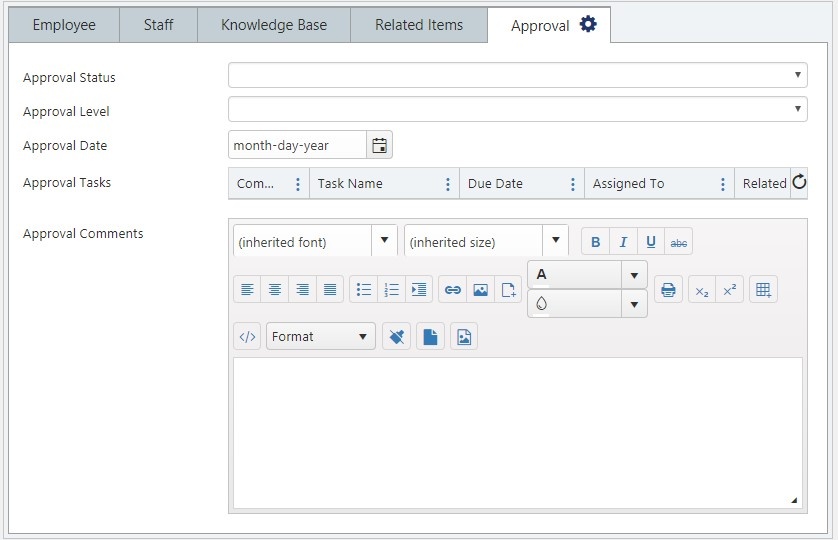
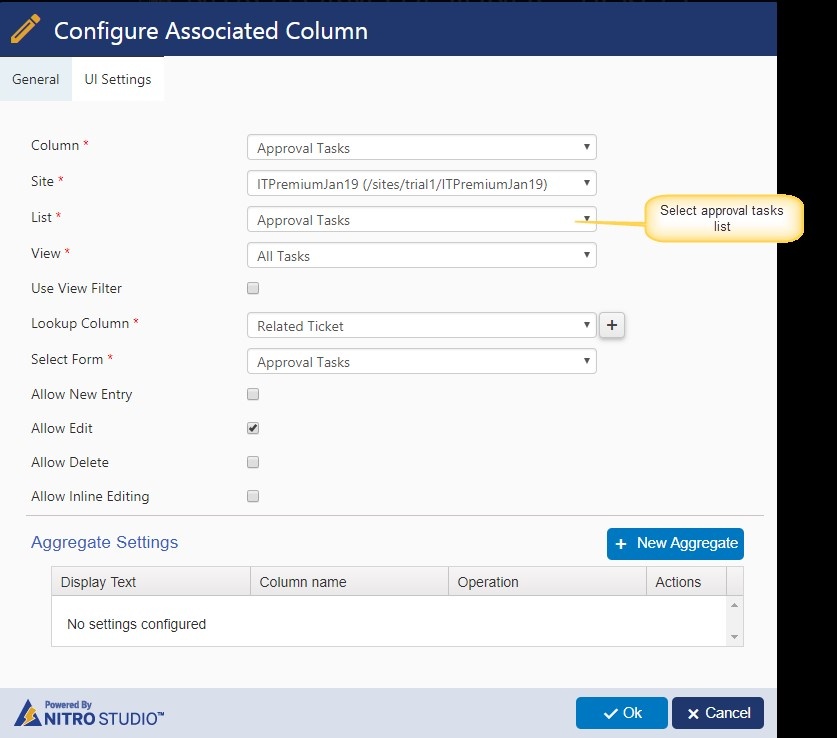
Configure associated item settings for Approval Tasks column.
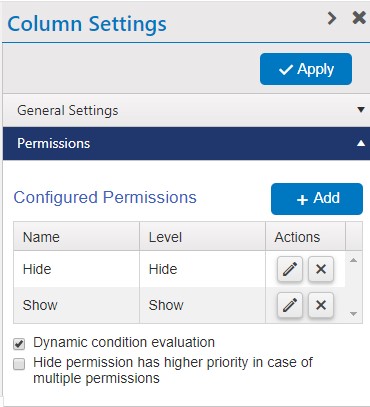
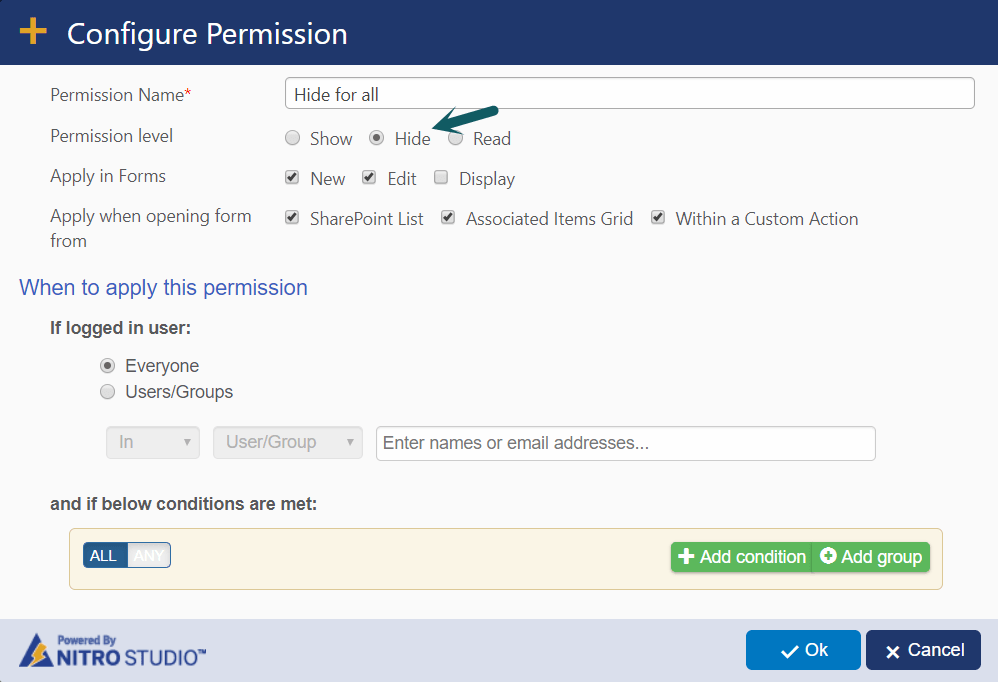
Configure tab permissions:
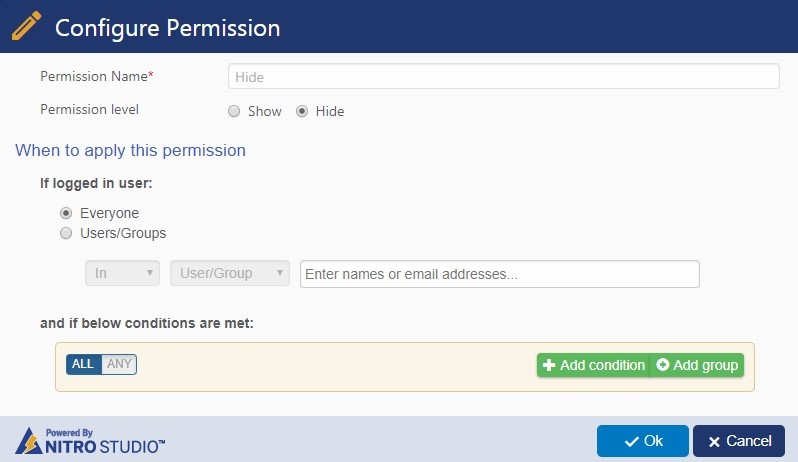
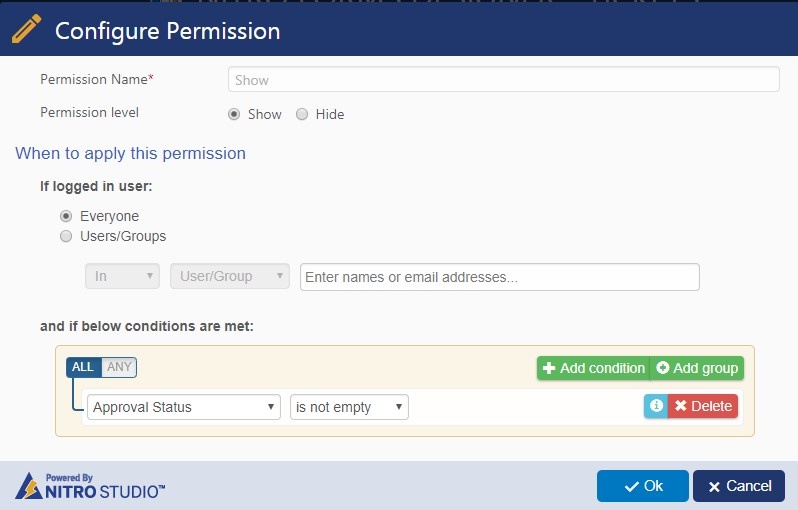
Select “Approval” tab and configure permissions as shown below:

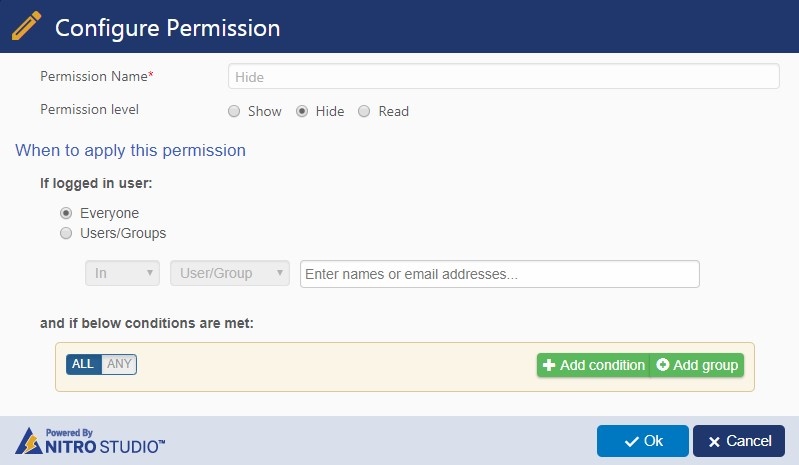
Hide Permission:
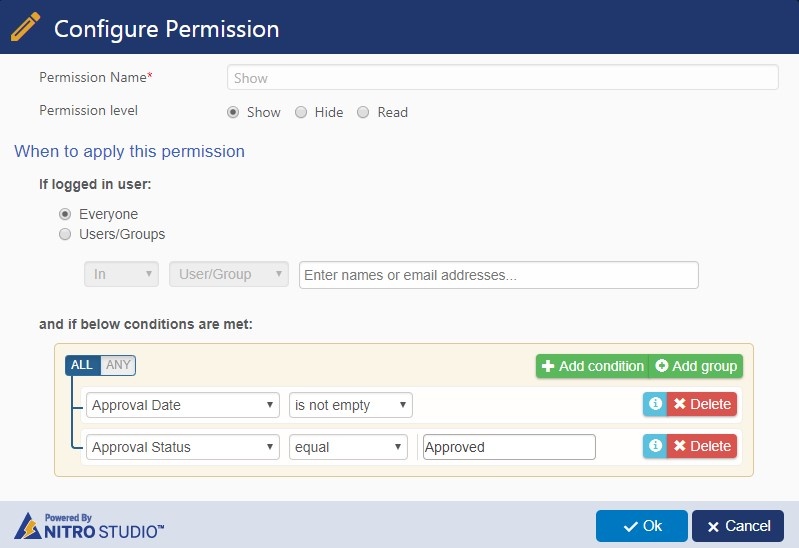
Show permission:
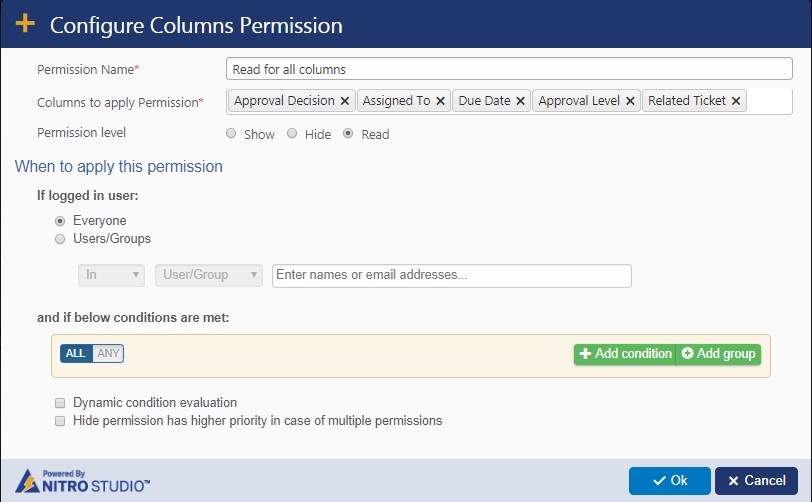
Configure column permissions:
Configure read permissions for “Approval Status and Approval Level” column.
Approval Date:
Hide permission:
Show permission:
Display Form
Configure the display form same as Edit form.
Approval Tasks list
Configure NITRO forms for “Approval Tasks” list as shown below
Go to Site Contents -> Approval Tasks list -> List Settings -> Crow Canyon NITRO forms and configure common form as shown below.
Configure Approve, Deny submit actions in the form.
Approve
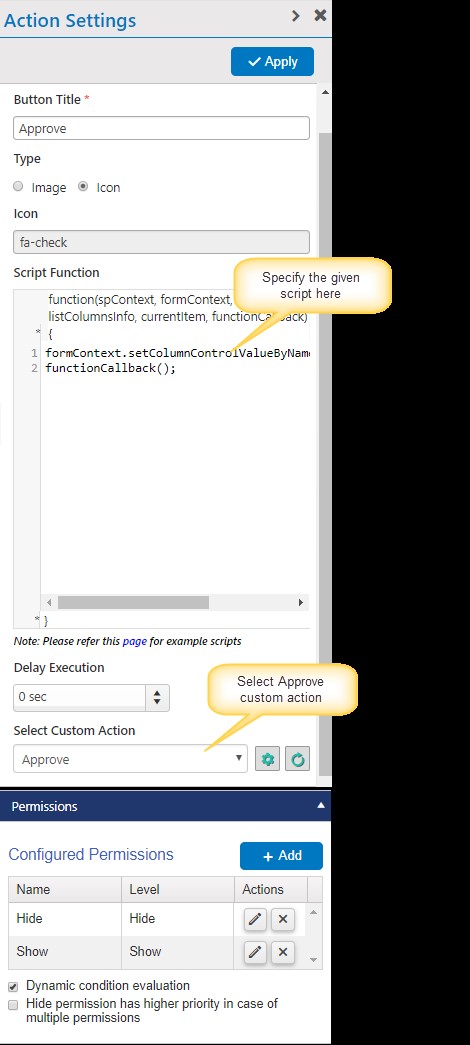
Script:
formContext.setColumnControlValueByName('Status','Approved');
functionCallback();
Permissions:
Hide
Show

Deny
Configure Deny custom action similar to Approve action. Select “Deny” custom action in place of “Approve” and configure below script. Permissions are same as “Approve”.
Script:
formContext.setColumnControlValueByName('Status','Denied');
functionCallback();
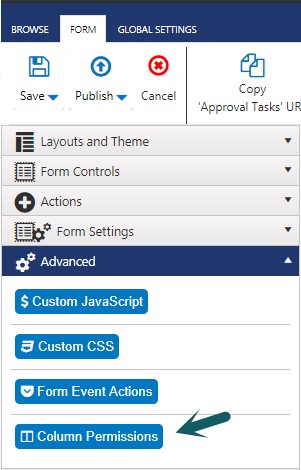
Column Permission
Configure read permissions for all the columns in the form except “Comments” column.
Go to Advanced section in NITRO forms -> Column Permissions and configure Read permissions for all the columns.