Applies To: SharePoint Online and On-premises NITRO activated sites
Introduction
NITRO Print supports standard print with table layout for list item columns. It also supports rich text based templates with column placeholders to create the required print format. For more information on rich text templates, please refer this article.
Additionally, JavaScript can be used to format print content for advanced requirements. Print process follows this flow:
- Define the print template with required format in NITRO print app settings
- List Print (multiple items from the view) or Item print (single item)
- Table type or Rich text template
- Specify the JavaScript for custom formatting
- User invokes List or Item print in SharePoint UI
- NITRO print generates the printable content by using the template and replacing the column placeholders with data from the list item(s)
- NITRO print executes the custom JavaScript on generated printable content to get the final printable content
- User can directly print or generate PDF/image or send mail using the final content
Configuration
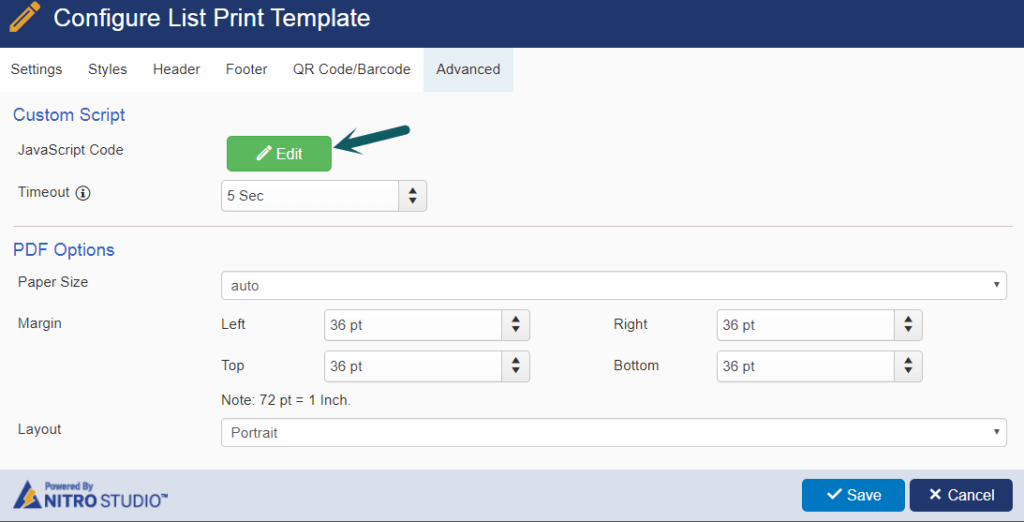
To configure custom JavaScript, navigate to list settings -> Crow Canyon Print Manager Settings -> Edit existing list/item print template or create new print template -> ‘Advanced’ tab -> Custom Script
How to get column element in JavaScript
Column placeholders in print template are replaced by column label and column value in printable content. Column element in HTML has a ‘name’ attribute with a specific syntax so that it can be queried easily in JavaScript.
// Format for column name attribute value:
ccs_control_<Column Internal Name>_<List Item Id>

// Example HTML:
<td style="width:82.2526%;">
   <span name="ccs_control_Priority1_1">Normal</span>
</td>
Sample JavaScript code to get the HTML element of column label with internal name ‘Category1’:
// get element for column with internal name Category1
var colElement = $('[name="ccs_control_Category1_' + objData.CurrentItem.get_id() +'"]');
To get multiple column elements:
var arrColumns = ["Category1","IssueType","DueDate1","Priority1"];
for (var i = 0; i < arrColumns.length; i++) {
var   colElement  = $('[name="ccs_control_'+arrColumns[i]+'_'+objData.CurrentItem.get_id()+'"]');
// do something with column element
}
To get value of a column from item (not from HTML). The value can be used for some checks like in case of permissions check:
// Use column internal name to get the value from the current item
var columnValue = objData.CurrentItem.get_item(<Column Internal Name>);
JavaScript Examples
1. Item Print: Remove column label from print content if column value is blank
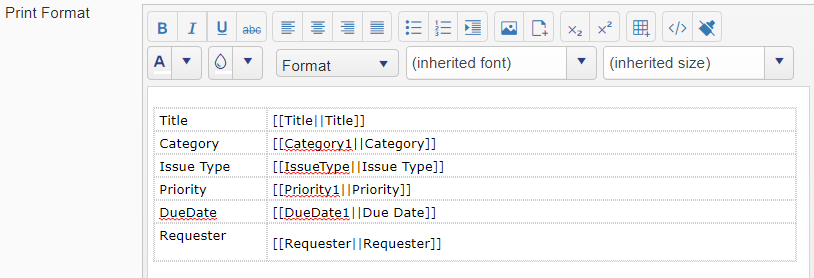
Some column values may be entered later in the business process. If item is printed before the values are filled, then column label will be in the print but not the value. One option is to have separate print templates for different stages. Instead of managing multiple templates, custom JavaScript can be used to remove rows of columns that do not yet have a value. In this example, script checks for value of ‘Category1’, ‘IssueType’, ‘DueDate1’ and ‘Priority1’ columns and removes the column row if column value is blank.
Print Template:
Custom Script:
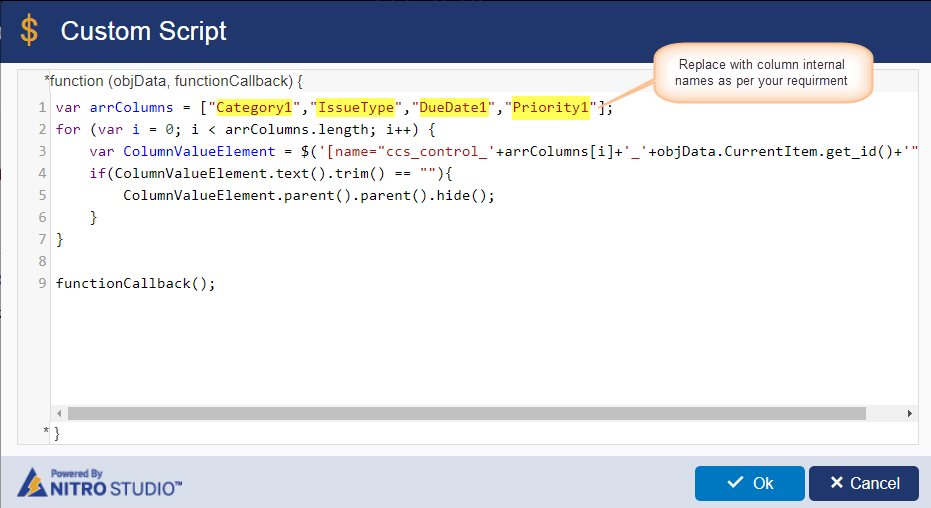
Script used in above:
var arrColumns = ["Category1","IssueType","DueDate1","Priority1"];
for (var i = 0; i < arrColumns.length; i++) {
	var ColumnValueElement = $('[name="ccs_control_'+arrColumns[i]+'_'+objData.CurrentItem.get_id()+'"]');
	if(ColumnValueElement.text().trim() == ""){
		ColumnValueElement.parent().parent().hide();
	}
}

functionCallback();
Note: In above script modify the column internal names as per columns in your list
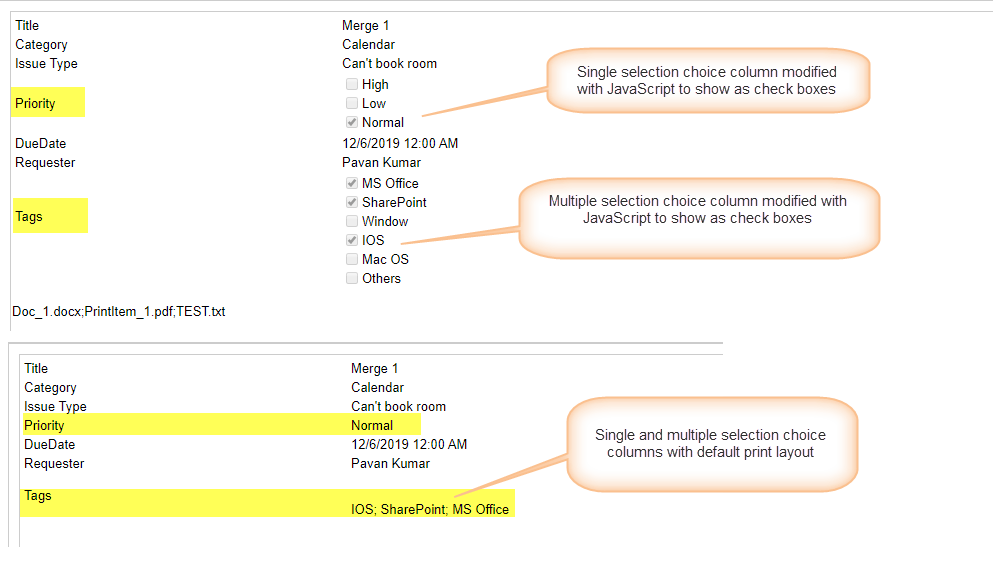
2. Item Print: Show multi-choice column as check boxes
Multi-choice column has the text of selected options and that is what gets printed by default. Options that are not selected are not shown in print. Frequently it is required to print these as check boxes with selected values as checked, same way as it appears on NITRO Forms.
Below example script changes the print content of a multi-choice column with name ‘Tags’ by replacing the text value with check boxes.
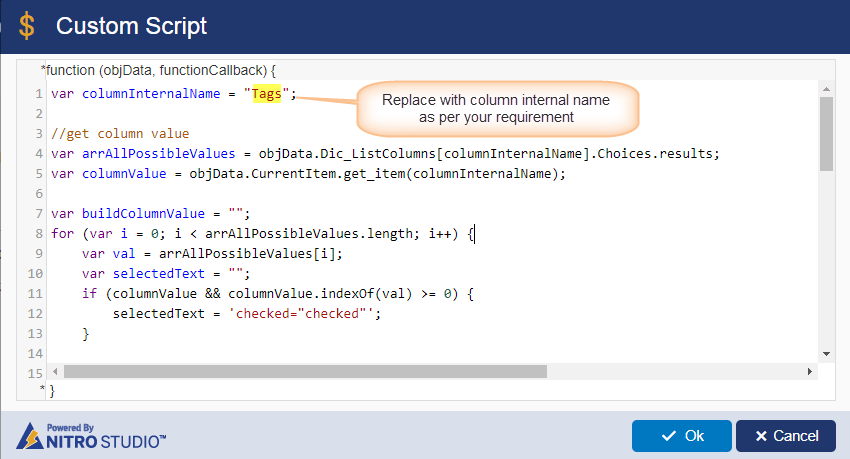
Script used in above:
var columnInternalName = "Tags";

// get column choice options
var arrAllPossibleValues = objData.Dic_ListColumns[columnInternalName].Choices.results;

// get column value in current item
var columnValue = objData.CurrentItem.get_item(columnInternalName);

// build check boxes html based on options and column value
var buildColumnValue = "";
for (var i = 0; i < arrAllPossibleValues.length; i++) {
	var val = arrAllPossibleValues[i];
	var selectedText = "";
	if (columnValue && columnValue.indexOf(val) >= 0) {
		// Check the box if value is in item, otherwise not
		selectedText = 'checked="checked"';
	}

	buildColumnValue += '<div><input disabled="disabled" type="checkbox" value="' + val + '" ' + selectedText + '><label>' + val + '</label></div>';
}

// Get column value document element
var columnElement = $('[name="ccs_control_' + columnInternalName + '_' + objData.CurrentItem.get_id() + '"]');
columnElement.empty();
columnElement.append(buildColumnValue);

functionCallback();
Sample Output:
3. Item Print: Custom permission checks to disallow item printing
Custom script can be used to disallow printing based on permissions that logged-in user has, item column values etc. If permissions are not matched then print content can be replaced with a custom message. Below script checks if logged-in user is a member of ‘Managers’ group, if not then a message is shown instead of print content. The script can be updated to check item column values if required.
Custom Script:
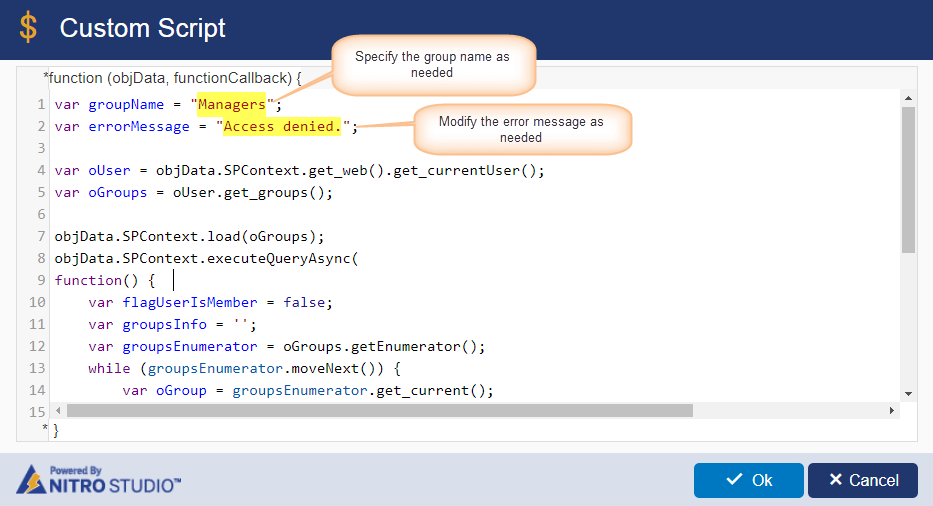
Script used in above:
var groupName = "Managers";
var errorMessage = "Access denied.";
var oUser = objData.SPContext.get_web().get_currentUser();
var oGroups = oUser.get_groups();
objData.SPContext.load(oGroups);
objData.SPContext.executeQueryAsync(
function() {
var flagUserIsMember = false;
var groupsInfo = '';
var groupsEnumerator = oGroups.getEnumerator();
while (groupsEnumerator.moveNext()) {
var oGroup = groupsEnumerator.get_current();
if(oGroup.get_title().toLowerCase() == groupName.toLowerCase()){
flagUserIsMember = true;
}
}
if(!flagUserIsMember){
$("#" + objData.ControlId ).empty();
$("#" + objData.ControlId ).append('<div style="Font-size: 14pt; color: #ff0000; padding: 10px;">'+errorMessage+'</div>');
}
functionCallback();
},
function() {
functionCallback();
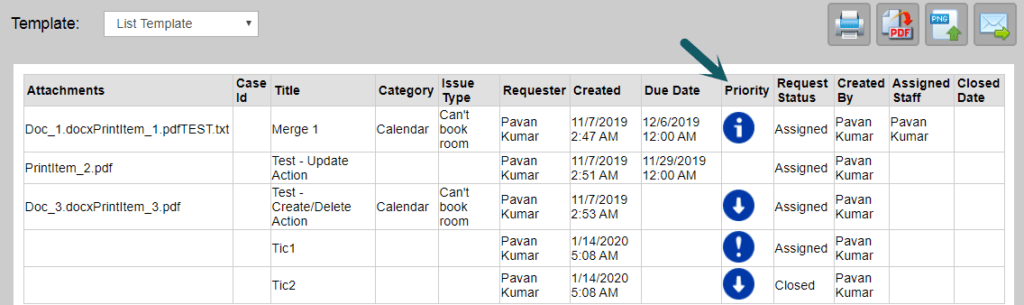
});4. List Print: How to show images for choice column values
In this sample we have a table of list items in print content. For a column with internal name ‘Priority1’ and having values ‘High’, ‘Normal’ and ‘Low’, we want to replace priority text in each row with corresponding image. Images corresponding to each priority value are are uploaded in ‘Site Assets’ document library in same SharePoint site.
Custom Script:

Script used in above:
var columnInternalName = "Priority1";
var objIconValue=
	{"High" : '/SiteAssets/High.png',
	"Normal":'/SiteAssets/Normal.png',
	"Low": '/SiteAssets/Low.png'};

$('[name^="ccs_control_'+columnInternalName+'_"]').each(
	function(index){
      	var element = $('[name^="ccs_control_'+columnInternalName+'_"]')[index];
		var val = $(element).text();
		if(objIconValue[val]){
		$(element).empty();
		$(element).append("<img src='" + _spPageContextInfo.webAbsoluteUrl + "/" + objIconValue[val] + "' />");
		}
	});

functionCallback();
Sample Output:
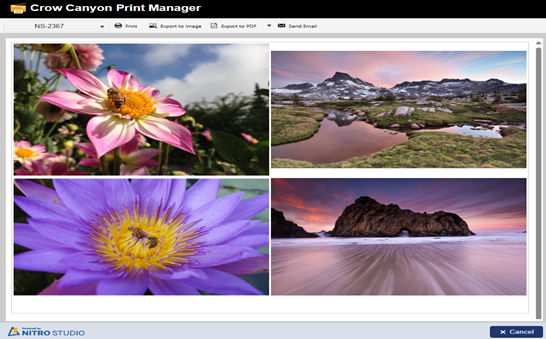
5. Item Print: Show fixed image size in the PDF
In this sample use case, we have to add a table and insert images in table cells in the item print template, that is, add ‘Picture’ type column placeholders in table cells. It is required to scale down images to display fixed image size in the PDF file.
Custom Script:

The script used above:
$("head").append("<style>#templateresults img {width: 100%;height: 100%;}</style>")
functionCallback();
Sample Output