Applies to: SharePoint Online and On-premises (2013, 2016, 2019/SharePoint Server Subscription Edition)
Application Type: Service Request Applications (IT Professional, IT Standard, Facilities, Request Management and Customer Service)
Description
A portal provides a secure and intuitive user interface to end users to interact with NITRO Applications.
Portal sites can be configured in two ways:
- Using Crow Canyon’s ‘Power Portal’ application. Please refer to this article for steps to create and configure a portal site
- As a NITRO activated site with portal functionality and look and feel. This is a newer method of building portals and gives more flexibility in site configurations. This article provides the details to create portal using this newer method.
Detailed Instructions
Navigate to NITRO Studio
Online:
Navigate to the Site Collection where we to install the NITRO applications -> Site Contents -> Click Crow Canyon NITRO Studio
On-premises:
Navigate to the Site collection where we want to install the NITRO application -> Site Settings (click gear icon) -> Crow Canyon NITRO Studio
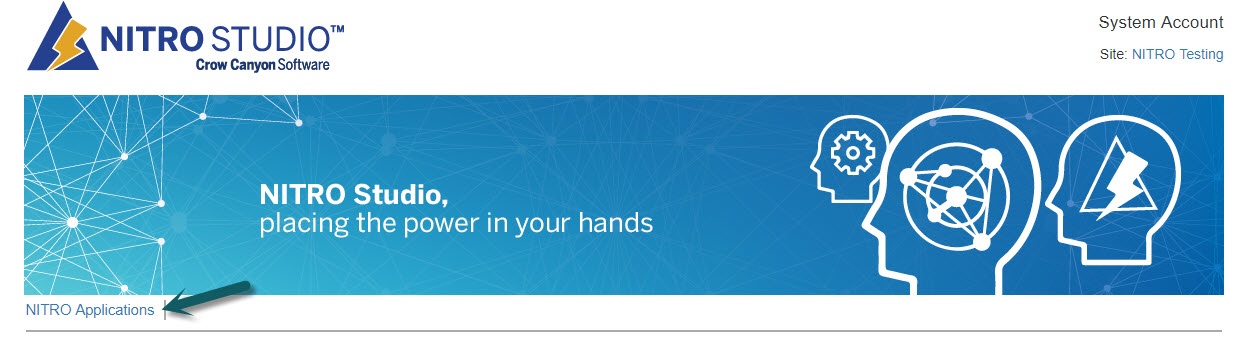
Navigate to NITRO Studio:
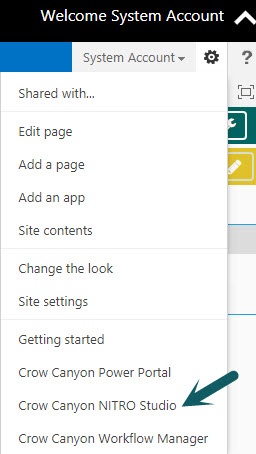
After navigating to NITRO Studio page -> Click ‘NITRO Applications’
Note:
SharePoint online supports Modern UI based applications and older Classic UI applications. For installing Modern UI based applications, switch to “Modern” tab and select the application that you want to install.
Click on the Portal application that you want to install:
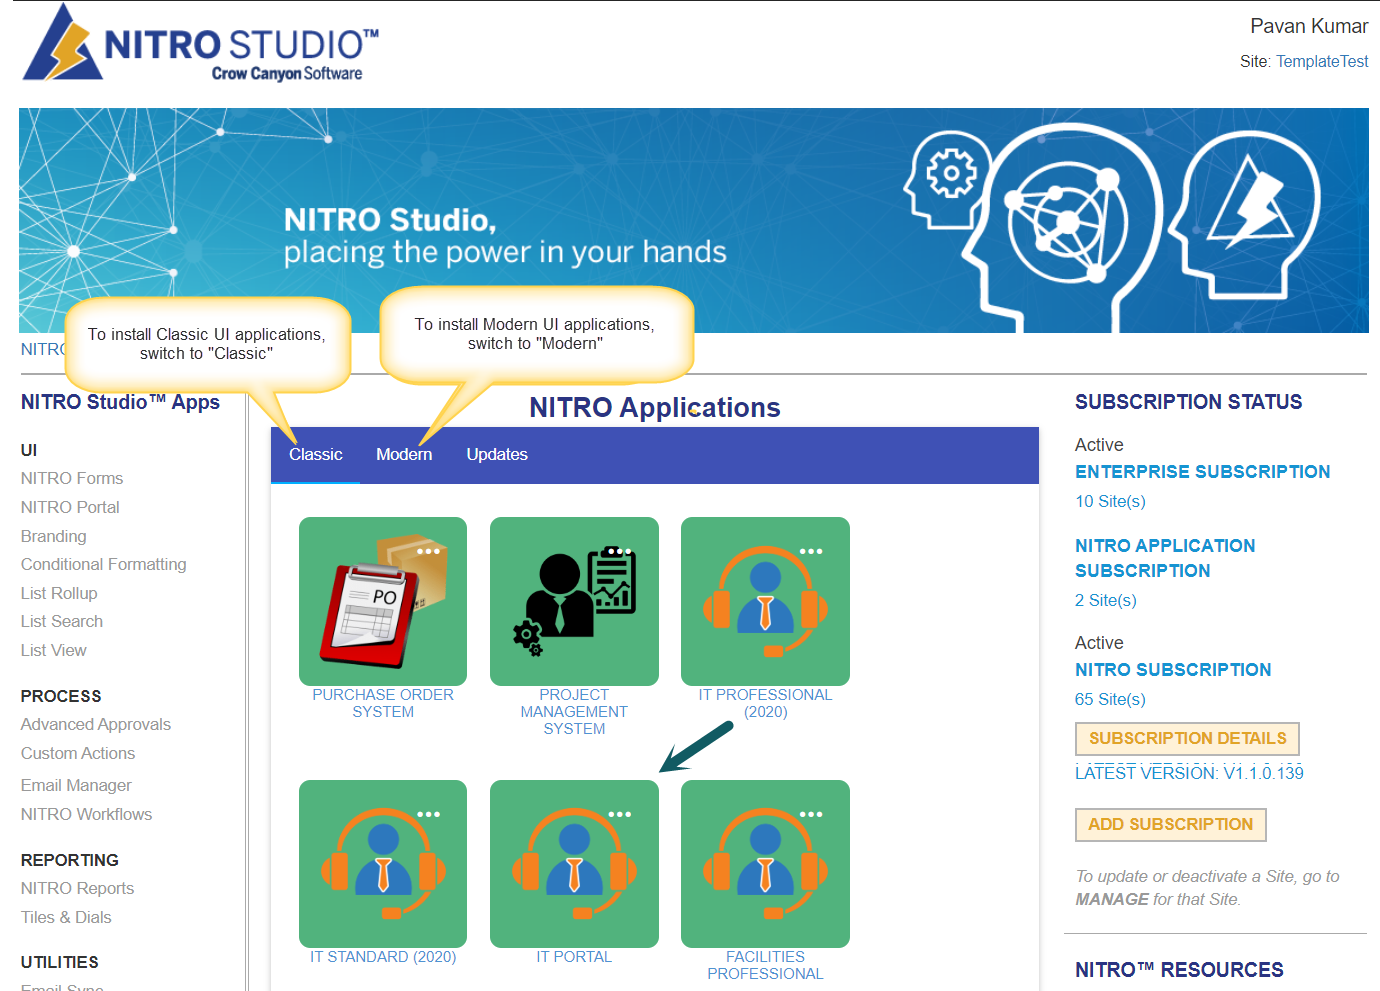
Below are the portal application names for the corresponding application types.
Classic Applications
| Application Type | Portal Application Name |
| IT Professional (2020) | IT Portal (2020) |
| IT Standard (2020) | IT Portal (2020) |
| Customer Service (2020) | Customer Service Portal (2020) |
| Facilities (2020) | Facilities Portal (2020) |
| Request Management (2020) | Request Management Portal (2020) |
Modern Applications
| Application Type | Portal Application Name |
| IT Professional (2020) | IT Portal (2020) |
| IT Standard (2020) | IT Portal (2020) |
| Facilities (2020) | Facilities Portal (2020) |
| Request Management (2020) | Request Management Portal (2020) |
| Customer Service (2020) | Customer Service Portal (2020) |
Portal Installation Steps
Note: Portal installation steps are same for all of the above mentioned applications.
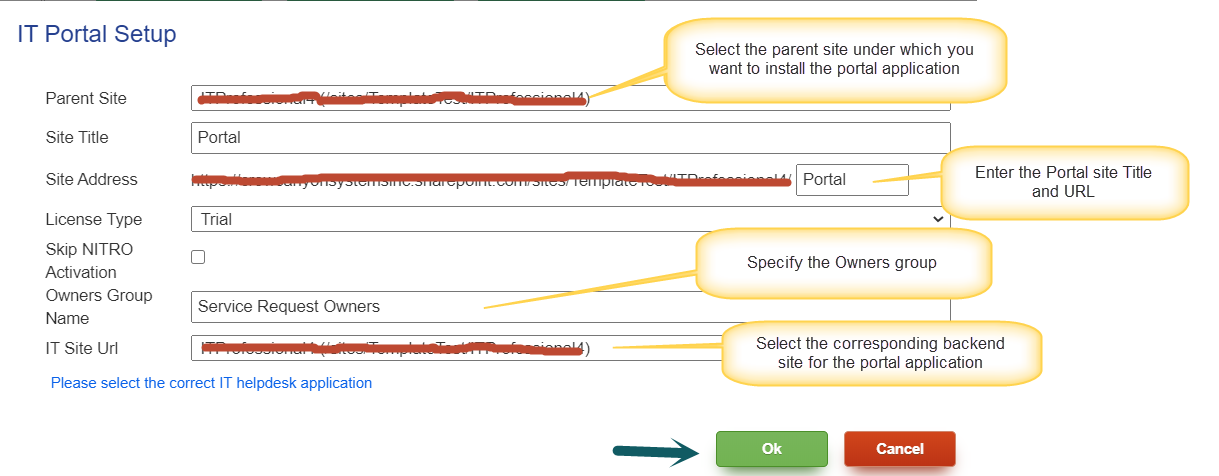
Click corresponding Portal tile in NITRO Applications page, enter the required details as described below and click Ok.
Parent Site: Choose the site under which the Portal site needs to be created. Generally it will be the back-end site (i.e. Helpdesk application site).
Site Title: Title for the new Portal site. This can be changed later from site settings if needed.
Site Address: URL of the Portal site. We recommend to use alpha-numeric URL name without spaces. Please note that it requires several configuration changes if URL is to be changed later. Or site can be reinstalled with different URL.
License Type: Choose the “Trial” and proceed with the installation. Once installation is done, contact Crow Canyon for permanent license. If no option is available under License Type, please contact Crow Canyon Support. Refer this article to convert the Crow Canyon NITRO Trial License to Subscription/Enterprise license.
Reassign Owners Group Name: Specify the required SharePoint group. Members of this group will have the permissions for portal administration. Any SharePoint site is created with 3 default SharePoint groups (Owners, Members, Visitors) prefixed with the site name. We can use these groups or some other custom group name that can be created after site is created.
IT Site URL: Select the back-end site URL (i.e. Helpdesk application site). Portal application will use the configurations from back-end site.
Additional Configurations
1. Delete unique permissions for the site and configure the permissions as required.
Go to Portal Site -> Portal Administration -> Security Settings -> click “Portal Permissions” and configure the permissions as required.
2. For Portal Classic applications:
Navigate to below Administration page, by modifying the Portal Site URL in below.
URL: https://Portal Site URL/Workspaces/Administration.aspx
Click “Branding” tile in “Home Page and Theme” tab
Go to Apply Theme tab in NITRO Branding, select “Helpdesk Portal Theme” under Custom Theme section and Click “Apply Theme”.