Applies To: SharePoint On-premises (2013, 2016 and 2019/SharePoint Server Subscription Edition)
Description
This article describes the instructions to install NITRO Workflows debugger service. This article assumes that NITRO Studio is already installed in your SharePoint environment. You can refer to this article for NITRO Studio installation.
Debugging service needs to be installed on one of the SharePoint servers in the farm. This installation will enable workflow debugging feature that can be used to develop and troubleshoot NITRO workflows.
Summary of steps:
- Install NITRO Workflows Debugger Service
- Install NITRO Web API
- Update NITRO Workflows farm properties
Instructions
Install NITRO Workflows Debugger Service
1.Download and copy the NITRO Workflows debugger service package into the SharePoint server.
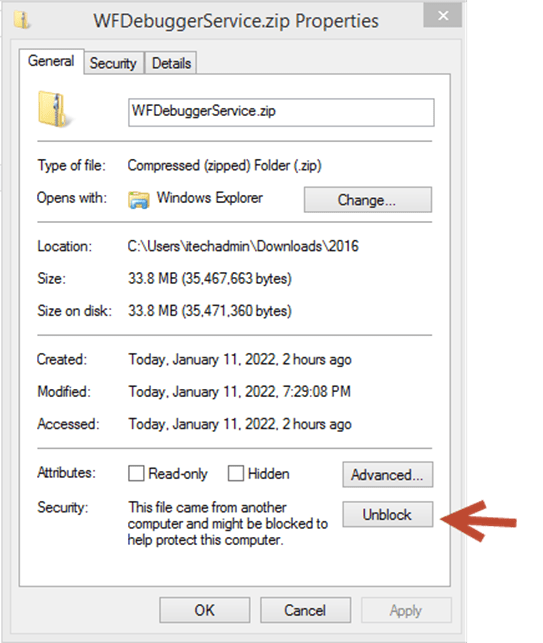
2. Unblock the “WFDebuggerService.zip” file
3. Extract the folder and move it to NITRO Studio installation folder on your SharePoint server. For example, if NITRO Studio is installed in “C:\Program Files\Crow Canyon\NITRO Studio” folder, then copy WFDebuggerService folder to a sub-folder so that it will be located at path “C:\Program Files\Crow Canyon\NITRO Studio\WFDebuggerService”
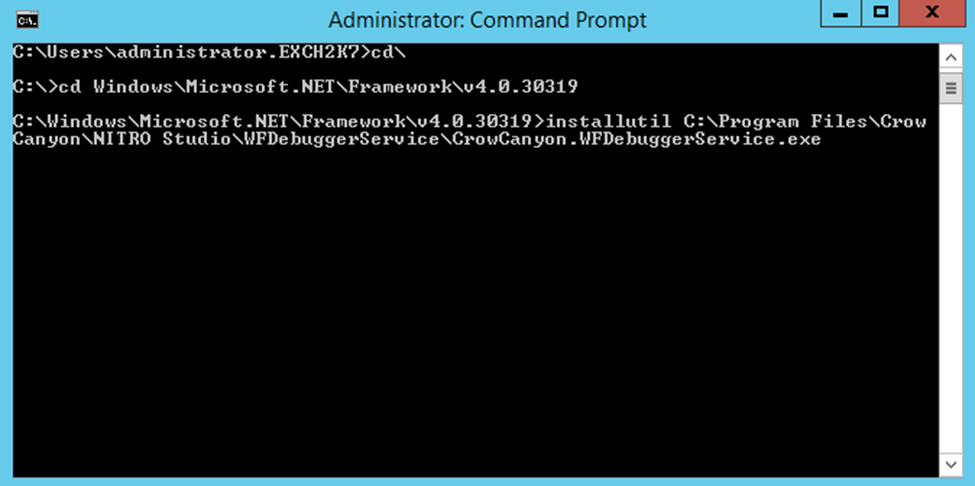
4. Open command prompt and navigate to below path and then run the command to install the debugging service.
Path: C:\Windows\Microsoft.NET\Framework\v4.0.30319
Command: installutil <<Path>>\CrowCanyon.WFDebuggerService.exe
Ex: installutil C:\Program Files\Crow Canyon\NITRO Studio\WFDebuggerService\CrowCanyon.WFDebuggerService.exe
5. Open Windows Services Manager on the server. Press the Win + R keys on your keyboard, to open the Run window. Then, type “services. msc” and press OK.
6. Verify that “CrowCanyonWFDebuggerService” is there in the services listing
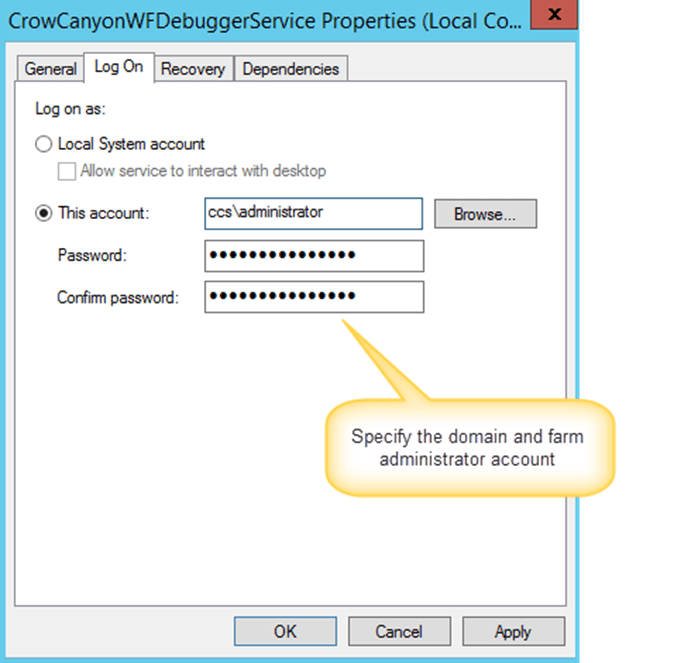
7. Modify the service account of “CrowCanyonWFDebuggerService” to administrator account:
Select “CrowCanyonWFDebuggerService” in the services listing -> Right click -> Properties -> Navigate to “LogOn” tab and specify the administrator account that is a domain user and local administrator and SharePoint farm administrator.
8. Start the service
Install NITRO Web API
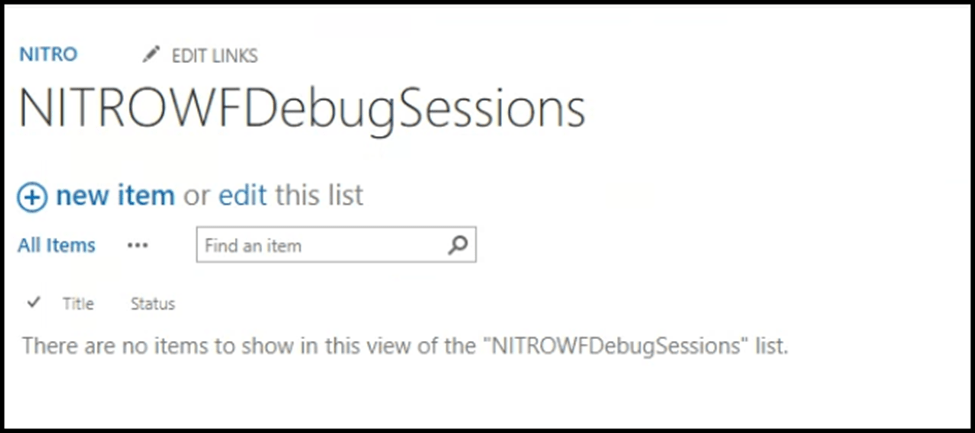
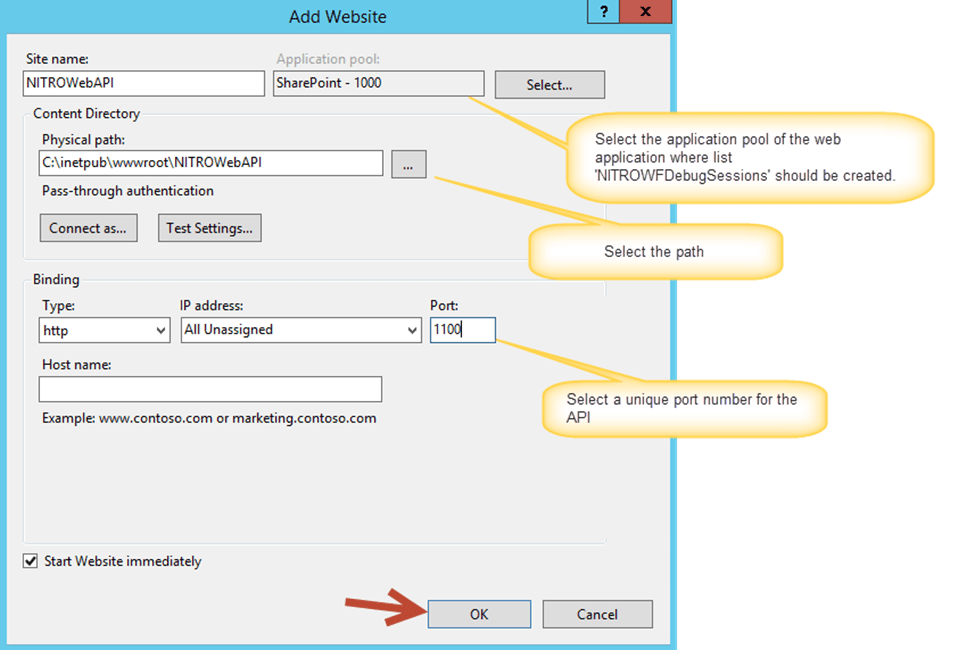
This component is used by workflow debugger service. Debugger service uses a list (“NITROWFDebugSessions”) to manage debugging sessions and this list is automatically created by this API. Debugger service and this list is common across the farm and is required to be created only once in any of the site collections in the farm. You can select the site collection where you are currently deploying NITRO Studio or any of the existing site collections.
Please note the URL of the site collection where you want this list to be created. Also note the web application of this site collection and the application pool of that web application. This API will be installed in the same application pool.
Below are the steps to install NITRO Web API component.
1. Download and copy the “NITROWebAPI” package to the SharePoint server
2. Extract the folder and unblock it
3. Paste the “NITROWebAPI” folder in below location
4. Location: C:\inetpub\wwwroot
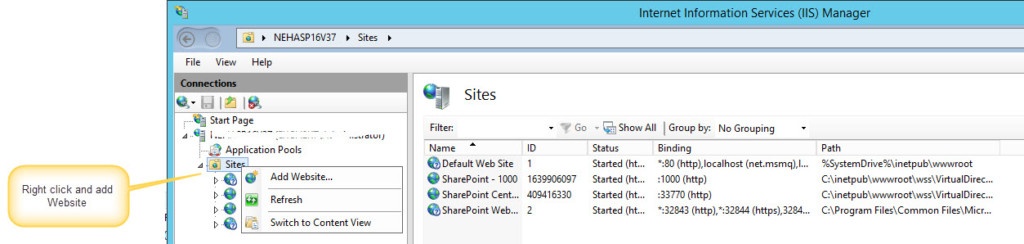
5. Open IIS Manager
6. Select Sites and create a new site as shown below:
7. After creating the site, select the site and click “Browse website”
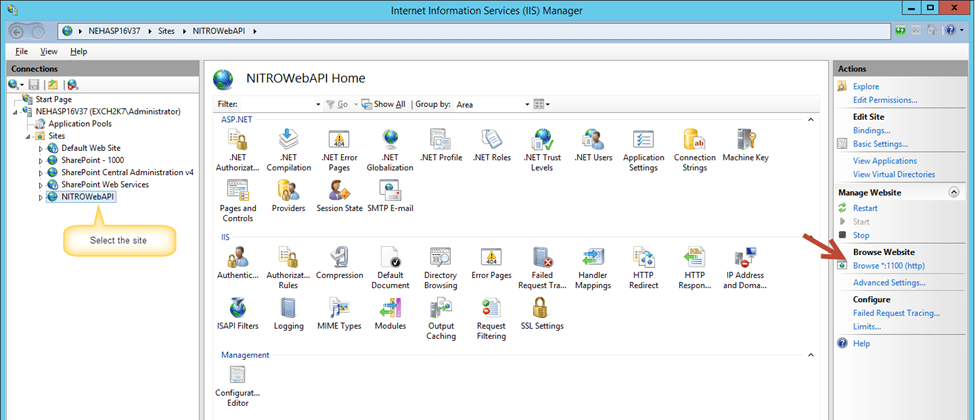
8. This will open the site in the browser, copy the URL of the site:
Example URL: http://localhost:1100/api/rest
Modify the URL by replacing “localhost” with the server name and port number used while creating the “NITROWebAPI” site:
For example, modified URL will be like: http://WIN12SP2019:1100/api/rest
Update NITRO Workflows farm properties
In this step we will create two farm level properties so that debugging service can access the NITRO Web API component and the list to manage the debugging sessions. For this we need the site collection URL noted above for hosting the list “NITROWFDebugSessions”. And we need the URL of the NITRO Web API site (step #7 above).
Open SharePoint Management Shell and run the below script:
Script:
$farm=Get-SPFarm
$farm.Properties.Add(“NITROWFDebugSessionSite”, “<<URL of the site collection where list ‘’ is to be created.>>”)
$farm.Properties[“NITROWebAPIURL”] = “<<NITRO Web API site URL>>”;
$farm.Update()
Note:
In above script, specify the site collection URL in second line, example:
$farm.Properties.Add(“NITROWFDebugSessionSite”, “http:// WIN12SP2019:1000/sites/helpdesk”)
And in third line, specify the NITRO Web API URL, example:
$farm.Properties[“NITROWebAPIURL”] = “http:// WIN12SP2019:1100/api/rest”;