Applies To
SharePoint Online and SharePoint On-Premises
Description
This article lists the common issues and fixes that occur in Crow Canyon NITRO Forms.
- Part of the Forms functionality is not working
- Date/Time format is not in correct format
- Attachments are not getting added to the item (for SharePoint OnPremises 2013/16)
- Item create/update fails with duplicate values error
- Form looks congested with associated items grid
- Not able to publish NITRO Forms
- Open item display/edit form with a different NITRO form instead of default form
Part of the Forms functionality is not working
The Associated item grid does not appear in the NITRO Form and cascaded lookup filters does not work.
Cause
This issue can happen if the site URL is changed or the user is using a different host named URL to access the site other than the installed URL.
Resolution
Please go to each list in the site for which NITRO Forms are configured, go to NITRO Forms –> edit each lookup setting, associated item settings, auto fill user information setting and save the settings once. Repeat this process for New, Edit and display forms and publish the forms. After making the above changes in the NITRO Form settings, click on Reset cache in the form settings and publish the settings.
After publishing the forms, please clear the browser cache and the forms will work as intended now.
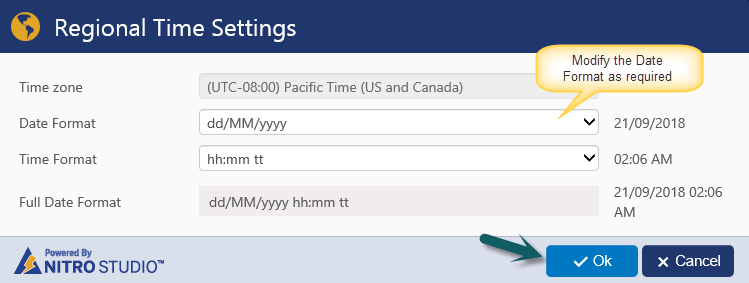
Date/Time format is not in correct format
To modify the date time format, go to any list -> List Settings -> Crow Canyon NITRO Forms -> Switch to “Global Settings” tab and modify the Regional Time Settings as required.
Note: This change will be applied to all the lists in that site.
Attachments are not added to the item
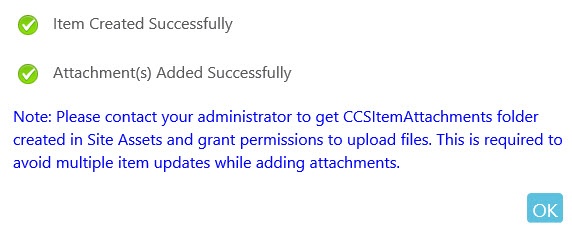
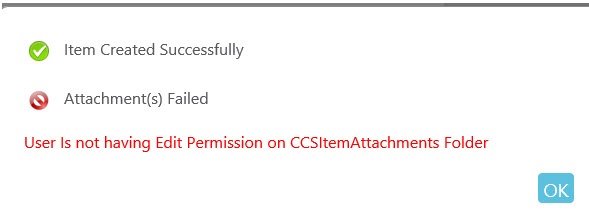
Attachments are not added to the item for SharePoint On-Premises (2013 & 2016) and below messages are shown:
1. “Please contact Your administrator to get CCSItemAttachments folder created in Site Assets and grant permissions to upload files.”
2. User is not having the Edit Permission on CCSItemAttachments Folder
Cause
This issue can happen if:
#1. “CCSItemAttachments” folder does not exist in the ‘Site Assets’ document library
#2. Or user does not have “Contribute” permission on CCSItemAttachments folder
Fix
#1. Activate (deactivate and activate again) “Crow Canyon Forms Attachments” feature in the site. For this, go to Site Settings -> Manage Site Features and activate Crow Canyon Forms Attachments feature
#2. Grant “Contribute” permission on CCSItemAttachments folder for the required users. For this, go to Site Contents -> Site Assets document library -> CCSItemAttachments folder -> ECB menu -> “Shared With” -> Advanced and grant “Contribute” permission level for the user
Item create/update fails with duplicate values error
Item create/update fails due to duplicate values error as shown below
Error details: “the list item could not be added or updated because duplicate values were found in the following fields (s)” in the list:
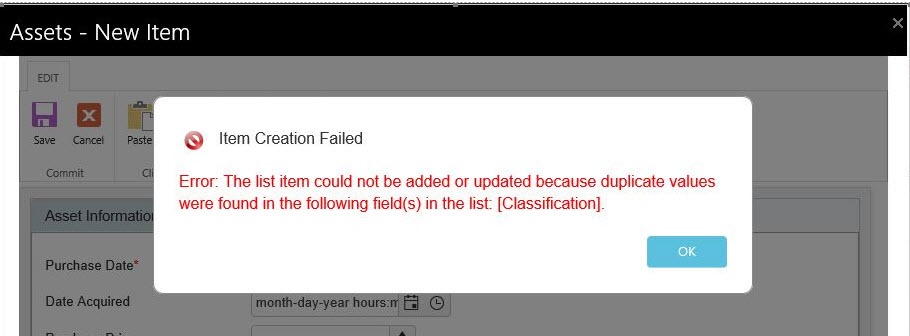
Cause
This issue can happen if “Enforce unique values” setting is enabled for the column shown in the error screenshot.
Fix
1. Disable the “Enforce unique values” setting for the column.
Go to List -> List Settings -> Edit column and disable the “Enforce unique values” setting and save.
2. If “Enforce unique values” is the business requirement then we need to specify a unique value for the column for every item while creating/updating items
Form looks congested with associated items grid
This can happen if associated items list view has many columns and one or more columns have multi-line data. With more columns, scroll bar comes up as shown below
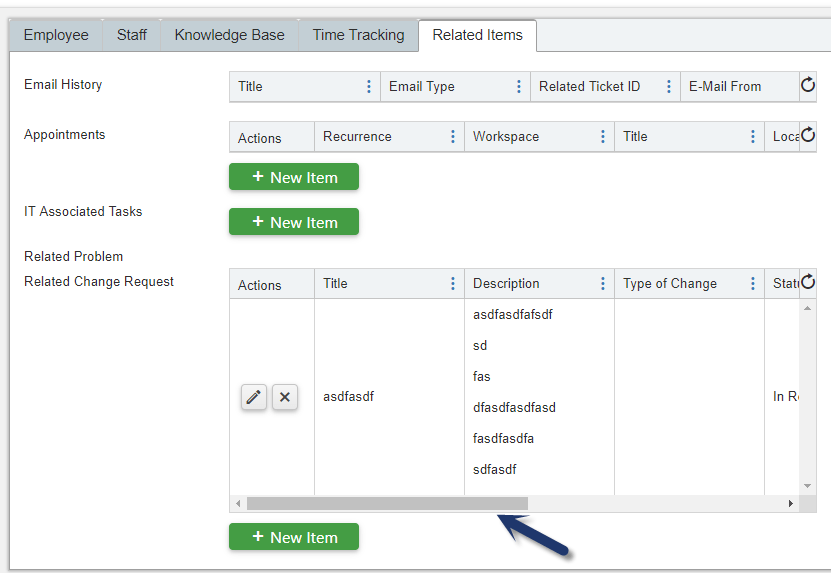
Please use one or more of the below options for this situation:
- Increase the Form width in the NITRO Form settings
- Navigate to required list –> list settings –> Crow Canyon NITRO Forms –> Layouts and Theme in left hand side panel –> adjust the Form Width of the NITRO form and publish the settings.
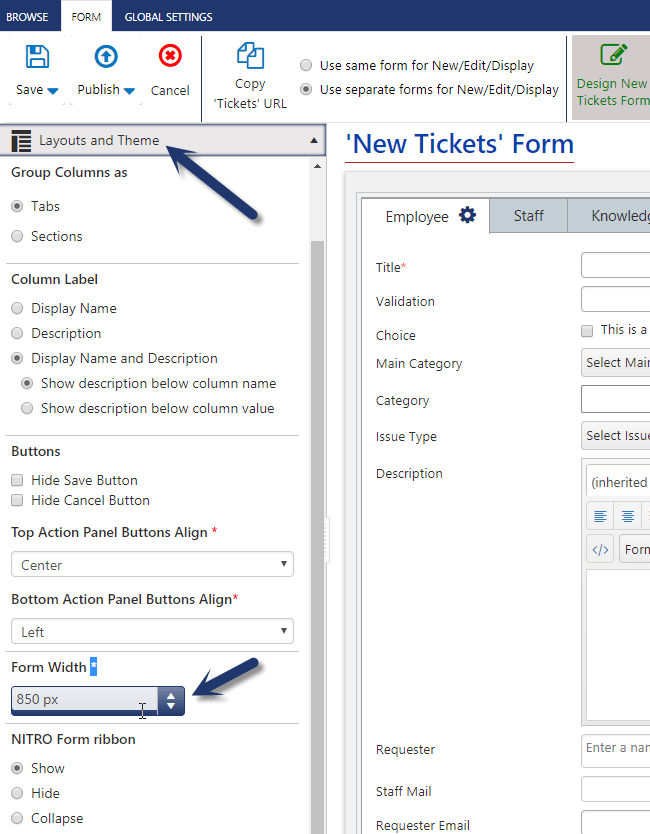
- Note: We need to configure form width for each form (new/edit/display) as required if separate forms are being used
- Navigate to required list –> list settings –> Crow Canyon NITRO Forms –> Layouts and Theme in left hand side panel –> adjust the Form Width of the NITRO form and publish the settings.
- Modify the columns in associated item list view:
Associated Items grid shows the columns as per the configurations in the list view specified in the associated item column settings. We can modify the view to remove columns that may not be required to show in the grid.
- Navigate to NITRO Forms configured for the list –> Advanced Section in left hand side panel –> Associated Item Settings –> Edit the required associated item settings to get the view name. See sample screenshot below:
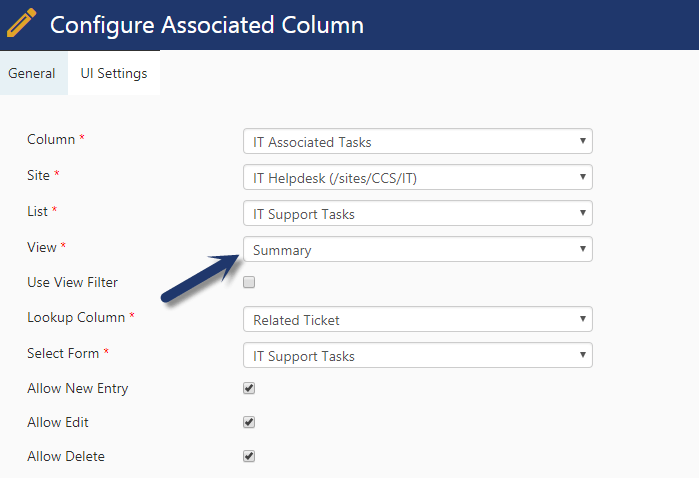
- Now navigate to the associated list –> List view as mentioned in the above screenshot –> edit the view and remove the columns that are not required
- Remove multi-line text columns
- Typically, description kind of columns have multiple lines of data and that doesn’t look very good in the grid as it increases the height of grid rows as per the data in multiple lines of text columns. Consider removing such columns from the view
- We can make use of Crow Canyon Associated item UI settings as shown below to have
- Vertical grid lines
- Enable pagination of items
- Set the width of individual columns
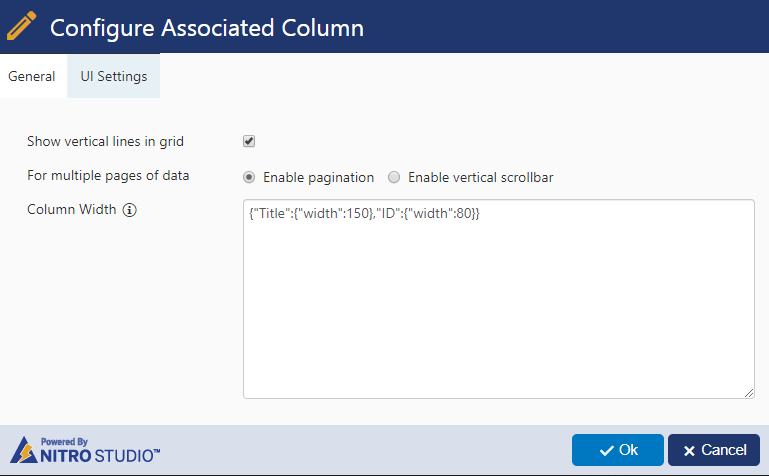
Note: We need to use the column internal names in the the column width JSON
Example format:{"Title":{"width":150},"ID":{"width":80}}
- Show/Hide vertical grid lines as required
- Pagination:
- Enable pagination to remove vertical scroll bar and show items in multiple pages. This is useful if associated items number is expected to be large
- If pagination bar is not required and number of items are not many, then enable vertical scrollbar
- We can also move the associated item to a new tab to have more space in case of having multiple associated items and having large content to be displayed on the form
- We can configure vertical layout in the tab/section settings as shown below where we have the associated items so that entire form width will be utilized by the associated item grid which makes the form look good.
Not able to publish NITRO Forms
Issue 1:
When publishing NITRO forms getting error as shown below:

Cause
This issue could happen if scripting capability is not enabled for the site.
Fix
Enable scripting capability for the site. Refer instructions from this article
Issue 2:
When publishing the NITRO forms, getting below error:

Cause:
This issue can happen if the size of NITRO forms settings file in “Site Assets” library exceeds 4MB.
Resolution:
Reduce the NITRO forms settings file size less than 4MB to publish the forms.
Follow below steps to reduce the NITRO forms settings file size:
- Instead of configuring separate forms for new, edit and display forms, configure a common form. Using column permissions in common form, columns can be hidden or made read-only depending on the mode (new, edit and display).
- Delete unused forms if multiple NITRO forms are configured for the list.
- Instead of configuring individual column level permissions, configure group ‘Column Permissions’ for multiple columns requiring same set of permissions. ‘Column Permissions’ is available in ‘Advanced’ section in left-hand panel of NITRO forms designer.
- Similarly, configure group ‘Column Validations’ for common validations for more than one column. ‘Column Validations’ is available in ‘Advanced’ section in left-hand panel of NITRO forms designer.
- Instead of directly putting custom script in “Eval” option in “Custom JavaScript” in NITRO Forms, put the script in a file and include the link to the file in “Link” option in “Custom JavaScript” in NITRO Forms.
- Refer this article for sample use case for custom script.
- If there are line/HTML controls with large text, then try to reduce it.
7. Open item display/edit form with a different NITRO form instead of default form
Description
We can configure multiple NITRO forms for a list. In some cases, we need to open different forms for different users.
For example, in Crow Canyon Helpdesk applications, staff will access the backend site (helpdesk site) to work on the Tickets and end users will use portal site to create/update/view the Tickets.
Based on the logged in user, we need to open the item in corresponding form. In this sample use case, we have considered Tickets list with below forms.
- Tickets (Default form), used in backend site for staff users.
- PortalTicket, used in portal site for end users.
For staff using the backend site, items will be opened with “Tickets” form (default). For end users using the portal site, items will be opened with “PortalTicket” form.
In some cases, staff will create Tickets from backend site on behalf of the end user. In this case, if requester (end user) opens this Ticket in portal, then it should open with “PortalTicket” form (and not the “Tickets” form).
In this sample use case, we have described a scenario where Staff will create Tickets from backend site using “Tickets” default form. On Tickets creation, a workflow will send an email to requester with link to the Ticket. When Requester clicks the Ticket link in the email, Ticket should open with “PortalTicket” form instead of “Tickets” form (form with which item was created). Link configured in send mail action: https://contoso.com/lists/Tickets/ccs_EditForm.aspx?FormKey=PortalTicket&ID=[ID|ID]
Issue
When Requester clicks the Ticket link in the email, Ticket opens with default form key “Tickets” instead of form key used in the link in the email.
Cause
Even though we specify value for “FormKey” in the URL, item will be opened with the form that was used to create the item. In this case, Ticket is created with default form “Tickets”, so it is opened with that form.
Resolution
Configure override form key in the URL in mail template.
Configure “OFormKey” instead of “FormKey” keyword in the URL in mail template
Ex: https://contoso.com/lists/Tickets/ccs_EditForm.aspx?OFormKey=PortalTicket&ID=[ID|ID]
Detailed steps
1. Modify the URL to open Tickets with ‘PortalTicket’ form as shown below:
Sample URL:
https://contoso.sharepoint.com/sites/Helpdesk/IT/Lists/Tickets/ccs_EditForm.aspx?OFormKey=PortalTicket&ID=[[ID||ID]]
Note:
‘FormKey= PortalTicket’ is replaced with ‘OFormKey= PortalTicket’.
2. Edit the mail template configured in ‘Send Mail’ action.
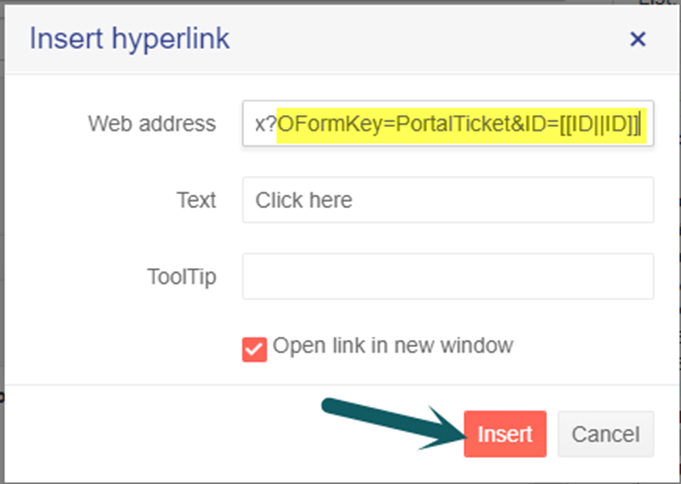
Select the text to insert link and click ‘Insert hyperlink’ from ‘Mail Body’.
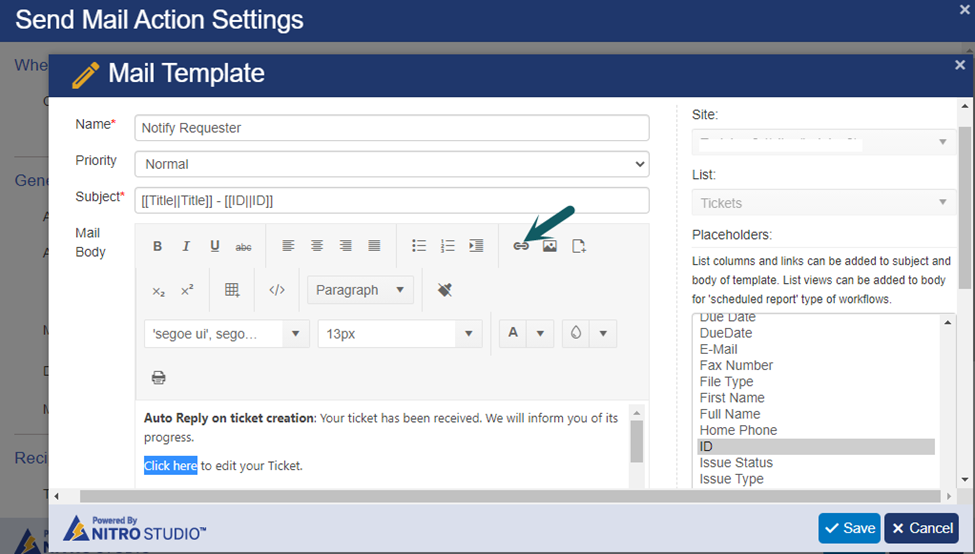
3. Paste the modified URL in ‘Web address’ -> Click ‘Insert’