Applies to: SharePoint Online and SharePoint On-Premises
Frequently asked questions on Configurable Portal
1. I was not able to get the copyright symbol into the footer. I tried using the html code, the html name code and copy and paste © . How do I add the copyright symbol?
Ans: Follow these instructions to add copyright symbol
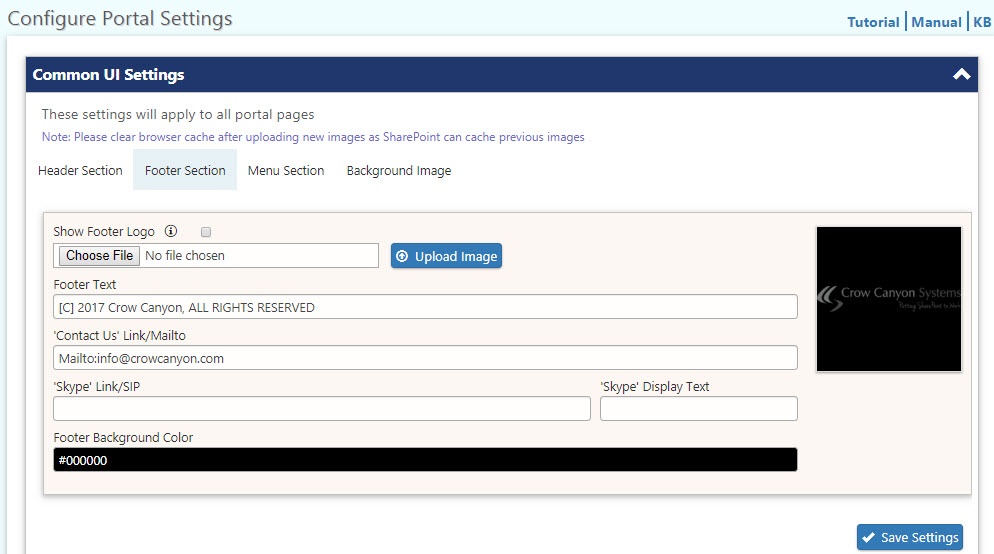
Please go to Portal settings –>Common UI Settings –> Footer Section –> configure Footer Text with copyright [C] symbol as specified below
2. How do I add new items under ”Notifications” and “Other Links” section?
Ans: Please go to Portal settings –> Home Page Settings –> click on ” Notifications” and ” Other Links” to configure notifications and other links respectively.

3. How to configure Quick Links with default field values?
Ans: Go to Portal settings –> Home Page Settings –> click on “Quick Links” to configure quick links respectively. Quick Links can be configured so that it auto fills Single Line Text field, Single Choice/Lookup type of controls in new form. URL format differs based on field type
Single Line Text Field/Single Choice field – PortalFormURL&FieldInternalName=<<Value>>
Lookup field – PortalFormURL&FieldInternalName=<<ID>>
To see field internal name, go to backend site –> Tickets list –> List Settings –> Edit the column and find internal name of the column at the end of the URL (see screenshot below)

Note: Internal name should be case sensitive.
Eg:
i) Auto Fill ‘Priority’ as ‘Normal’
Click on ‘Manage Quick Links’ link as shown above in Portal Settings and create/update an existing item as shown
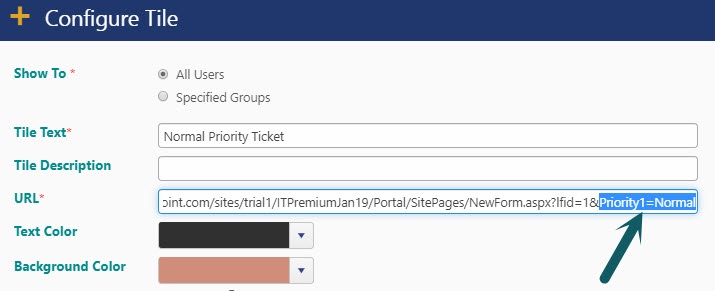
Output: When this Quick link is clicked, ‘Priority’ value should get auto filled as ‘Normal’
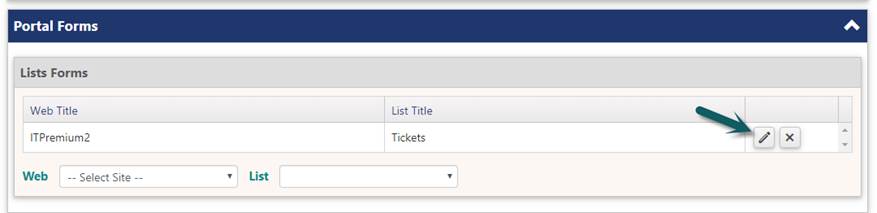
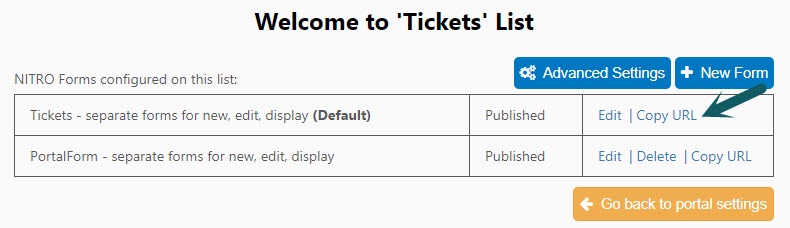
To copy portal form URL, select a portal form and click on edit icon and copy URL as shown below.

ii) Auto fill ‘Category’ and ‘Issue Type’ fields with default values
In a similar way as shown above, configure a quick link with Category as ‘Calendar’ and Issue Type as ‘Remainders’ by specifying their corresponding IDs
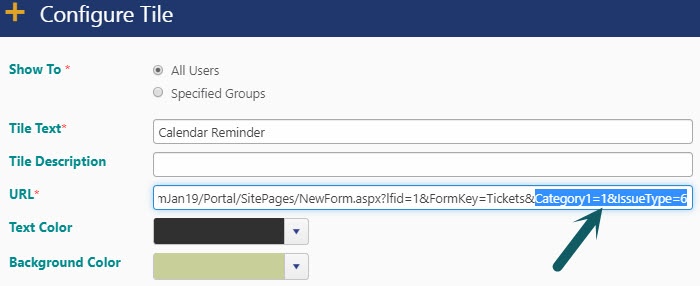
Output: When this quick link is clicked, portal form gets opened with Category and Issue Type values as ‘Calendar’ and ‘Reminder’
4. The Cancel button on the Submit New Ticket page navigates to View Submitted Tickets page. Is that the correct path?
Ans: As per our application by default we configure it to ‘View Submitted Tickets’ page when a Submit Ticket gets cancelled/saved. If you want to change it please go to Portal settings –> Portal Forms –> Edit “Tickets” form —> Edit “Tickets” form –> left side panel click on “Layouts and Theme” configure Save Button Redirect and Cancel Button Redirect Url.

5. Configuration on “Other Links” is as shown
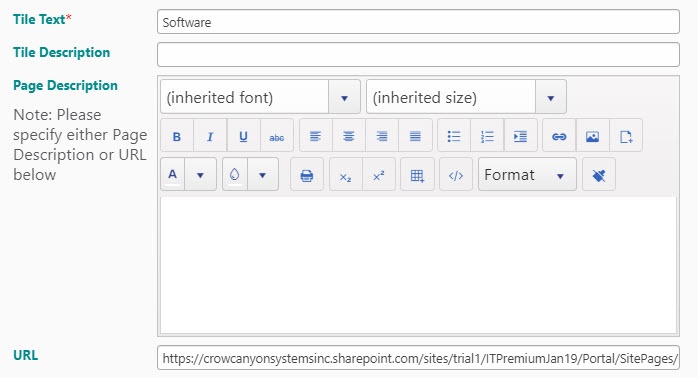
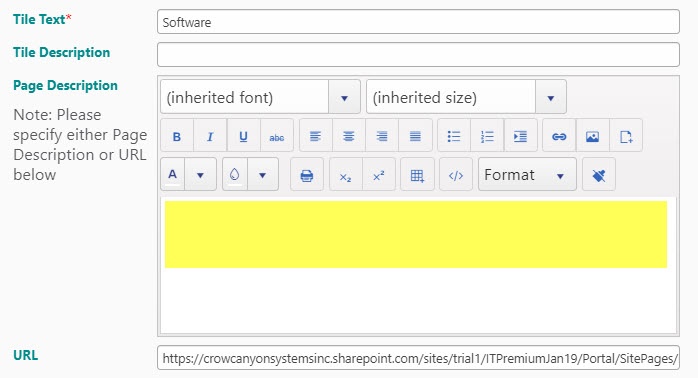
When I click on an “Other Links” tile I am getting a blank page.

Ans: As “PageDescription” in “Other Link” configurations is left blank (image 1). Please go to Portal settings –> Home Page Settings –> click on “Other Links” and edit link which is showing blank page and fill some description.
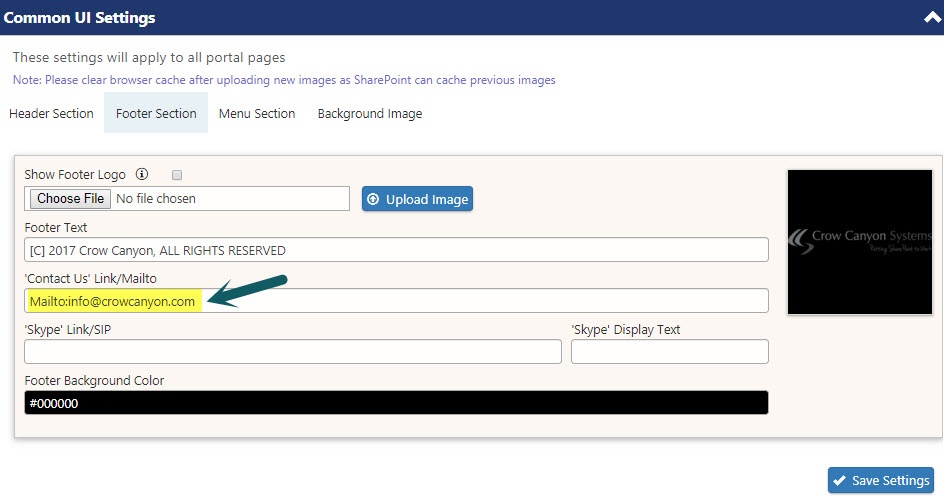
6. ‘Contact Us’ Link/Mailto link does not open Outlook it goes to the link specified below. What is the correct configuration?
/Portal/SitePages/info@crowcanyon.com
Ans: Configuration under ‘Contact Us’ should be as mailto:emailaddress format. To check configuration please go to Portal settings –> Common UI Settings –> Footer Section –> ‘Contact Us’ Link/Mailto. If it is not as specified please update link under ‘Contact Us’ and save settings.
E.g.,
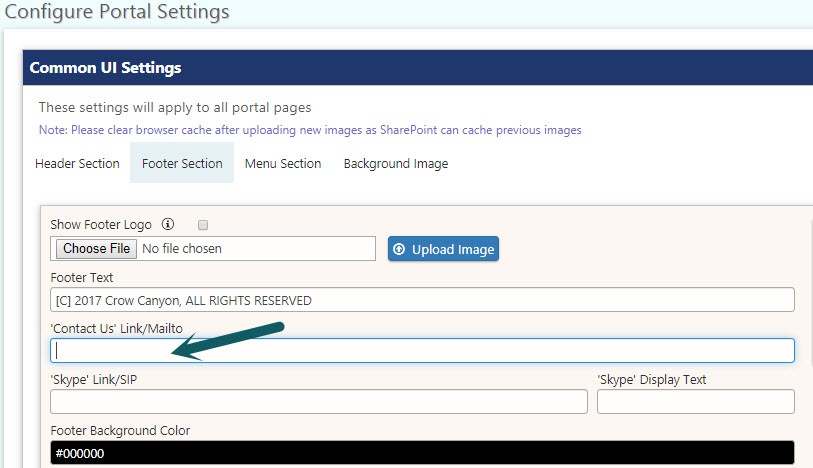
How to remove “Contact Us” from footer section?
If we want to remove “Contact Us” from footer section set the value of contact us to a space (not blank, since that takes the default value) in Footer section of the portal settings.
7. what are the image resolution sizes in portal?
Logo: 150 x 150px
Footer Logo: 230 x 50px
Background Image: 1350 x 900px
Page Icon: 135 x 125px
Browser tab icon: 32 x 32px
8. How to configure security settings for end users in Portal?
Please refer https://www.crowcanyon.help/article/248 to configure security settings for end users in portal
9. How to add fields into new/edit/display forms in Portal?
Go to Portal site –> Portal Settings –> Portal Forms –> Edit new/edit/display Form–> Click on “Create column” and create column as per your requirement–> Left side pane click on Form Controls and add that recently created column into the form.

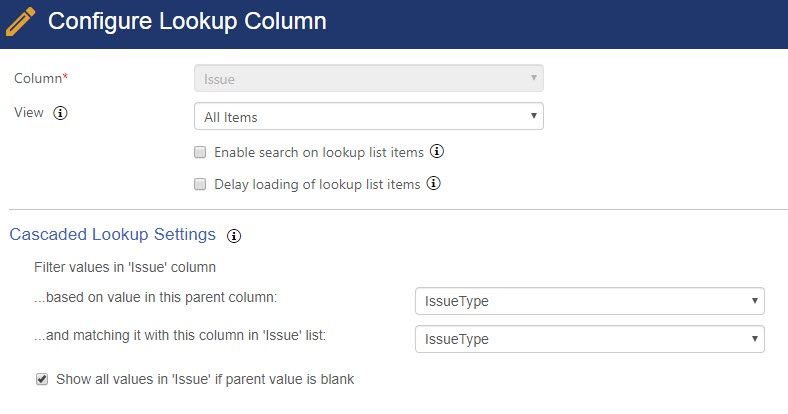
10. How to configure Cascading functionality between three lookup columns in Portal?
1. We already have a Category and Issue Type cascading feature set up for the Tickets. Simply add another list in the Site, called “Issue”.
2. The Issue list needs to have a column for the Issue name (this can be the Title column renamed to “Issue”) and a standard SharePoint Lookup column for “Issue Type”.
3. Add an “Issue” column as a standard SharePoint Lookup column to the Tickets list.
Go to Portal site –> Portal Settings –> Portal Forms–> Edit Form–> left side pane open Form Settings –> click on Lookup Settings –> Configure Cascading between Category, Issue Type and Issue like below.
In an item in the Tickets, you will see three levels of cascading (assuming the three columns — Category, Issue Type, and Issue — have been added to the Ticket form).
11. How to configure Advanced lookup column settings in Portal?
Go to Portal site –> Portal Settings –> Portal Pages –> Edit Form –> left side pane open Form Settings –> click on Lookup Settings and configure the auto-fill lookup data like shown below
The below configuration will auto populates the “Description” with “Template” field data (lookup list column).

Note: If we don’t want to configure the cascaded lookup settings then leave the settings and configure the column mapping.
12. How to add/modify the banner image in the Portal?
i. Add Banner image to the Portal site:
Prepare the banner image (690×120 px) and save it with the name as banner.png
Step1: Go to Portal site, say https://…./Portal/SitePages/Index.aspx be the URL of th Portal site
Step2: Edit the URL manually and go to Portal Site Contents, URL will be like: https://…./Portal/_layouts/15/viewlsts.aspx
Step3: Go to Site Assets Document Library –> Portal Folder –> upload the image in this folder with the name as banner.png
The added image will be applied as the banner image in the Portal.
ii. To modify the Banner image, plesae go to Step3 and upload the new banner.png file and replace on prompt.
iii.If we want to remove the banner image from the portal, then delete the banner.png file from the Portal folder
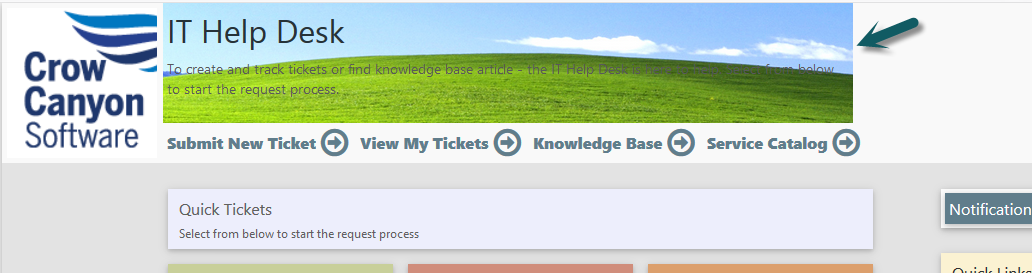
Portal Page before uploading the banner:
Portal Page after uploading the banner:
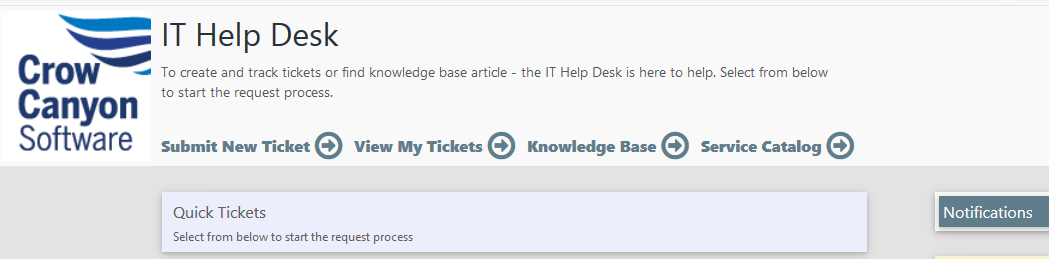
13. How to change the default landing page in Crow Canyon configurable portal?
Go to Portal settings –> Home page settings –> Select the required page in “Start Page” drop down and save the settings (Knowledge Base page is selected in the sample screenshot below).

14. How to modify the Email icon in the footer?
It is directly not possible to modify the mail icon in footer section. Go to Portal site (URL: https://contoso.sharepoint.com/sites/demo/itpremium/portal/SiteAssets) -> Site Assets -> Portal folder -> Images -> rename the icon that you want to upload in place of mail icon to “contactus.png” and upload it in this folder.
Icon resolution: 20 x 20
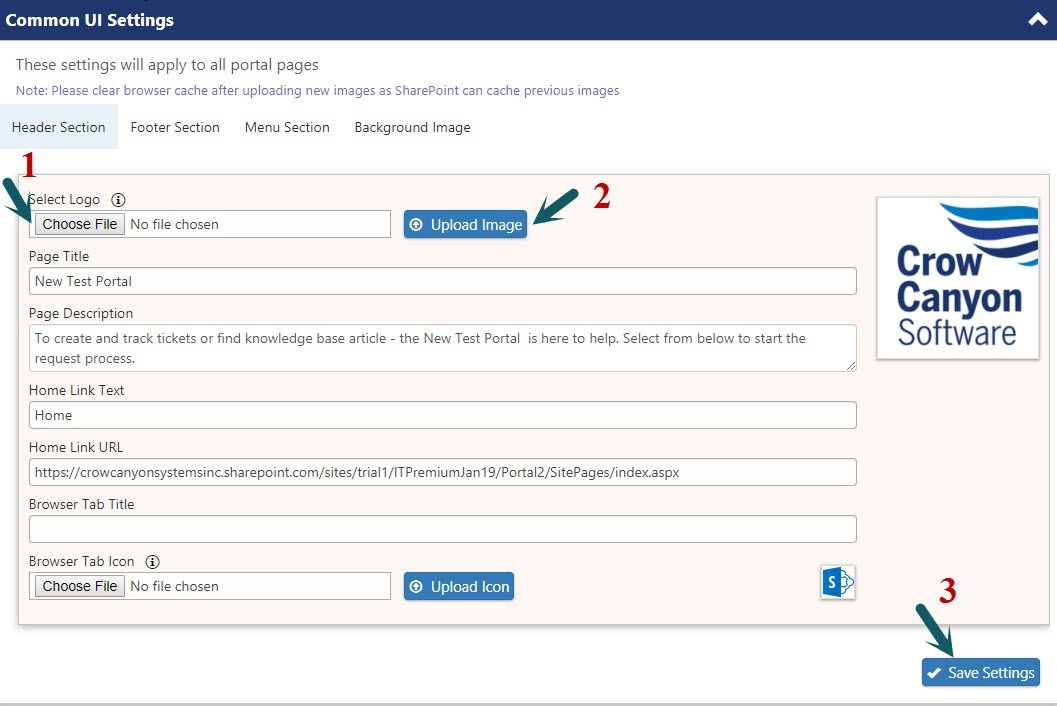
15. How to change the Portal logo?
Go to Portal Settings –> Common UI Settings –> Header Section –> Select the logo image (150 X 150 px). Click ‘Upload Image’ and Save the settings as shown below:
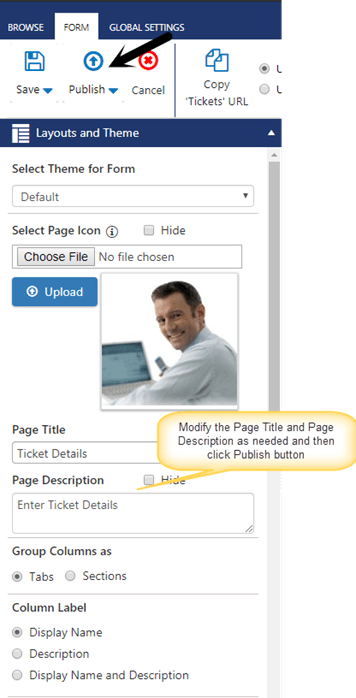
16. How to modify the page “Title” and “Description” in portal forms?
Go to Portal Settings –> Portal Forms -> Edit Tickets list forms. This will open the NITRO forms designer. Modify the “Page Title”, “Page Description” in “Layouts and Theme” section and then publish the NITRO forms.
Note: If these settings are not visible in the forms designer, please upgrade the portal site using Crow Canyon Power Portal App and try again. To upgrade portal, go to Application Administration in back-end site –> Crow Canyon NITRO Apps –> Power Portal App.