Applies to: SharePoint Online and SharePoint On-Premises
Requirement Description:
Send the resolution for requester approval before closing the ticket. Generally Assigned Staff is allowed to close the ticket directly, however, it is possible to configure such that resolution is sent to requester so requester can close the ticket from portal and/or can add comments and update the ticket.
Summary of Steps:
- Configure required list schema
- Add “Resolved” status option to the “Request Status” choice column in Ticket list
- Create “Resolved Date” date time column in Tickets list
- Configure notification to Requester on ticket resolve and update resolved date on the ticket using Crow Canyon NITRO Workflow Manager
- Refer Article to send notification on ticket resolution and updates the Resolved Date on Ticket
- For mail template configuration, please follow “Mail template Configuration Steps” instructions under “Detailed Steps” below in this article
- Configure portal ticket edit form with custom action that is visible for only Resolved tickets
- Refer “Custom Action in Portal Forms” instructions under “Detailed Steps” below in this article
- Configure a workflow that auto closes the resolved ticket after “n” number of days of its resolved date
- Refer Article to auto close resolved tickets after ‘n’ number of days.
Detailed Steps:
Mail template Configuration Steps:
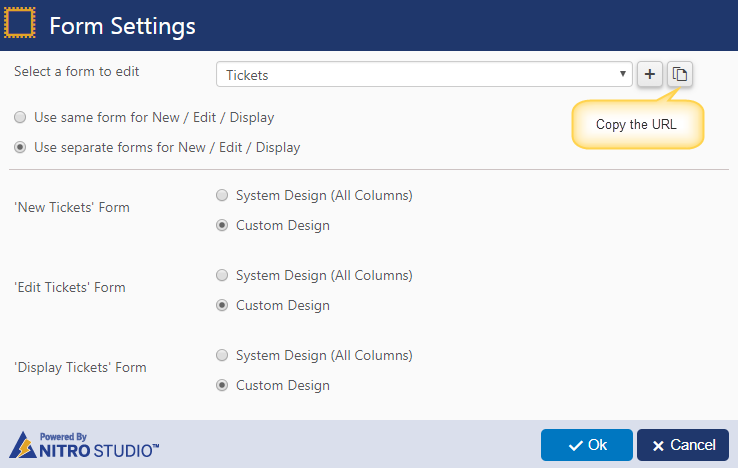
Copy the Tickets list forms URL from Portal Site. Go to Portal Site –> Portal Settings –> Portal Forms –> Edit Tickets list forms –> Form Settings and copy the URL like shown below
Format the URL like shown below:
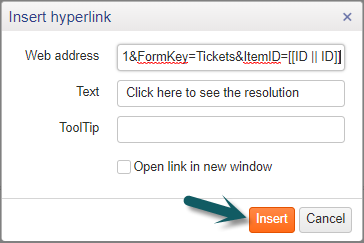
Ex: https://crowcanyonsystemsinc.sharepoint.com/sites/demoSP20/NitroUpgrade/Portal/SitePages/DisplayForm.aspx?lfid=1&FormKey=Tickets&ItemID=[[ID || ID]]
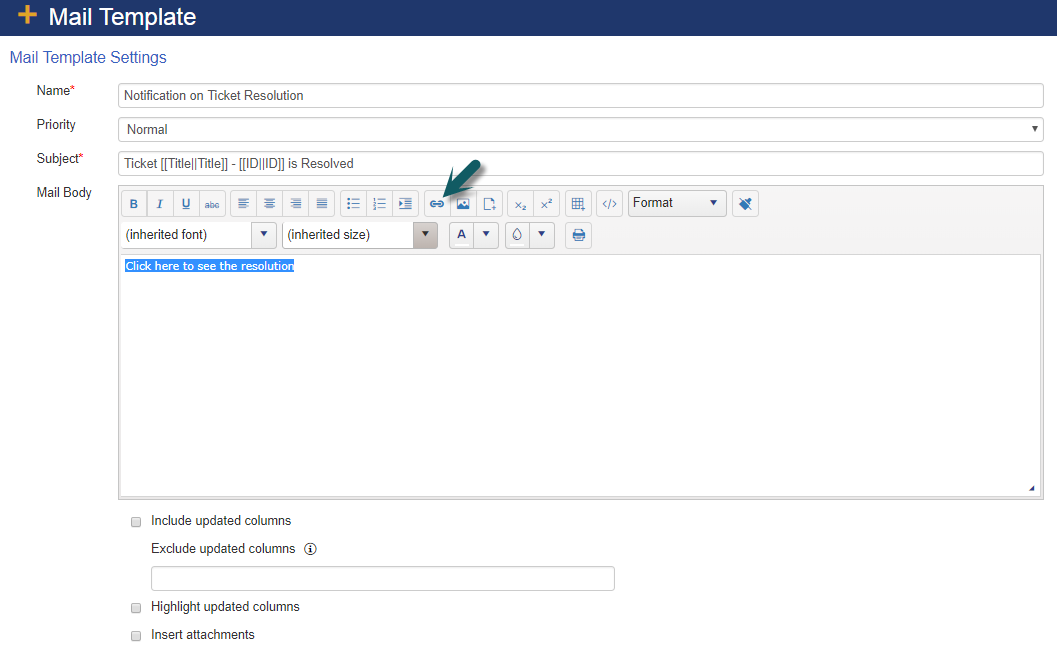
Next, configure the URL in mail template like shown below.
Custom Action in Portal Forms
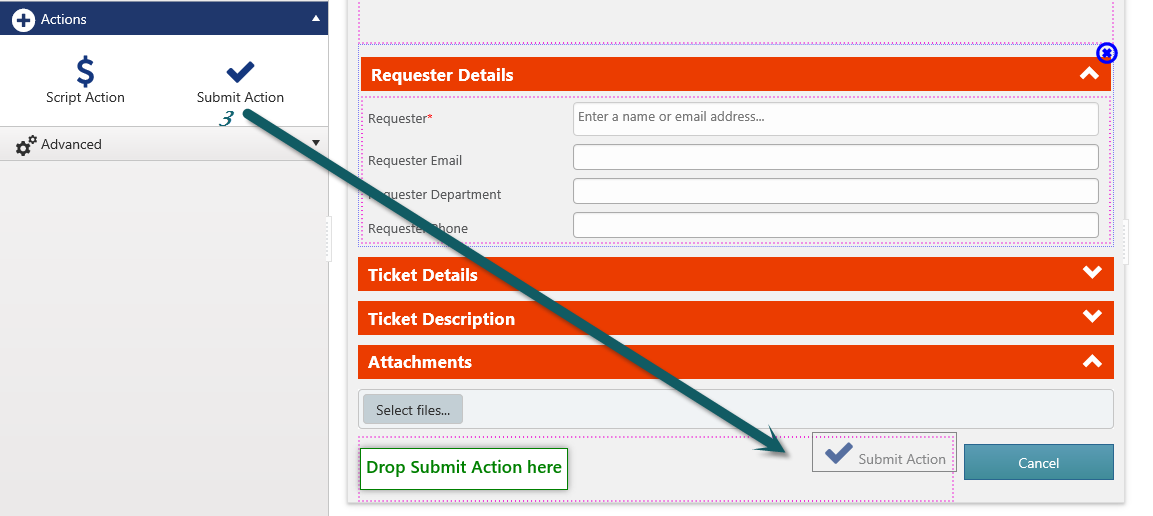
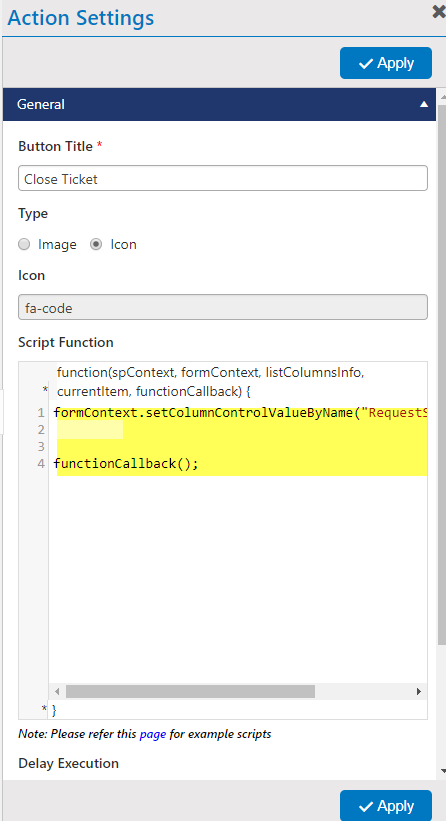
Go to Portal Site –> Portal Settings –> Portal Forms –> Edit Tickets list forms –> Switch to Edit form –> Add “Submit Action” button to the form.
In Submit Action settings, add the below two lines of script code to the “Script Function” container and then click “Apply” button.
Script:
formContext.setColumnControlValueByName("RequestStatus", "Closed");
functionCallback();
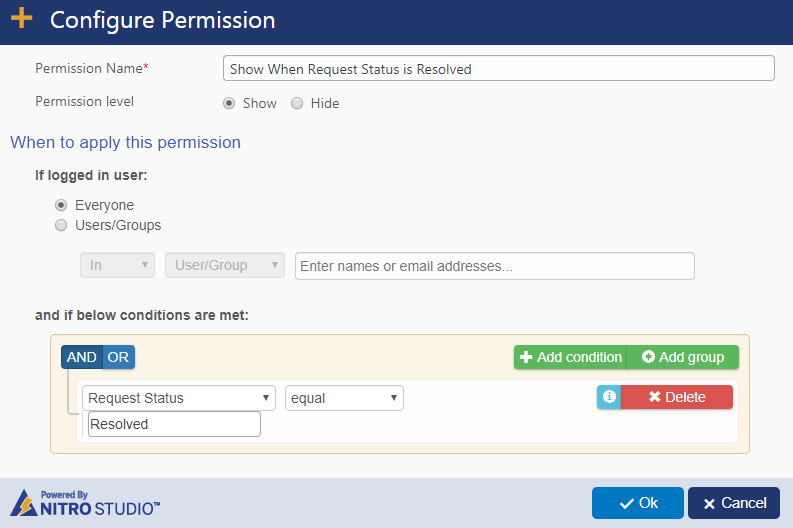
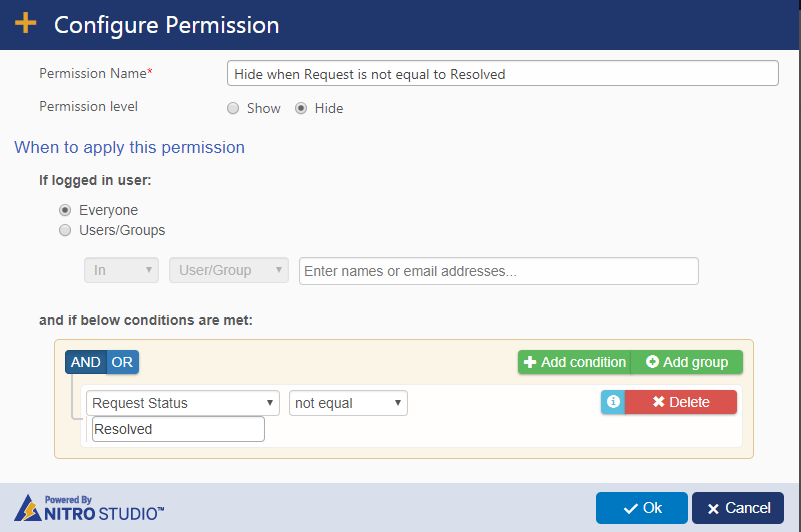
Configure permissions to show this button only when the “Request Status” is equal to “Resolved”
Show:
Hide:
After configuring the permissions, click “Apply” button and publish the Ticket forms.