Applies to: SharePoint Online
Description
This article describes the steps to migrate NITRO configurations from one site to another site.
Summary of steps
- Create site and lists schema
- Validate site schema
- Install NITRO Studio
- Export and import NITRO configurations (Forms, Custom Actions and Workflows)
- Reconfigure other NITRO components
- Configure workspace/site pages
- Register License
Detailed steps
- Create site and lists schema
- In SharePoint Online, we cannot take source site collection backup and restore it in target site collection like SharePoint on-premises. We must take the list templates from source site manually and create lists using these list templates in target site.
- When doing this, lookup columns will be broken in target site. We need to recreate those columns manually with same internal name along with other column settings and update the required views.
- In SharePoint Online, we cannot take source site collection backup and restore it in target site collection like SharePoint on-premises. We must take the list templates from source site manually and create lists using these list templates in target site.
- Validate site schema
- Go to site contents and make sure that list names match in both source and target sites.
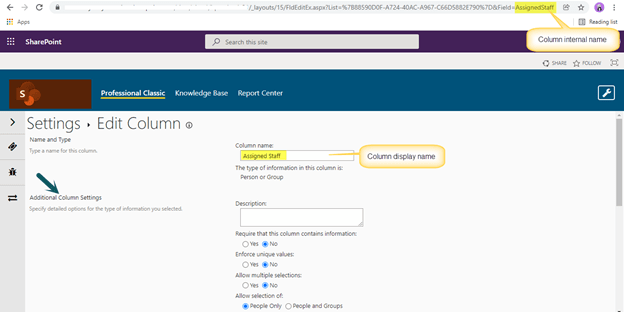
- Go to the list that has NITRO Forms/Workflows/Custom Actions configured, go to list settings, open a column, check the internal name and column settings, they all should match with corresponding source list column settings.
- If we create list using list template, then we only need to check this for the columns that we recreate as mentioned in #1 above.
- We can find the internal name of the column as shown in address bar of browser when we open a column:
- Install NITRO Studio
- Reference: https://www.crowcanyon.help/article/424/
- Note:
- If any custom migration tool is used, then skip “Site Assets” library from the data migration if there are no other files except NITRO configurations in “CCS” folder, because these files will be created after we import/reconfigure NITRO configurations.
- If the “CCS” folder data in “Site Assets” library is already migrated, then delete “CCS” folder manually in target site.
- Export and import NITRO configurations (Forms, Custom Actions and Workflows)
- Reference: https://www.crowcanyon.help/article/445/
- Note: This article does not indicate custom actions, but we do support NITRO custom action export/import.
- Reconfigure other NITRO components
- If other NITRO components like list views, reports, print templates, list formatting, ID column, linked items etc. are used in source environment, then configure them manually in target site.
- Configure workspace/site pages
- Contact sharepointsupport@crowcanyon.com for licensing target site.
- We need source site and target site URLs.