NITRO Forms
In this update we alphabetized the lists of columns in various settings. For instance, if you’re selecting multiple columns in the Column Permission settings, you’ll now see all of the list’s columns in alphabetical order. Previously, they would be in the order in which they were created. This will make it easier for selecting columns from the drop down. Of course, you can still search for the column in case you have a large number of columns in the list.
You’ll see this in Column Permissions, as mentioned above, but also Column Validations, Form Event Actions, in the Form Controls section, and anywhere else you see a list of columns to select.
Tiles and Dials
For Link Tiles, you now have an option to float a caption outside of the tile itself. For example, if you wanted to create the tile as a circle (from the 2.0.0.71 release), but put the text below the tile, that is now possible. Here is an example, using rectangular tiles, of what that can look like:
To set this up, go to the Tiles and Dials settings, and click on the Tiles/Header Layout section. Then scroll to the bottom to enable captions:
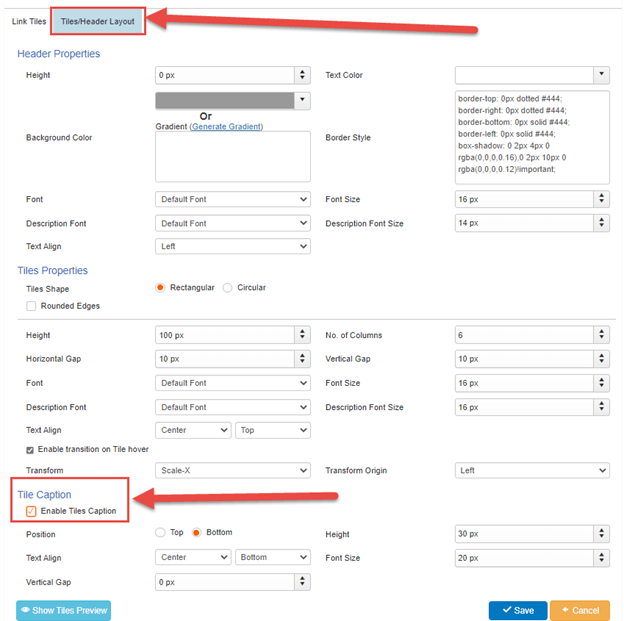
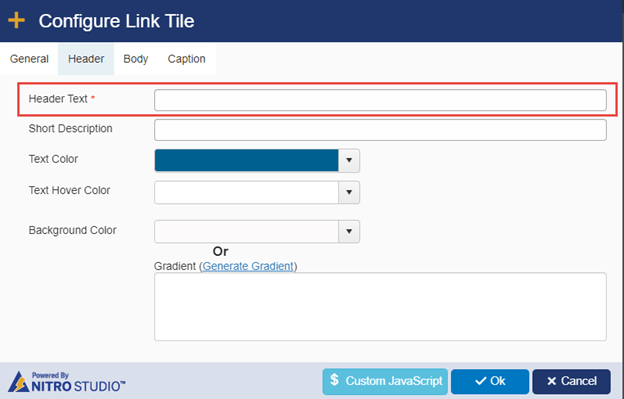
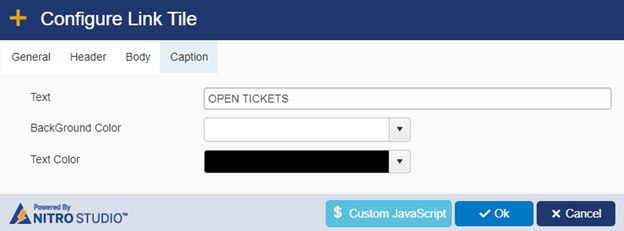
Once checked, you’ll have options for how the caption is presented. Go back to the Link Tiles section. The Header Text should be removed. Even though it shows as required, it will not be required. Then you can select the Caption option to configure your caption:
Delete text from the highlighted field, if any:
Add text to Caption, and configure the colors of the font and background:
NITRO Studio Responsive UI
We released several new features and fixes in the responsive UI for NITRO for when accessing sites on a mobile device. These include:
- Scrolling fixes in NITRO portal knowledge base web part.
- Added class for page title so that it can be customized.
- List search grid view alternate colors.
- Fix for horizontal scrolling issue in NITRO forms.
- UI fixes for tiles and dials.
NITRO Engage
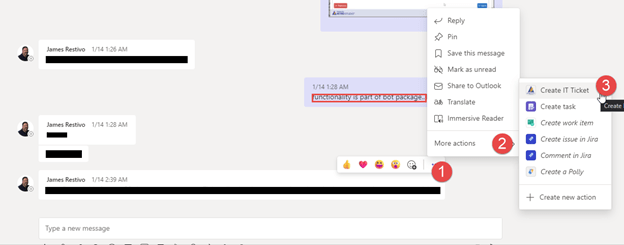
For our Teams integration work, we added the ability to create an item from a conversation in Teams. This is managed through the NITRO Engage app.
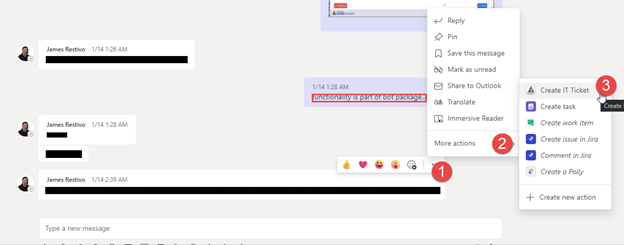
When chatting with someone you can select the ellipsis in the chat and navigate to Create IT Ticket to create a new ticket in our NITRO Help Desk:
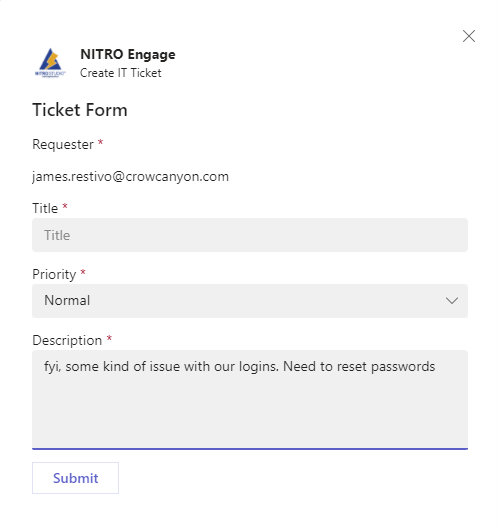
You’ll get a simple form to fill out with the content of the most recent message as the description:
Enabling the feature
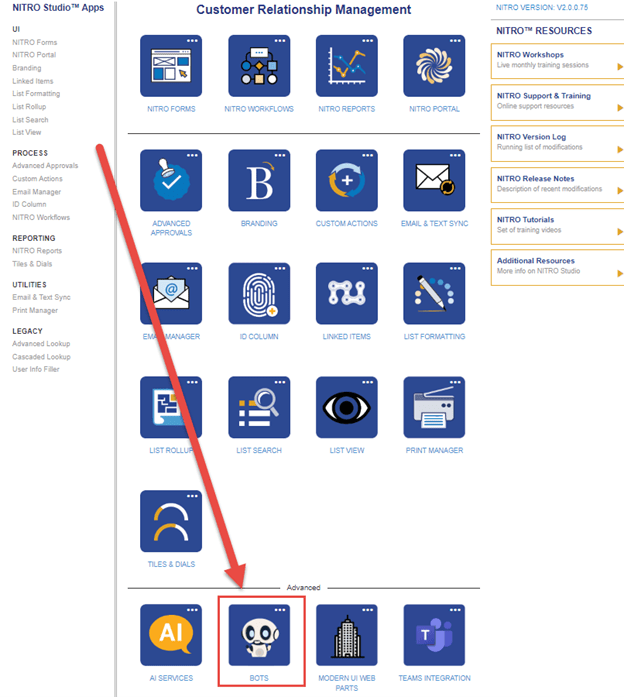
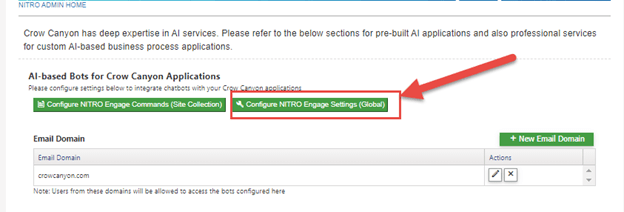
You can set this up in the NITRO Engage app by going to Bots under the NITRO Studio page:
Then click on “Configure NITRO Engage Settings (Global)”:
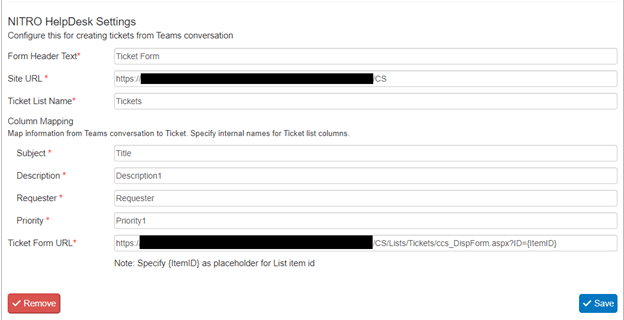
Then fill out the NITRO Help Desk Settings section:
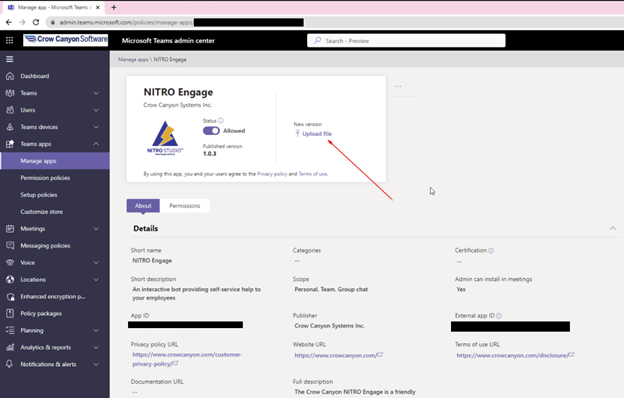
Once that is done, you can then update the NITRO Engage app in Teams if you haven’t already:
Restart Teams, and then you’ll see the option: