Applies To
SharePoint On-Premises
Description
This article describes the additional configurations required after web application or site collection backup/restore operation using standard Microsoft methods. This will be applicable to both NITRO Studio activated sites and NITRO pre-built application sites.
Summary of Steps
Detailed Steps
We need to ensure all the Crow Canyon Solutions are already deployed in the target SharePoint environment prior to the restore process. Install Crow Canyon NITRO Studio solutions (CrowCanyon.NITROStudio.wsp, CrowCanyon.WorkflowManager.wsp and CrowCanyon.CommonUtils.wsp) in target SharePoint on-premises environment.
If the web application has one of the below Crow Canyon pre-built applications then we need install two additional solutions (CCSSRWorkflows.wsp and CrowCanyon.TimerJobs.wsp)
Pre-built Crow Canyon Applications
- IT Help Desk
- Facilities Management
- Request Management
- Customer Service
- Asset Management
- Equipment Management
If source environment is using NITRO Secure version: Refer https://www.crowcanyon.help/article/617 to install Crow Canyon NITRO Studio Secure.
If source environment is using NITRO Studio version: Refer https://www.crowcanyon.help/article/448 to install Crow Canyon NITRO Studio.
Note: This step needs to be performed before the restore operation.
Web Application Backup and Restore
Backup process reference: https://docs.microsoft.com/en-us/sharepoint/administration/back-up-a-web-application#use-sql-server-tools-to-back-up-a-databases-that-are-associated-with-a-web-application
Restore process reference: https://docs.microsoft.com/en-us/sharepoint/administration/restore-a-web-application#using-sql-server-tools-to-restore-databases-associated-with-a-web-application-in-sharepoint-server
Please note that after the content database is restored, there are other steps like “Mount-SPContentDatabase” etc. and we are not covering those steps here as this article intention is to describe the NITRO specific steps after the restore is done.
Site Collection Backup and Restore
Backup process reference: https://docs.microsoft.com/en-us/powershell/module/sharepoint-server/backup-spsite?view=sharepoint-ps
Restore process reference: https://docs.microsoft.com/en-us/powershell/module/sharepoint-server/restore-spsite?view=sharepoint-ps
Activate NITRO Studio and Apply License
After the Web Application/Site Collection is restored in target environment, we need to go to Crow Canyon NITRO Studio –> Activate NITRO Studio for all the sites in target environment, for the sites that use NITRO in source environment.
Please refer the steps from ‘Activate NITRO for a site’ section to activate NITRO from https://www.crowcanyon.help/article/617/
Please contact sharepointsupport@crowcanyon.com for the license in target environment and the steps to register the NITRO license.
1. Reconfigure NITRO site for URL Change
Refer https://www.crowcanyon.help/article/605 for the steps to perform for the NITRO Studio activated sites.
2. Crow Canyon Timer Jobs
This step can be skipped if we are not using Crow Canyon prebuilt application except Onboarding, Contracts Management and Project Management applications.
Reactivate Crow Canyon Timer Job Features for the site collection and ensure timer jobs are created in SharePoint Central Administration.
Refer #1 and #3 steps in https://www.crowcanyon.help/article/418.
3. Recreate Crow Canyon Product workflow instances
Refer https://www.crowcanyon.help/article/312 for the steps.
Note: This step is applicable for only Crow Canyon prebuilt applications like IT Help Desk, Facilities, Requests Management and Customer Service.
4. Navigation Links
Review every link in Top Link and quick launch menu links and update the link as required. Please refer the steps from https://support.microsoft.com/en-us/office/customize-the-navigation-on-your-sharepoint-site-3cd61ae7-a9ed-4e1e-bf6d-4655f0bf25ca
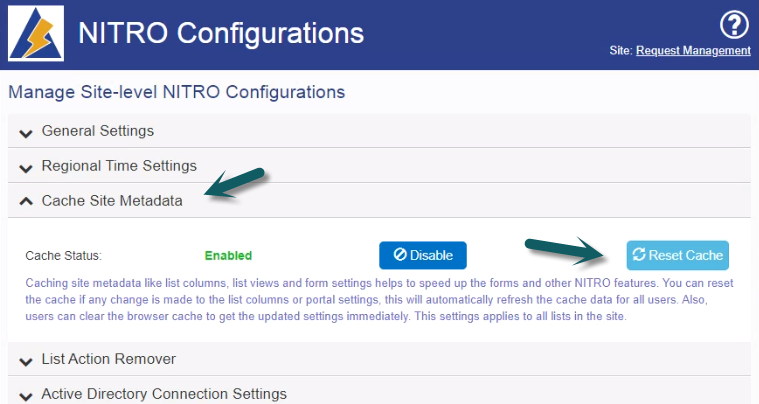
5. Reset NITRO Cache
Go to site settings -> Site Administration -> Crow Canyon NITRO Site settings -> Cache site metadata -> click on ‘Reset Cache’
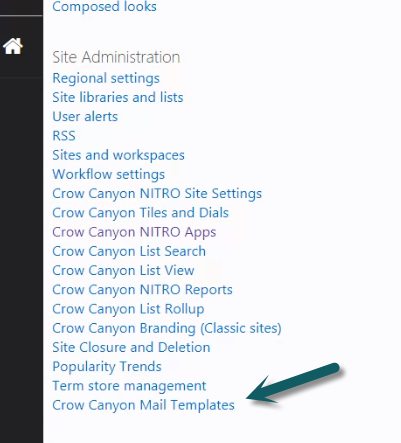
6. Update hyperlinks in Mail Template
Go to site settings -> Site Administration -> Crow Canyon Mail Templates -> edit each mail template -> replace any link that refers to source site URL with corresponding target site URL
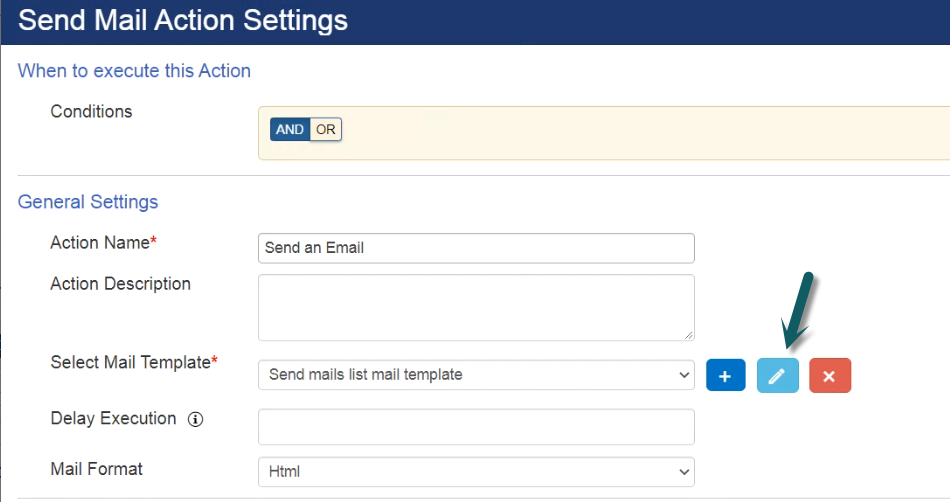
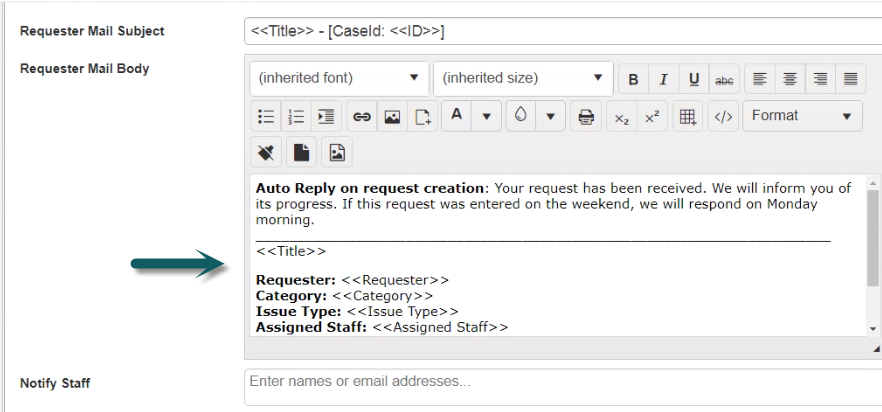
Go to Crow Canyon Workflow Manager -> edit each workflow -> edit each send mail action -> edit the mail template -> replace any link that refers to source site URL with corresponding target site URL
For Crow Canyon prebuilt applications like IT Helpdesk, Facilities, Requests Management and Customer Service, go to Application Administration, Notifications, update standard auto notification mail templates if there are any links referring to source environment.
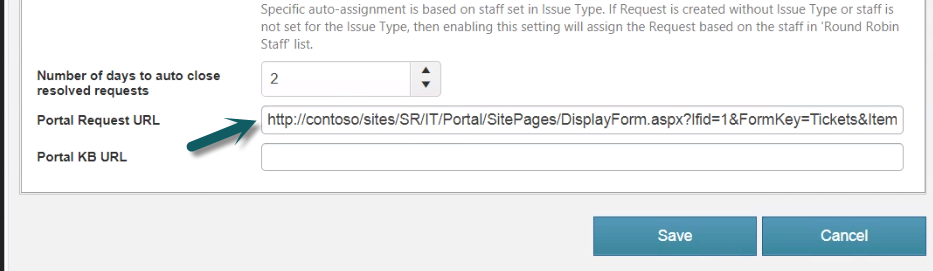
7. Portal Ticket Link in Configurations
For Crow Canyon prebuilt applications: IT Helpdesk, Facilities, Requests Management and Customer Service sites; go to Application Administration -> General Configurations -> replace source portal Ticket link URL with corresponding target site URL.
8. Portal Site
Refer “Power Portal section from https://www.crowcanyon.help/article/605