Applies to: SharePoint Online
Introduction
This article describes installation of Crow Canyon NITRO Studio. This installation uses the NITRO Framework app with site collection level permissions. Please note that it is preferable to use framework app with tenant level permissions as it makes the NITRO installation and upgrades significantly easy and automated. You can refer this Article for installation instructions. However, if you can’t install the tenant level app due to any restrictions then please follow this article to complete the install using site collection level app.
Prerequisites
- User Permissions
- User doing the installation needs Site Collection administrator permissions on the site collection where NITRO Studio is going to be installed
- Site Collection
- To install NITRO Studio in a new site collection, tenant administrator should create a new site collection
- Or installation can be done in an existing site collection
- Site Collection App Catalog
- Site collection app catalog has to be created by the tenant administrator if it doesn’t exist already. Reference: Create a site collection app catalog
- Once the app catalog is created, adding apps and installation can be done by site collection administrator.
- Access Control
- If “Allow access from specific IP Address locations” is enabled in Access Control for the tenancy, please refer this article and allow the the IP Addresses.
- Enable Custom App Authentication in O365
- Some SharePoint tenancies have custom app authentication disabled. In this scenario, Custom Apps do not work in SharePoint sites and show “The Remote Server returned an error: (401) Unauthorized” error. If you encounter this error when opening NITRO Studio app, please click here to check and enable Custom App authentication.
Package Information
- Please contact support@crowcanyon.com for the NITRO Studio Site Collection Framework package.
- Once downloaded to your computer, right click on the downloaded “NITRO_O365_SiteCollection.zip” file, go to properties and unblock it if it is blocked and then extract the files.
Extracted package contains below files:
| App Name | Description |
| CrowCanyon.NitroStudio.app | Main NITRO Studio App that is used to activate NITRO features in a site and manage NITRO in activated sites |
| CrowCanyon.NITROFramework.app | Used by NITRO Studio App for working with SharePoint Online. It provides the base functionality and permissions for NITRO activation and updates etc. |
| CrowCanyon.EmailSync.app | This App provides the functionality to monitor emails in a Microsoft Exchange mailbox and create those mails as SharePoint list items in O365 |
| CrowCanyon.ApprovalWorkflow.app | Configure approval workflows easily on SharePoint lists |
| CrowCanyon.WorkflowManager.app | Configure business workflows on SharePoint lists. Supports workflows on list item create/update/delete, based on date time values in the list items and also scheduled workflows (fixed time or recurring Calendar) |
| CrowCanyon.ConfigurablePortal.app | Create easy to configure and use versatile Portal sites as a front end to your SharePoint business process sites. Provides customized UI and security settings to provide a simplified and secure interface to users |
| CrowCanyonNITROSPFxWebParts.sppkg | Provides NITRO features in SharePoint modern sites. Modern UI has different types of lists and pages and all the NITRO components are fully supported |
| CrowCanyonNITROWebPartsII.sppkg | Provides NITRO features in SharePoint modern sites. Modern UI has different types of lists and pages and all the NITRO components are fully supported |
Installation
Summary of Steps
- Upload all the apps (SharePoint Add-ins) listed in above table into the site collection app catalog
- Install below SharePoint add-ins in the root of the site collection
- CrowCanyon.NitroStudio.app
- CrowCanyon.NITROFramework.app
- Setup NITRO Studio
- Activate NITRO Studio
Detailed Steps
Upload SharePoint Add-ins to site collection app catalog
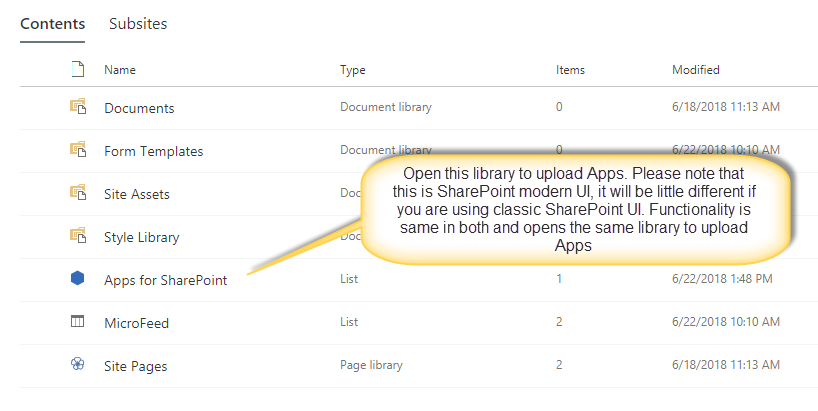
- Go to root site of the site collection (It will have URL like https://<your SharePoint tenant name>.sharepoint.com/sites/<your site collection URL name>), “Site Contents” and click “Apps for SharePoint” library link to open it as shown below.
![]()
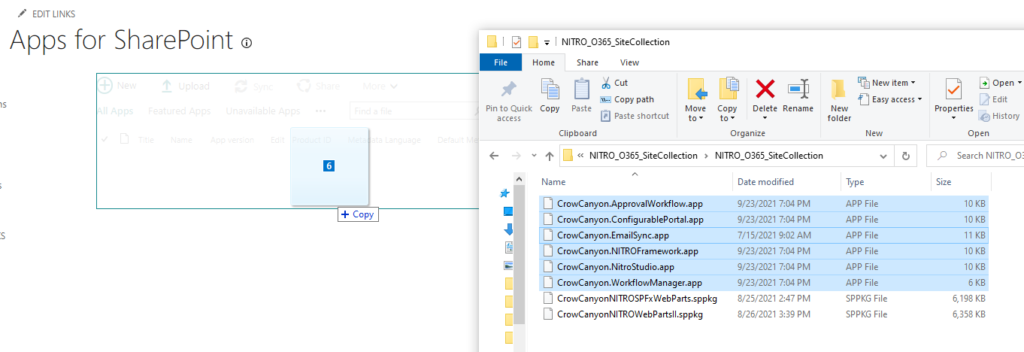
- Upload all the extracted SharePoint Add-ins into ‘Apps for SharePoint’. Select all the files except “CrowCanyonNITROSPFxWebParts.sppkg” and “CrowCanyonNITROWebPartsII.sppkg” and drag them over at once as shown below.
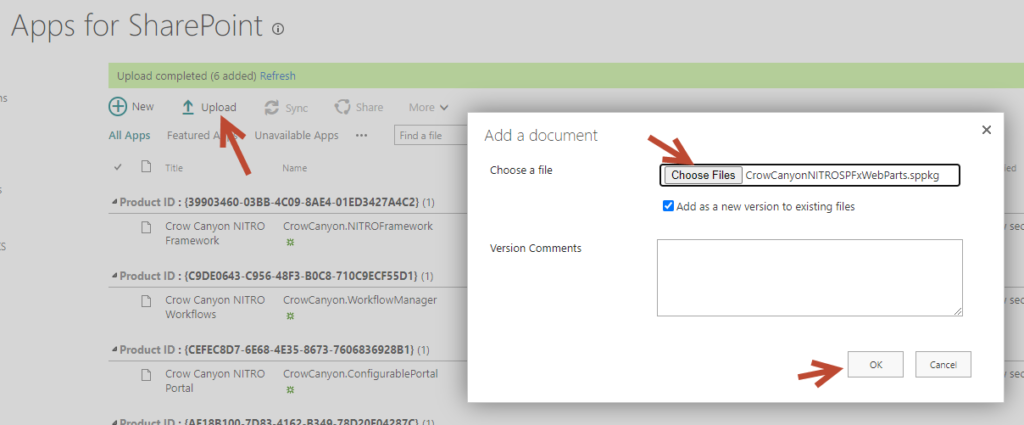
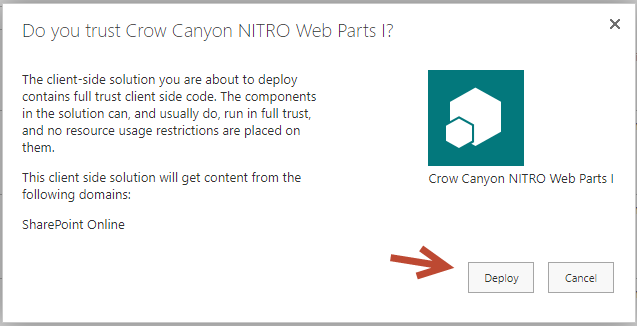
- Upload “CrowCanyonNITROSPFxWebParts.sppkg” and “CrowCanyonNITROWebPartsII.sppkg” files one by one. It will show a dialog to trust and deploy, click “Deploy” as shown below.
Install SharePoint-Add ins in root site of the site collection
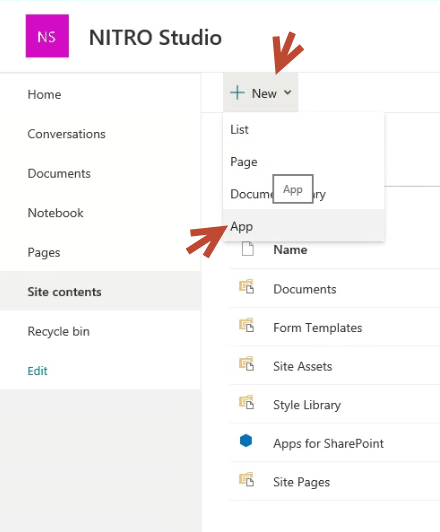
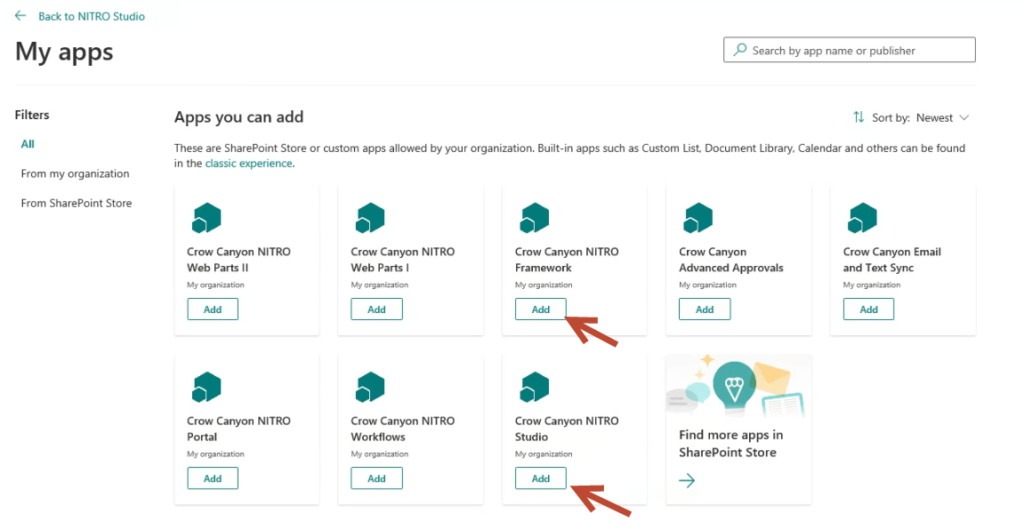
- Go to root site of the site collection (It will have URL like https://<your SharePoint tenant name>.sharepoint.com/sites/<your site collection URL name>), “Site Contents” and click “+ New”, “APP” and add both “Crow Canyon NITRO Studio” and “Crow Canyon NITRO Framework” apps as shown below.
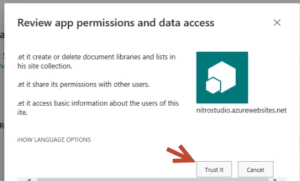
When it prompt for review app permissions and data access, click “Trust It” button
Setup NITRO Studio
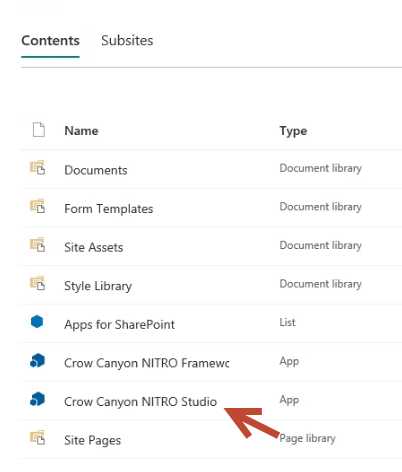
Go to root site of the site collection, site contents, open “Crow Canyon NITRO Studio” app
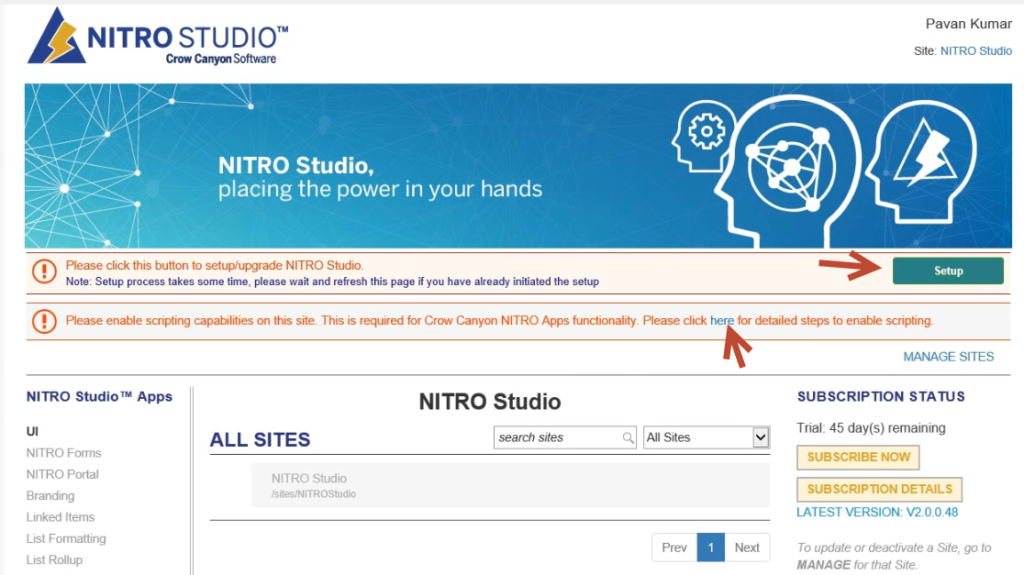
In NITRO Studio app page, in case if we see the scripting message shown below, then click “here” link and follow the instructions. And then click “Setup” button as shown below.
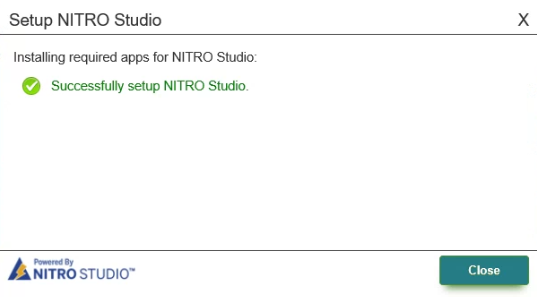
After the setup process is completed, it will show the success message as shown below and click “Close” button to finish the process.
Activate NITRO Studio
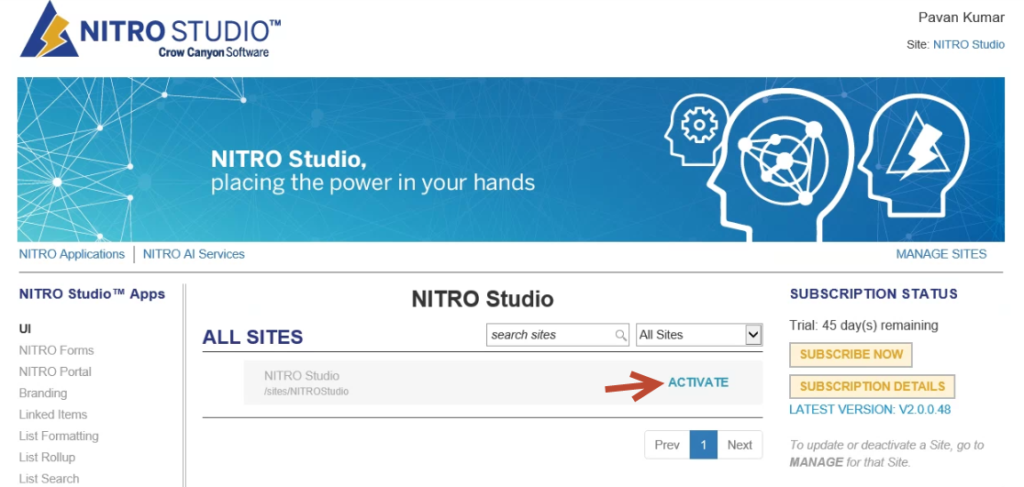
After the above setup process is completed successfully, “All SITES” section will show “Activate” button as shown below and click on it to activate the NITRO Studio to the required site(s).
Note
If you have installed the NITRO in Site Collection, please refer this Article to activate the NITRO for a sub site and to install the prebuilt Crow Canyon NITRO applications.