Applies to: SharePoint Online
Introduction
Site Collection administrator can manage the NITRO Studio for a sub site from NITRO administration page. This article describes the following features:
- Activate NITRO in a sub site
- Install pre-built NITRO applications
- Upgrade NITRO Studio
- NITRO Repair
- Uninstall NITRO Studio
- NITRO Licensing
Note
This article assumes that you have already installed the Crow Canyon NITRO Studio and Tenant Framework App in the Site Collection where you want to activate the NITRO for a sub site. If you are not installed these apps, please refer instructions from article
Pre-requisites
- User should be a site collection administrator.
- User should have “Manage Web” permission level on the sub site.
1. Activate Nitro in a Sub site
Go to Site Collection -> Open Crow Canyon NITRO Studio app. All sub sites in the site collection will be listed in the NITRO Studio Admin page. Click the “ACTIVATE” link to install NITRO Studio in the required sub site.
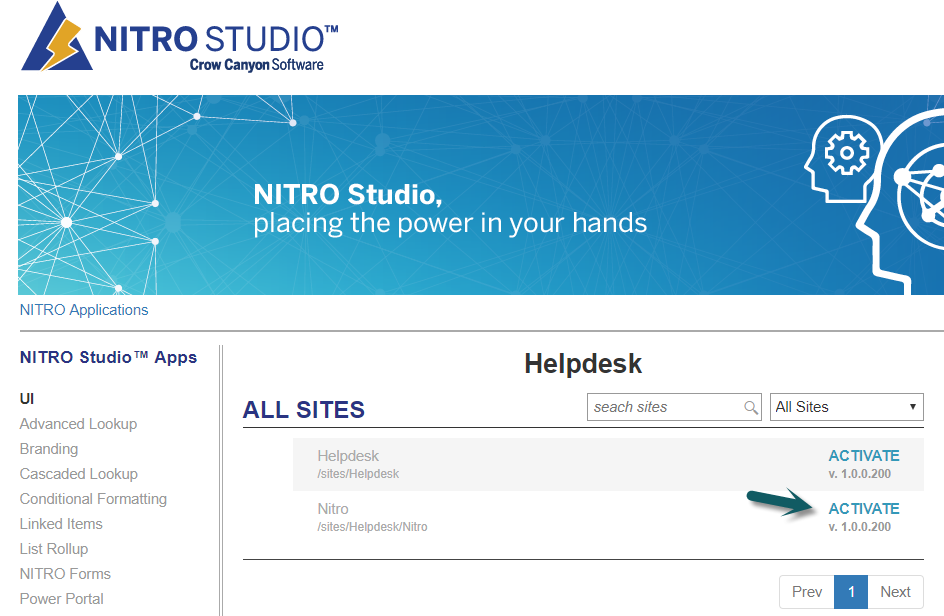
By default License Type will be Trial, if we have purchased the subscription or enterprise level license then it shows those options in the License Type drop down (Trial, Subscription, Enterprise). Please contact Crow Canyon Software (sales@crowcanyon.com) to get the subscription/enterprise licenses and more details about the licensing.

2. Install pre-built NITRO Applications
NITRO provides a great set of prebuilt applications developed using the NITRO framework. These full featured applications can be installed with just few clicks and then customized as required using the no-code NITRO features.
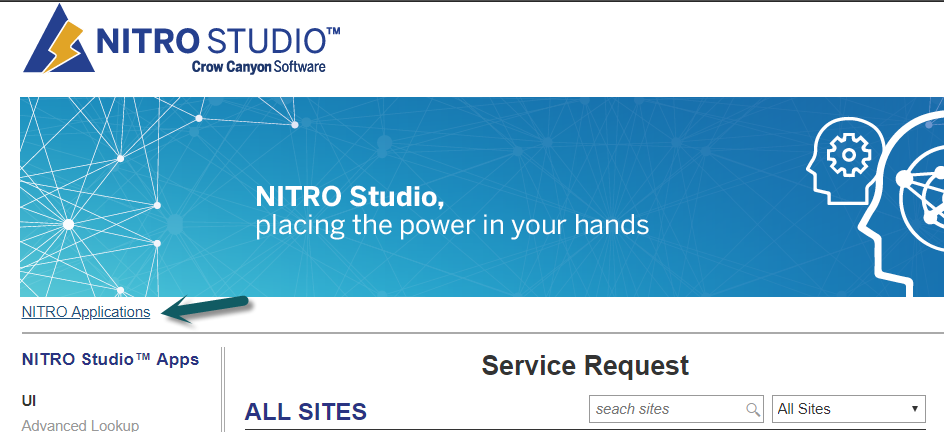
Click on NITRO Applications link in the NITRO Studio Admin page, all the prebuilt applications will be available in this page. Click on the Application that you want to install in the Site Collection.
Refer this article for more detailed instructions to install pre-built Crow Canyon NITRO applications.
3. Upgrade NITRO Studio
Frequently Crow Canyon will release new features and issue fixes to NITRO Studio components. Users can easily upgrade the NITRO Studio for the site to have these new features.
Refer this article for NITRO Studio release version notes
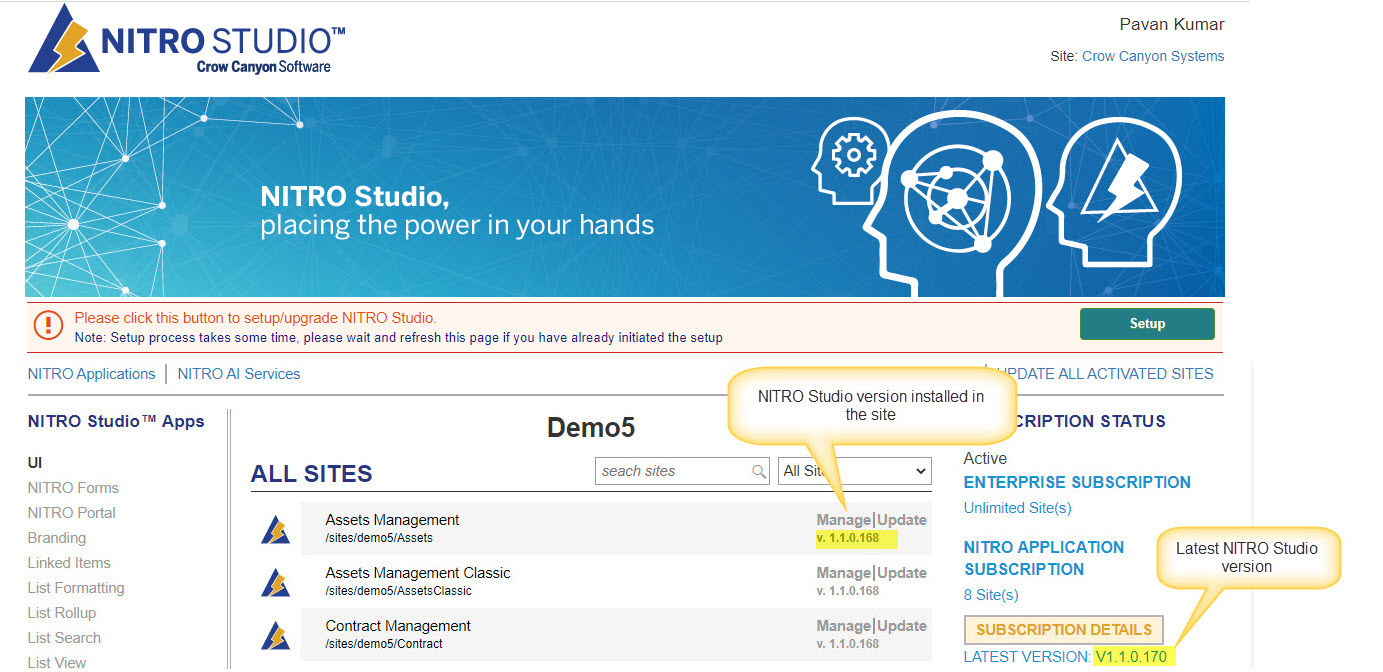
To identify the NITRO Studio latest version in NITRO Admin page and the version installed in the sub site,
Go to the root Site Collection -> Crow Canyon NITRO Studio app -> Identify the latest NITRO Studio version and the NITRO Studio version installed in the sub site as shown below:
Click “Set UP” button to install the latest Crow Canyon NITRO Web part apps in the app catalog site
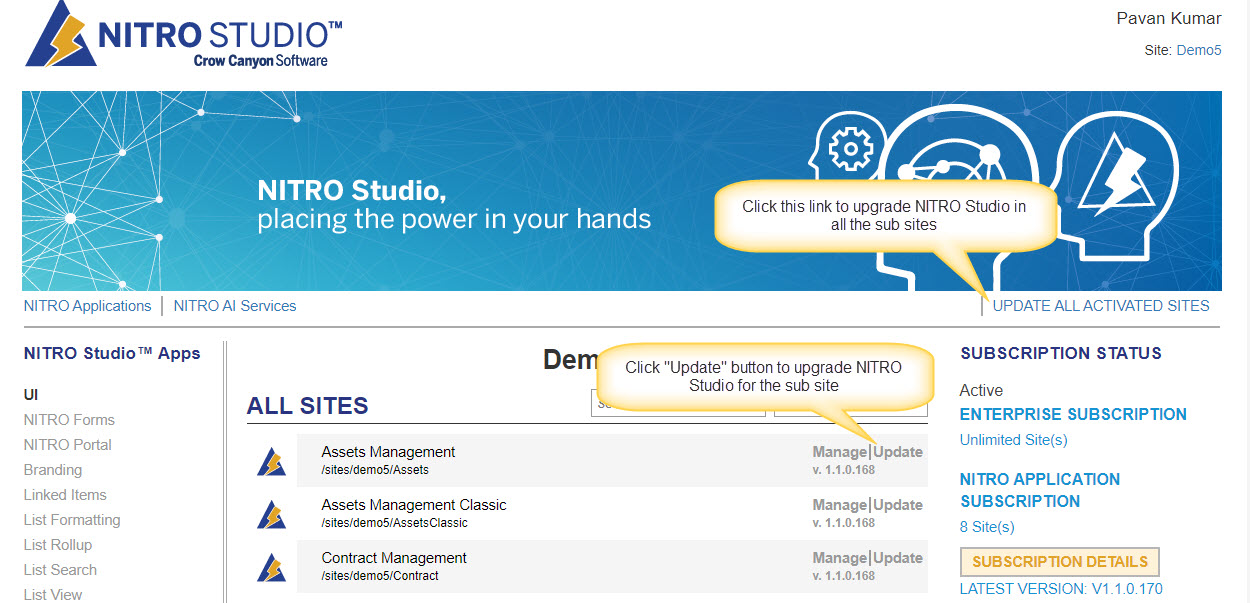
To upgrade NITRO Studio for the site, click “Update” link for the sub site. This will install the latest NITRO Studio version in the sub site.
To upgrade NITRO Studio for all the sites at a time, click “UPDATE ALL ACTIVATED SITES” link in the NITRO admin page as shown below:
To upgrade NITRO Webpart apps in the sub site, navigate to NITRO Studio apps page for the sub site and click “Update” button. This will update the NITRO webpart apps in the site.
4. NITRO Repair
Refer NITRO repair instructions from this article
5. Uninstall NITRO Studio
Refer uninstall instructions from this article
6. NITRO Licensing
When we install the NITRO Studio initially it comes with default 30 days trial license. Contact Crow Canyon Software (sales@crowcanyon.com) to get the subscription/enterprise license and more details about license validity and other details.
If we have applied the NITRO Studio to a sub site in the site collection before purchasing the subscription/enterprise licenses and now we would like to convert the trial license to subscription/enterprise for that sub site, please refer this article to convert the trial license to Subscription/Enterprise.